Tandberg MXP Training
180 likes | 340 Vues
Tandberg MXP Training. Version 1.1, By David Anstee, First Connections Ltd. Welcome Screen / Main Menu. This is the main screen when not in a call this will either be local video or your own Company logo. Make a call. Standby. Phone Book. Move Camera. Presentation. Multipoint Services.

Tandberg MXP Training
E N D
Presentation Transcript
Tandberg MXP Training Version 1.1, By David Anstee, First Connections Ltd
Welcome Screen / Main Menu This is the main screen when not in a call this will either be local video or your own Company logo.
Make a call Standby Phone Book Move Camera Presentation Multipoint Services Control Panel Introduction to the Menu When the system is not in use, it is in standby mode. The screens are black. Wake up the system by picking up or pressing any key on the remote control. When the system is switched on, you will see the welcome screen. The welcome screen presents the Main Menu and displays your Main Camera image in the background (Main Camera is system default). Your dial in numbers and system name are displayed in the upper right corner. Your ISDN Number and IP Number are the numbers that your contacts need to place a video call to you. The menu is the Interface you will use to control the system. The main menu contains:
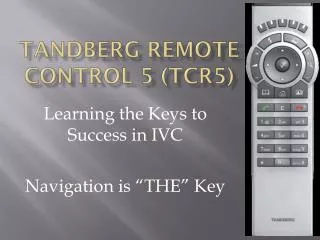
Important Buttons • OK / Menu • Access the Menu • Choose / Accept Options • Arrows • Menu Navigation • Camera Direction • Cancel • Cancel out of menus • Cancel Options
Important Icons These are some important icons that appear on screen whilst using the Tandberg system. Secure Call using DES This icon shows when your call is secure using DES encryption. Volume Off This icon shows when your volume is turned off. Press the Volume up key to turn the volume back on. Microphone Off This icon shows when your local microphones are switched off. The icon will flash if audio is detected in the room during a call and the microphone is off. Secure Call using AES This icon shows when your call is secure using AES encryption. Floor This icon shows when you are displayed full screen in a multipoint call. Call not Secure This icon shows when your call is not using encryption and is not secure.
Using the Phone Book The Phone Book again is very similar to a phone book found on your mobile phone.You can store up to 200 contacts in the phone book and it even includes the lastnumbers dialled. Using the phone book saves time and reduces the amount of failedcalls due to wrong numbers or call settings. How to make a call using Phone Book: 1. Press Phone Book on the remote control or from the main menu. 2. Choose a contact using arrow keys or letter keys. 3. Press OK to select the contact. This will take you to the Call menu, where you may edit the number or call settings before you place the call. Alternatively press the green Call key on the remote control to call directly.
Ending a call Ending a call is similar to ending a call on your mobile phone. At the end of yourcall press the End Call from the Main menu or the red disconnect key on the remotecontrol. An “End Call” dialog box appears, this is confirmation that you wish to endthe call, press End Call again to disconnect. • How to end a call: • Press the red key on the remote control or End Call from the main menu • Press the red key on the remote control again or OK to confirm that you want to end the call. NOTE: Switching off the monitors will not end the call, you must end the call from the control or menu.
Camera/Video Sources Most Tandberg MXP products have a fixed camera, as well as having this fixed camera the Tandberg system can support additional camera / video inputs. For example you could have a T880 with the main fixed camera, a second camera, DVD Player input and a PC Input. The next few slides will explain how to select each of the Camera/Video sources to display to the far end, and how to use the “DuoVideo” feature of the Tandberg MXP platform that allows you to send two Camera/Video sources at the same time!
Selecting Camera/Video Sources To change your Camera / Video sources from the Main Menu select “Presentation” and this then lists any sources that are currently available (depending on what you have plugged in) Select the video source you with to view / present to the far end and select OK The Tandberg MXP supports DuoVideo / H.239 Dual Stream – this means that if you place a call to a similar system that supports the same standard, you can present your Main Camera AND a presentation source such as VCR or PC at the same time! If presenting a PC or Document Camera you can send them at high resolutions such as 1024x768 so you can see the picture as if it were local!
Moving the Near Camera • When you have the Main Camera selected: • The directional arrow keys will move the camera up, down, left and right • The Zoom +/- button allows you to zoom in on people or objects.
Moving the Far Camera FECC (Far End Camera Control) give you the ability to access the remote sides cameras and video sources just like you can select your own. • In the Main Menu, choose ‘Move Camera’ • Select the ‘Far End’ option • Use the number keypad to access the far end camera presets. • Press Presentation to access the far ends Presentation sources. When finished using the far end camera, press OK to finish.
Using Camera Presets NOTE:You can store presets on any video source, such as VCR, Document Camera and PC.
Volume Control To adjust the volume of the Tandberg MXP you press the Volume + and - An on screen indication shows the volume level NOTE:There may be a volume control on your TV or external audio device in addition to the Tandberg volume control.