Download
1 / 92
1.12k likes | 1.81k Vues
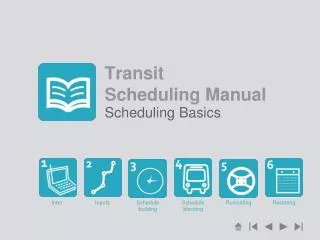
Transit Scheduling Manual. Scheduling Basics. Intro. Inputs. Schedule building. Schedule blocking. Runcutting. Rostering. Chapter 1. Introduction to Scheduling. Scheduling.

E N D
Transit Scheduling Manual Scheduling Basics Intro Inputs Schedule building Schedule blocking Runcutting Rostering
Chapter 1 Introduction to Scheduling
Scheduling • Is both an art and a science, combining the best of creativity with pragmatism; elegance with mathematical precision
A Good Schedule • Provides the right level of service at the minimum cost. A good schedule is the key to an efficient and sustainable transit operation.
Who Should Use this Program • This introduction to scheduling is designed to teach the basics for creating manual or automated schedules. It should be used by: • Beginning schedulers • Schedulers of all levels who rely on automated schedules • Planners • Anyone who needs to understand how a schedule works.
How to Use this Program • This program is broken down into chapters that each represent a step in the scheduling process: • Chapter 2 – Inputs to the Scheduling Process – what you need to know to get started • Chapter 3 – Schedule Building • Chapter 4 – Blocking or creating the daily schedule for a vehicle • Chapter 5 – Runcutting or creating the daily schedule for drivers • Chapter 6 – Rostering or creating a weekly driver schedule • Some pages need a little bit of time to finish. Wait a little bit and if nothing changes, it is done and you can go to the next page. • Words in blue have definitions. • The buttons below can take you to the beginning, the end, forward a page and backward a page.
Helpful Tips for Using this Program • Scheduling is both an art and a science. Both parts take some practice. To use this program effectively, you may want to have both pencil and paper handy and excel opened and available on your computer. • Let’s get started.
Chapter 2 Inputs to the Scheduling Process
Schedulers Don’t Work in Isolation • Schedulers cannot work in isolation and need to be aware of the issues surrounding their work and the objectives and goals they are trying to achieve. Typically this requires an understanding of the transit agency, its policies structures and goals.
What you need to know before you start a schedule • Scheduling provisions from your collective bargaining agreement, or past practices to consider. • Route design considerations • Service Standards • Service data including running times patronage and operations data
Route Design – Scheduling Considerations • To begin writing a schedule for a route you need to know some basic things about the way it operates… • What kind of route is it? Does it have branches or short turns or other kinds of deviations, or does it always run the same pattern of stops? • What is its Span of Service – when does service begin and when does it end? What days does the route operate? • How frequently does the service operate? Does it run at the same frequency of service all day, or does the frequency vary as ridership varies? • Are there other considerations, such as the need to “meet” with other lines, have departures on a “clockface” schedule, or other limitations that the scheduler needs to be aware of?
Route Examples Simple Branching Route Basic Route Route Deviation
Introduction to Route 97 We will be using Route 97 as a basic scheduling example throughout this class. Here’s what you need to know to get started. You’ll need similar information about any route you work on. • Span of Service: 6:00 AM to 7:00 PM • Headway: 30 minutes throughout • Patterns: All trips operated from timepoint A to timepoint D. Reverse direction trips from D to A • Garage: This route operates out of Park Garage which is nearer to the timepoint A end of the route • Deadhead times to and from the garage are: 10 minutes to/from “A”, 20 minutes to/from “D” • Mileage and running time: shown in the diagram below 1.38 miles 2.87 miles 2.22 miles
Chapter 3 Building a Simple Schedule
Scheduling a Simple Route • Remember the characteristics of Route 97 • Span of Service: 6:00 AM to 7:00 PM • Headway: 30 minutes throughout • Patterns: All trips operated from timepoint A to timepoint D. Reverse direction trips from D to A • Garage: This route operates out of Park Garage which is nearer to the timepoint A end of the route • Deadhead times to and from the garage are: 10 minutes to/from “A”, 20 minutes to/from “D” • Mileage and running time: shown in the diagram below Even the most complicated schedule is no more than a series of the steps required to schedule a simple route. 1.38 miles 2.87 miles 2.22 miles
Calculate Roundtrip Cycle Time • Roundtrip Cycle time is the time it takes a bus to cover the route and return to the original terminal or timepoint. Roundtrip cycle time includes both roundtrip travel time and layover. Click here for definitions Route 97 From our route map we know that it will take a bus 33 minutes to travel in each direction, or 66 minutes without layover. We know the driver needs some time at the end of the route to rest and get back to schedule, but how much is the right amount? 1.38 miles 2.87 miles 2.22 miles
How Much Layover is Enough? Tip This calculation gives us the MINIMUM layover that can be offered on any trip. The cycle time can be lengthened if necessary, decreasing efficiency. Never reduce a minimum required layover time or a calculated travel time to “squeeze” the cycle to better fit the schedule – or the route will be very unreliable. • Your union contract may specify the amounts and distribution of layover. • A general “rule of thumb” would allocate a minimum of 10% of running time or a minimum of 6 minutes per round trip whichever is greater In our example: 10% * 66 = 6.6 min or 7 min 7 min is greater than the minimum of 6 so the minimum layover on each trip is 7 minutes. 66 min. running time + 7 min. layover = 73 min cycle time.
Determine the Basic Schedule Requirements headway the number of minutes between buses • We have been given a 30 minute headway • We can quickly calculate how many buses we will need to run this headway and do a quick test to see how efficient our route will be: • roundtrip cycle time • headway Remember, you always have to “round up” the number of buses to a whole number. The SMALLER the remaining fraction, the less efficient your schedule will be. = # buses needed when rounded UP For our example: 73 minutes cycle time/30 minute headway = 2.43 or 3 buses For a discussion of options for making this route more efficient, click here. To operate every 30 minutes with 3 buses, we will need to operate a 90 minute cycle time (30 minutes x 3 buses)…or 17 more minutes than we would have wanted or with a total of 24 minutes of layover.
Laying out a schedule sheet • Start by creating a spreadsheet with your schedule on the left and inputs on the right. You could use two different tabs within the same workbook as well. • In this example, our schedule sheet will be located in columns A through M and the inputs will be in columns P Q and R Use formulas wherever possible, and keep your inputs linked to your schedule sheet Open a sample empty spreadsheet
Note: In this example, we put out inputs at the right hand side of our schedule sheet. This keeps inputs visible. Set your sheet up the same way to keep formulas consistent. Keeping track of your schedule inputs • Use your inputs sheet to summarize running time and distance between time points. Always enter headway time in “time format” in your spreadsheet. Multiplying by a factor 0.006944 will convert a number to a time format. Remember to format the cells for time once you have made the conversion. Click to continue Don’t forget the time and mileage from the garage to your end points. Click to continue Include several headway options so that you can easily make adjustments. Click to continue
Laying out your schedule sheet • Now layout your column headings like this Always have both directions of your route next to each other with a space in between. Click to continue Leave a column for a block number – we know there will be three vehicles or “blocks” on this route. Click to continue Leave a column for the Next Trip so you can show how your schedule links together. Click to continue Create columns to show the time each bus pulls in and out of service. Click to clear
Filling in your schedule sheet • Begin with your first trip. We have been told that service begins from the eastern timepoint at 6 AM. With service every 30 minutes, buses will leave from Point A every hour and half hour. Click for example We know it takes 33 minutes to get from Point A to Point D Click to continue Dividing our 24 minutes of layover into 2-12 minute layovers at each end, means that our bus will be ready to turn around at 6:45. Buses will leave from Point D 15 and 45 minutes after the hour to maintain the half hour headway. Click to continue Remember, your westbound service needs to begin at 6:15, so fill in the first trip beginning at 6:15 from point D. This will be the first trip of the day for this bus. Click to continue
Filling in your schedule sheet • Now let’s use formulas to create the rest of the service day. We know that service operates every 30 minutes all day long until the last trip at 7:00 PM. • Use military time or a 24 hour clock to make it easy to distinguish AM from PM. • Here is the formula for adding the next trip 30 minutes later. Tip Excel can be switched from showing the value in a cell to showing the formula. The command is CTRL + ~ $Q$35 is Headway Option 0:30. $Q$12 is the Eastbound total runtime. Now you try filling in the headways to the bottom of your sheet. Remember, at this point you are only filling in times at the ending timepoints.
Completed Headway Sheet • Check your work against this completed sheet Open a sample filled spreadsheet
Fill in the Intermediate Times • Using formulas you can now fill in the intermediate time point times. • Using show formula, we have filled in the timepoints for Rows 6 and 7 below • Now fill in the remaining times by copying the formulas down the page. Tip $Q$9 is Eastbound running time between A and B. $Q$10 is Eastbound distance between B and C. $Q$11 is Eastbound running time between C and D. $Q$35 is Headway Option 0:30. $Q$18 is Westbound running time between D and C. $Q$19 is Westbound running time between C and B. $Q$20 is Westbound running time between B and A.
Completing the Headway Sheet • Here’s what your completed schedule sheet looks like: • Click here to download a sample spreadsheet and check your formulas
Moving On • You have reached the end of the basic schedule building section. • For a more advanced example to work on independently, click here • To continue with blocking click here
Chapter 4 Blocking or Creating the Daily Schedule For a Vehicle
Blocking • In this step we link trips together to make the daily work assignments for vehicles. Later, we’ll “cut” those blocks into runs for drivers.
Linking Trips Together in Blocks • Begin blocking with your first full trip. Looking down your schedule sheet, link the arrival time at point D with the next departure time that satisfies your layover requirement.
Add Block Numbers and Pull Times Click to continue Begin numbering 9701 at timepoint A at 6:00 AM. It arrives at Point D at 6:33 and departs at 6:45 after 12 minutes of layover. The trip arrives back at point A at 7:18 and can make its next departure at 7:30. Follow your block 9701 down the page, adding in the departure times for each subsequent trip. Begin numbering 9701 at timepoint A at 6:00 AM. It arrives at Point D at 6:33 and departs at 6:45after 12 minutes of layover. • Begin numbering 9701 at timepoint A at 6:00 AM. Begin numbering 9701 at timepoint A at 6:00 AM. It arrives at Point D at 6:33 and departs at 6:45 after 12 minutes of layover. The trip arrives back at point A at 7:18 and can make its next departure at 7:30. You should know the number of buses or “blocks” needed before you begin. Click to continue Click to continue Click to continue Blocks must always include a pull in and pull out time to show the time the bus leaves and returns to the garage. Different operators use different schemes of block numbering When you complete the block, remember to add pull out and pull in times. For this example, we know that it takes 10 minutes to travel between the garage and Point A and 20 minutes to travel between the garage and Point D. Now fill in the remaining blocks and pull out and pull in times. Click hereto see a completed example.
Creating a Blocking Sheet • The Blocking Sheet shows all of the trips assigned to each block you have created in a summary fashion, showing what each bus is assigned to do throughout the day. • Begin by creating a spreadsheet with the headings shown below: • You can fill in the spreadsheet using links to your Master Schedule • Click hereto see a completed blocking sheet for Block 1. • Now complete the sheet for the remaining blocks. • Click herefor the final product. Keep basic information about layover or other special requirements clear on your blocking summary. As conditions change, it will be clear how your schedule is impacted.
Summarizing Results • Now we want to summarize the number of hours and miles for each block. • The easiest way to compute mileage is to multiple the number of trips by the mileage for each trip using a count function. • Hours can be easily computed by taking the difference between departure and arrival times at the garage for each block. • See if you can duplicate the spreadsheet below on the right hand side of your schedule sheet. You can see the formulas by rolling over each cell. If you design your blocking spreadsheet correctly, your summary reports can be completed with little effort. Computerized scheduling programs will compute these statistics for you. Click here to see formulas
Estimate Your Operator Needs • Your block summary shows that this service will require 41:14 daily platform or service hours. • Dividing 41:14 by approximately 8 hours per shift, results in just over 5 operators needed. • The service could be operated by 5 drivers with shifts just over 8 hours, or with 6 operators with fewer hours. The choices will be evaluated in the runcutting section. Runs with approximately 7:30 hours of platform time will generally result in full time runs that don’t have much overtime. platform The number of hours a bus driver is actually in revenue service, from the time they leave the garage to the time they return.
Graphing Your Blocks • Blocks are often displayed graphically to illustrate the time spans that the blocks are in service. This is a helpful lead in to runcutting. • An example of a graphic display of the blocks you created is shown below:
Moving On • You have reached the end of the schedule blocking section. • For a more advanced example to work on independently, click here • To continue with runcutting click here
Chapter 5 Basic Runcutting
A Quick Review • In the previous sections you have learned: • How to develop a basic schedule from common inputs • How to divide the schedule into blocks that represent a vehicle work day. • How to calculate hours and miles of service and estimate the number of drivers needed to operate your service • In this section you will learn how to divide or “cut” blocks into work schedules for drivers, called “runs”. There is no single right answer in runcutting. There are only better or worse solutions based on your property’s objectives.
Runcutting Objectives • Typical objectives in runcutting include • Creating “legal” runs that meet all written rules of the labor agreement • Creating efficient runs that reduce the cost of operation. • Creating runs that are simple and easy to operate on the street. • Create humane runs that allow for a reasonable workplace for drivers. Be sure you know the priorities of your agency before you begin the runcut.
1-Piece Straight Multi-Piece Straight Break (paid or unpaid) Types of Runs • Straight runs • Generally a single piece of work where the driver stays with the same vehicle for their entire work day. • Straight runs may have a break as required by contract, which is either paid or unpaid.
Types of Runs • Split or Swing Runs • usually have two work pieces with a longer generally unpaid break between those pieces. These are common runs, because more service is often needed during the peak periods and less in the midday or evening. Split Run Break (‘swing’, normally unpaid))
Types of Runs • Trippers or part time runs • Short one piece runs that are typically used for a single peak or school period. Part Time Run
Report 0:15 Travel/ Pull 0:20 Revenue Time 7:15 Travel/ Pull 0:18 Sign Off 0:10 Total Hours = 8:18 Components of Runs pay hours The total amount of paid time for a driver, including report time, travel time and sign off time in addition to revenue time in the bus. Pay hours also include any premiums such as over time or make up time but do not include any time associated with benefits such as sick leave or holidays. • The time the driver spends in the vehicle in revenue service often represents only 60-70% of their total pay hours. • In this one piece straight run, the driver is in revenue service for 7:15 but is paid for 8:18 • In this split run, the driver is in revenue service for only 6:15 but is paid for 8:08 in a total work day that stretches over more than 11 hours. • Understanding the components of runs is required to complete a runcut. Tip Many systems measure the efficiency of runs by dividing pay hours by revenue hours. In the first example, the ratio is 1.14; in the second, it’s less efficient at 1.30 Travel/ Pull 0:20 Revenue Time 3:00 Travel/ Pull 0:18 Sign Off 0:10 Report 0:15 Travel/ Pull 0:15 Revenue Time 3:15 Travel/ Pull 0:20 Sign Off 0:05 Unpaid Break (Swing) 3:00 Report 0:10 Total Spread = 11:08 Total Hours = 8:08
Another common collateral is “bonus time” or time paid to a full time driver who has a run of less than 8 hours. Bonus time is paid up to the 8 hour minimum for a full time run. Common runcutting terms • You have seen that runs are made up of a number of components. Not all of these are paid in the same way. The following is a list of common pay differentials. These will vary from property to property. The total set of premium and penalties is often referred to as “collaterals”. Here are some common premium collaterals…
Runcutting Inputs • The success of any runcut depends on the quality of information available as inputs to the process. • Before you begin your runcut make sure you have this information in its entirety. • A complete set of trips and vehicle blocks • All relevant defined rules (usually the labor agreement summarized) • Defined relief types, relief locations and travel times • Known limitations—cost limits, work rule preferences etc.
Runcutting Example – Trips and Blocks Download a full set of trips and blocks for Route 97. • For the purposes of this exercise we are using our intermediate blocking example Route 97. Click here to open completed Schedule Block Sheet Master Schedule Click here to open completed Block Sheet
Things to note in the graph: • Many of the blocks are around 14 hours which will probably allow us to cut them into two pieces, each as a single run • The peak blocks are shorter in the AM Peak than the PM Peak (this is not unusual). The AM blocks are around 3:30 and the PM blocks around 4:30. This may allow us to create 8:00 split runs without too much difficulty (subject to spread limitations). • We will need two additional runs during the peaks to cover the two additional peak vehicles. • We will have three runs in operation during the off peak. Creating a Graph ofVehicles in Operation • Creating a graph that shows the number of vehicles in operation throughout the day makes it easier to begin runcutting. • Using the block diagram, start with the longest block first graphing horizontally from start time to end time. • Here is the completed graph of Line 97
Creating a Graph ofVehicles in Operation • Looking more carefully at our graph, we can see opportunities for straight and split runs Likely Split Runs Likely Straight Runs Looking again at a line graph of the blocks reinforces our conclusions.
Know the Work Rules • Before you begin your runcut make sure you know the workrules that apply to your property. Here are the rules we will use in this exercise. Click hereto open a copy of the work rule table.
Understanding Reliefs • Relief locations are the places where drivers begin and end their shift. • Because one bus may remain in operation for more than one driver’s shift, knowing where relief locations are and how drivers will travel to the relief location is critical in runcutting. • For this exercise we assume all reliefs occur at one end of the route and that 10 minutes of travel time are required to get from the garage to the relief location. Drivers may be asked to walk to a relief point, take transit, or may be driven in a company car. The simplest relief is done by pull-out meaning all drivers begin their work day by pulling out a new bus, avoiding change overs