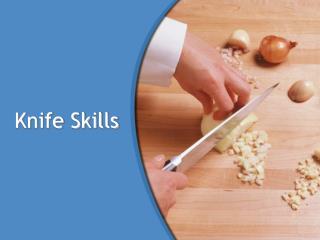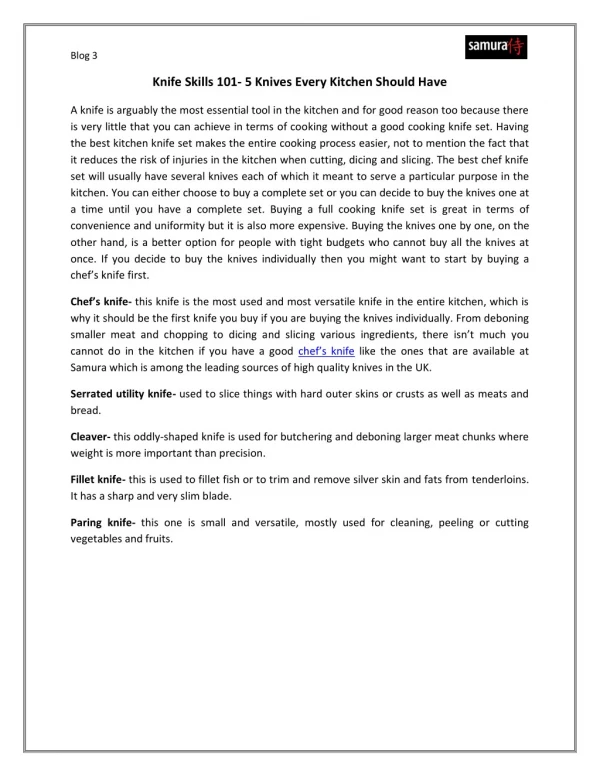
Knife Skills
5. Knife Skills. Knife Sharpening When sharpening a knife against a three-sided whetstone, go from the coarsest to the finest surface. Knife Sharpening Honing a knife against a steel straightens the blade between sharpenings.

Knife Skills
E N D
Presentation Transcript
5 Knife Skills
Knife Sharpening When sharpening a knife against a three-sided whetstone, go from the coarsest to the finest surface.
Knife Sharpening Honing a knife against a steel straightens the blade between sharpenings.
Gripping Your Knife The most common grip: Hold the handle with three fingers while gripping the blade between the thumb and index finger.
Gripping Your Knife A variation on the most common grip: Grip the handle with four fingers and place the thumb on the front of the handle.
Gripping Your Knife The underhand grip for a rigid boning knife: Grip the handle in a fist with four fingers and thumb. This grip allows you to use the knife tip to cut around joints and separate flesh from bone when boning meat and poultry.
Gripping Knives: Method A 1. Keeping your fingertips curled back, grip the item being cut with three fingertips and your thumb. Hold the knife in the other hand. While keeping the knife’s tip on the cutting board, lift the heel of the knife.
Gripping Knives: Method A 2. Using the second joint of your index finger as a guide, cut a slice using a smooth, even, downward stroke. Adjust the position of the guiding finger after each slice to produce slices of equal size. After a few cuts, slide your fingertips and thumb down the length of the item and continue slicing. For this slicing technique, the knife’s tip acts as the fulcrum.
Gripping Knives: Method A 3. An index finger placed on top of the blade steadies a traditional Japanese knife when slicing using Method A.
Gripping Knives: Method B 1. Grip the item as described in Method A. Using the second joint of your index finger as a guide, lift the knife’s tip and slice by drawing the knife slightly back toward you and down through the item, cutting the item to the desired thickness.
Gripping Knives: Method B 2. The motion of the knife should come almost entirely from the wrist, not the elbow. Allow the weight of the knife to do most of the work; very little downward pressure needs to be applied to the knife. For this slicing technique, your wrist should act as the fulcrum.
Chiffonade 1. Wash and destem the leaves as necessary. Stack several leaves on top of each other and roll them tightly like a cigar.
Chiffonade 2. Make fine slices across the leaves while holding the leaf roll tightly.
Rondelles Peel the item (if desired) and place it on a cutting board. Make even slices perpendicular to the item being cut.
Diagonals Peel the item (if desired) and place it on a cutting board. Position the knife at the desired angle to the item being cut and slice it evenly.
Oblique-cut Place the peeled item on a cutting board. Holding the knife at a 45-degree angle, make the first cut. Roll the item a half turn, keeping the knife at the same angle, and make another cut. The result is a wedge-shaped piece with two angled sides.
Lozenges 1. Slice the item into long slices of the desired thickness. Then cut the slices into strips of the desired width.
Lozenges 2. Cut the strips at an angle to produce diamond shapes.
Butterfly 1. With your hand opened and your fingers arched upward, hold the item to be cut firmly in the center of your palm.
Butterfly 2. Holding the knife parallel to the table, slice a pocket to the desired depth, or cut through the item completely.
Coarse Chopping Grip the knife as for slicing. Hold the item being chopped with your other hand. It may not be necessary to use your finger as a guide because uniformity is not crucial.
Chopping Parsley and Similar Foods 1. Wash the parsley in cold water; drain well. Remove the parsley sprigs fromthe stems.
Chopping Parsley and Similar Foods 2. Grip the knife in one hand. With the other hand spread flat, hold the knife’s tip on the cutting board. Keeping the knife’s tip on the board, chop the parsley sprigs by rocking the curved blade of the knife up and down while moving the knife back and forth over the parsley.
Chopping Parsley and Similar Foods 3. Place the chopped parsley in a clean kitchen towel or a double layer ofcheesecloth. Rinse it under cold water and squeeze out as much water as possible. The chopped parsley should be dry and fluffy.
Chopping Garlic 1. Break the head of garlic into individual cloves with your hands. Lightly crush the cloves using the flat edge of a chef’s knife or a mallet. They will break open and the peel can be separated easily from the garlic flesh.
Chopping Garlic 2. With a flat hand, hold the knife’s tip on the cutting board. Using a rocking motion, chop the garlic cloves to the desired size. Garlic is usually chopped very finely.
Chopping Garlic 3. Garlic paste can be made by first finely chopping the garlic and then turning the knife on an angle and repeatedly dragging the edge of the knife along the cutting board, mashing the garlic.
Cutting Sticks and Dicing Julienne—(ju-lee-en) a stick-shaped item with dimensions of 1⁄8 inch × 1⁄8 inch × 2 inches (3 mm × 3 mm × 5 cm). When used with potatoes, this cut is sometimes referred to as an allumette (al-yoo-meht). A fine julienne has dimensions of 1⁄16 inch × 1⁄16 inch × 2 inches (1.5 mm × 1.5 mm × 5 cm).
Cutting Sticks and Dicing Bâtonnet—(bah-toh-nay) a stick-shaped item with dimensions of 1⁄4 inch × 1⁄4 inch × 2 inches (6 mm × 6 mm × 5 cm).
Cutting Sticks and Dicing Brunoise—(broo-nwaz) a cube-shaped item with dimensions of 1⁄8 inch × 1⁄8 inch × 1⁄8 inch (3 mm × 3 mm × 3 mm). A 1⁄16-inch (1.5-mm) cube is referred to as a fine brunoise.
Cutting Sticks and Dicing Small dice—a cube-shaped item with dimensions of 1⁄4 inch × 1⁄4 inch × 1⁄4 inch(6 mm × 6 mm × 6 mm).
Cutting Sticks and Dicing Medium dice—a cubeshaped item with dimensions of 1⁄2 inch × 1⁄2 inch × 1⁄2 inch (1.2 cm × 1.2 cm × 1.2 cm).
Cutting Sticks and Dicing Large dice—a cube-shaped item with dimensions of 3⁄4 inch × 3⁄4 inch × 3⁄4 inch (2 cm × 2 cm × 2 cm).
Cutting Sticks and Dicing Paysanne—(pahy-sahn) a flat, square, round or triangular item with dimensions of 1⁄2 inch × 1⁄2 inch × 1⁄8 inch (1.2 cm × 1.2 cm × 3 mm).
Cutting Julienne and Bâtonnet 1. Peel the item (if desired) and square off the sides. Trim the item so that the slices cut from it will be the proper length. Cut even slices of the desired thickness, 1⁄8 inch (3 mm) for julienne or 1⁄4 inch (6 mm) for bâtonnet.
Cutting Julienne and Bâtonnet 2. Stack the slices and cut them evenly into sticks that are the same thickness as the slices.
Cutting paysanne from a 1⁄2-inch 1⁄2-inch (6-mm 6-mm) stick.
Dicing An Onion 1. Using a paring knife, remove the stem end. Trim the root end but leave it nearly intact (this helps prevent the onion from falling apart while dicing). Peel away the outer skin; be careful not to remove and waste too much onion.
Dicing An Onion 2. Cut the onion in half through the stem and root. Place the cut side down on the cutting board.
Dicing An Onion 3. Cut parallel slices of the desired thickness vertically through the onion from the root toward the stem end without cutting completely through the root end.
Dicing An Onion 4. Make a single horizontal cut on a small onion or two horizontal cuts on a large onion through the width of the onion, again without cutting through the root end.
Dicing An Onion 5. Turn the onion and cut slices perpendicular to the other slices to produce diced onion.
Mincing 1. Peel and dice the shallots, following the procedure for peeling and dicing an onion.
Mincing 2. With a flat hand, hold the knife’s tip on the cutting board. Using a rocking motion, mince the shallots with the heel of the knife.
Tourner (toor-nay) to cut into football-shaped pieces with seven equal sides and blunt ends
Tourner 1. Cut the item being “turned” into pieces 2 inches (5 cm) x 3⁄4 to 1 inch (2 to 2.5 cm). Each piece should have flat ends. (Potatoes, turnips and beets may be cut into as many as six or eight pieces; carrots can simply be cutinto 2-inch lengths.) Peeling is optional because in most cases the item’s entire surface area is trimmed away.
Tourner 2. Holding the item between the thumb and forefinger, use a tourné knife or a paring knife to cut seven curved sides on the item, creating a flat-ended, football-shaped product.
Parisiennes 1. Cut each scoop with a pressing and twisting motion.
Parisiennes 2. Make the cuts as close together as possible in order to minimize trim loss.