Download
1 / 57
570 likes | 601 Vues
Learn how to navigate, access, search for patients, create patient lists, and view clinical data using eKiDs PowerChart. Step-by-step tutorial for community healthcare providers.

E N D
Introduction to PowerChart For CHKDHS Community Providers May 2010
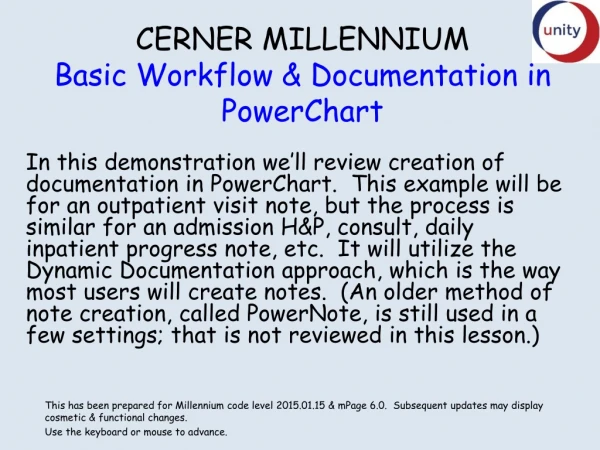
How to Use this Tutorial Welcometo the PowerChart for Community Physicians CBT. This tutorial will give you general knowledge of how to use PowerChart to view patient information.
Navigation in this Tutorial There are several ways to navigate through the content of this tutorial. A few methods include: • Click your left mouse button or use the page down key on your keyboard to move forward in this slide presentation. • Right-click on the current slide and choose ‘Reverse’ to go back to a previous slide in the presentation. 3
Course Objectives Purpose: The purpose of this tutorial is to provide Community Physicians with a high level overview of the key features of eKiDs PowerChart. In this brief lesson you will learn how to: • - Log in the eKiDs PowerChart • Search for patients • Create a Patient List • Open a patient’s chart • Navigate the patient chart tabs to view and filter clinical data
Accessing PowerChart To access eKiDs PowerChart, you must first log in through the http://www.chkd.org website. From the website, select For Health Professionals.
Accessing PowerChart -- Continued Then select Physician Extranet at the For Health Professionalsscreen.
Accessing PowerChart -- Continued Click the Log In option. When the Citrix Access Gateway screen appears, enter your login credentials. Then, select Log On.
Accessing PowerChart After you have logged in to Citrix, all applications for which you have access will display. Select PowerChart and log in using your username and password. doeja ************
Accessing PowerChart – Complications??? If there are any problems accessing PowerChart or if you do not know your login credentials, contact the CHKD Community Physicians Liaisons.
When you are ready to proceed to Lesson One: Conducting a Patient Search, please click the link below.
Lesson One: Conducting a Patient Search As a community provider, you will have the ability to create patient lists that display patients based on specified parameters (i.e. patients that you have a relationship with). However, if the need arises, you can manually look up a patient and access the chart. Keep in mind that when you access a patient’s chart, you are establishing a relationship with the patient within the application. You will be listed in the Patient-Provider Relationship Summary. Therefore, please ensure that you are only selecting patients that you have relationships with.
Lesson One: Conducting a Patient Search You can initiate a patient search by: Selecting Search from the Patientmenu Clicking the search icon within the Organizer Both actions will cause the Patient Search Window to appear. There is also a drop down box where you can elect to search by MRN or by a patients name.
Lesson One: Conducting a Patient Search When the Patient Search window appears, begin the search for your patient. The MRN is the fastest and most direct method of searching for a patient. However, you can also search for a patient by entering information in the Name, FIN, SSN, Birth Date, Age and / or Gender Fields.
Lesson One: Conducting a Patient Search After you conduct a patient search, all matching patients will display at the top of the screen. The selected patient’s encounters will display at the bottom of the screen. Click the appropriate encounter and OK to open the chart.
Lesson One: Conducting a Patient Search You can also click the Preview button to Preview information before opening the chart. This is helpful to ensure that you are selecting the correct patient and the correct encounter. When the Quick View window opens, click the appropriate tab (Person / Encounter) and expand the applicable folders to preview information.
Lesson One: Conducting a Patient Search You can also search for a patient using the Recent button within the Organizer. The Recent button will display the names of the last nine charts that you accessed.
Lesson One: Conducting a Patient Search After you have selected the chart to open, you will be prompted to establish a relationship with the patient if you do not have one. Your selection options are Referring Physician and PCP. Choose the correct option and click OK. REMEMBER: When you access a patient’s chart, you are establishing a relationship with the patient within the application. Your name will be listed in the Patient-Provider Relationship Summary in PowerChart.
Lesson One: Conducting a Patient Search TIP: If the patient record that you are accessing has been marked as deceased, you will receive the message below before accessing the chart. To continue to the patient’s chart, click OK on the message. You will also be able to view the information from the Patient Information tab within the patient’s chart.
When you are ready to proceed to Lesson Two: Creating Patient Lists, please click the link below.
Lesson Two: Creating Patient Lists After you have gained access to PowerChart, your Organizer screen will appear. Until you set up a Patient List, this screen will appear blank. You must create a patient list to view information in eKiDs PowerChart.
Lesson Two: Creating Patient Lists What is a Patient List? A Patient List is a listing of all patients that meet certain criteria. For example, you can create a Patient List to show all patients that you have a relationship with. As a Community Provider, you will open the patient’s chart directly from the Patient List.
Lesson Two: Creating Patient Lists As a Community Provider, your access in eKiDs PowerChart will allow you to create three types of Patient Lists: Provider Group Lists, Relationship Lists, and Query Lists.
Lesson Two: Creating Patient Lists The process for creating Patient Lists starts the same for all list types: • Select the List Maintenance icon from the toolbar. • Then, indicate the type of List that you are creating.
Lesson Two: Creating Patient Lists – Provider Group List A Provider Group List displays all patients based on the group that the Community Physician belongs to (i.e. Chesapeake Pediatrics). PROVIDER GROUP LIST
Lesson Two: Creating Patient Lists – Provider Group List After selecting the Provider Group List type, the Provider Group Patient List screen will appear. • Choose the applicable Provider Group for your practice by putting a check mark in the box. • Change the name of your list based on your preferences. Tip: Provider Groups are not listed alphabetically, so you may have to scroll down to find your provider group in the listing. PROVIDER GROUP LIST
Lesson Two: Creating Patient Lists – Provider Group List • You can add admission and discharge criteria to your patient list by selecting the applicable option. For example, selecting a Discharged Criteria value of All Patients Not Discharged will show only in-house patients. • When finished, click Finish. PROVIDER GROUP LIST
Lesson Two: Creating Patient Lists – Provider Group List In order for the Patient List to display on your screen, it must be made active. Click the Patient List and move it to the Active Lists column by clicking the right-arrow. Then click OK. PROVIDER GROUP LIST
Lesson Two: Creating Patient Lists – Provider Group List Provider Group Patient List
Lesson Two: Creating Patient Lists – Relationship List A Relationship List displays all patients for which you have a relationship (i.e. Attending Physician, Primary Care Physician). This list is populated based on how the patient was registered in the CHKDHS patient registration application. RELATIONSHIP LIST
Lesson Two: Creating Patient Lists – Relationship List • After selecting the Relationship Patient List type, the Relationship Patient List screen will appear. • Expand the Visit Relationship box and choose All Visit Relationships. • Expand the Lifetime Relationship box and choose All Lifetime Relationships. • A Name will default for the list. Change the name based on your preferences. Click Next. RELATIONSHIP LIST
Lesson Two: Creating Patient Lists – Relationship List • You can add admission and discharge criteria to your patient list by selecting the applicable option. For example, selecting a Discharged Criteria value of All Patients Not Discharged will show only in-house patients. • When finished, click Finish. RELATIONSHIP LIST
Lesson Two: Creating Patient Lists – Relationship List In order for the Patient List to display on your screen, it must be made active. Click the Patient List and move it to the Active Lists column by clicking the right-arrow. Then click OK. RELATIONSHIP LIST
Lesson Two: Creating Patient Lists – Query List A Query List displays all patients based on the group that the Community Physician belongs to (i.e. Chesapeake Pediatrics). This list displays the same information as the Provider Group List. However, the list generates much faster because of the method that the system uses to access the information. However, this list is not updated automatically. You must use the execute button to update the list. Tip: This list generates based on inpatient active encounters and is date and time stamped with the most recent execution time. QUERY LIST
Lesson Two: Creating Patient Lists – Query List • After selecting the Query List type, the Query Based Patient List screen will appear. • Provider Group List will be the only option available. • A Name will default for the list. Change the name based on your preferences. • Make sure that the execute query option remains checked. Click Next. QUERY LIST
Lesson Two: Creating Patient Lists – Query List • On the Providers screen, expand the Provider Groups folder to display your practice. • Then, put a checkmark in the box next to your practice. • Select Next. QUERY LIST
Lesson Two: Creating Patient Lists – Query List • Once your practice is selected, the individual practice providers will display. • You can select your name from the list by putting a checkmark in the box. However, patients for all providers in the group will display even if only one provider is selected. • Click Finish. QUERY LIST
Lesson Two: Creating Patient Lists – Query List The Query List will generate and display the date and time that it was last executed. The execute button will re-generate the query. The refresh button will update statues of the patients on the displayed list and will display room assignment changes, new results or length of stay.
When you are ready to proceed to Lesson Three: Viewing the Patient Chart, please click the link below.
Lesson Three: Viewing the Patient Chart After you have set up your Patient List, viewing the Patient Chart is as simple as double clicking on the name. The patient’s chart will open, displaying tabs for which you have access. This lesson will acquaint you with the different tabs that are available within the patient’s chart.
Lesson Three: Viewing the Patient Chart 1 2 4 3 1. Patient Demographic Bar – will display the patient’s name, sex, financial number, medical record number (EMR), location and allergy information. The location and allergy display are links, when selected will provide additional information. 2. Chart Tabs – will default patient data in a variety of formats such as orders, documents, recent results, lab as well as patient information and chart summary. 3. Clinical Categories Navigator– will provide the ability to filter the existing order clinical categories to view by selecting or deselecting items. If entered, will display allergy and problem list information. You can expand or collapse this view. 4. Existing Orders Profile – will display categories of orders and occurrences as well as detailed information about the order and it’s current status. You can expand or collapse this view.
Lesson Three: Viewing the Patient Chart – Orders Tab The Orders tabprovides a view of the patient’s existing orders. From this tab you have the ability to filter the view of existing order categories. You can also select a past visit to view orders entered during a specific visit encounter. ORDERS TAB
Lesson Three: Viewing the Patient Chart – Chart Summary Tab The Chart Summarytab provides a “snapshot” of the selected patient’s chart displaying listed Problems, Ht, Wt, Reason for Visit, Allergy, Isolation, Critical labs and Continuous Infusions. CHART SUMMARY TAB
Lesson Three: Viewing the Patient Chart – Patient Information Tab The Patient Information tab displays high-level data about the patient relative to demographic information and additional patient identifiers such as medical record or social security numbers. This tab has sub-tabs that display additional information. PATIENT INFORMATION TAB
Lesson Three: Viewing the Patient Chart – Viewing Allergy Information Allergy Information is accessible from within the Patient Information Tab. Simply select the Allergies sub-tab and the Allergy information is displayed. VIEWING ALLERGY INFORMATION
Lesson Three: Viewing the Patient Chart – Recent Results Tab The Recent Results tab provides flowsheet views that display all recent clinical information recorded for a patient including results from laboratory or radiology tests. RECENT RESUTS TAB
Lesson Three: Viewing the Patient Chart – Lab Tab The Lab tab provides a flowsheet view of the patient’s results; you can filter by available categories and view information in a group, table or list format. LAB TAB
The Lab tab will default the flowsheet to display laboratory results in various formats. Result information will be displayed based on the criteria you select. The default is the Last 250 Results. To display the Result Legend click on the Options menu.
Lesson Three: Viewing the Patient Chart – Radiology Tab The Radiology tab provides result information you can filter by available categories using the navigator view or information in a group, table or list format. RADIOLOGY TAB