Download
1 / 36
360 likes | 492 Vues
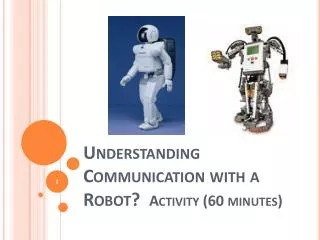
Understanding Communication with a Robot? Activity (60 minutes). Summary so far. The parts of a robot are A computer that needs to be programmed (to make decisions) Inputs (to ‘sense’ via sensors) Outputs (to ‘act’, e.g., via motors)

E N D
Understanding Communication with a Robot? Activity (60 minutes)
Summary so far • The parts of a robot are • A computer that needs to be programmed (to make decisions) • Inputs (to ‘sense’ via sensors) • Outputs (to ‘act’, e.g., via motors) • Our NXT has all three of these, but in this activity we’ll be using the computer and outputs. • You’ll make the NXT robot run by creating a ‘program’ to tell the NXT computer how to use its outputs.
Activity Part I – For Teacher • Split the students into groups of two • Mark four points on the ground – say on the corners of a 5 foot square. Space the points farther apart to increase degree of difficulty. • Have one person in each group close their eyes and have the other member direct the first around the room with verbal commands. • The goal is to become the first group to have the member with his/her eyes closed touch all four points, following the RULES on the next slide.
Activity Part I – Student Rules • Rules: • The command giving partner can only give commands that follow a specific format: The command must tell the partner to walk a certain number of steps in one direction. • Example: Move three steps to your right. • Example of incorrect command: Move a little to your right then turn slightly left and walk forward. • Why above command is incorrect: First, it specifies movement in multiple directions, instead of only one direction. Also, command doesn’t specify an exact number of steps to walk. • NO COMMAND CAN BE GIVEN WHILE THE PARTNER IS IN MOTION!! Commands can only be given after previous commands have been executed.
Activity Part II – for teacher • First you have to assemble the NXT Robot using the documentation in the pdf “How to assemble an NXT Taskbot”. This in the attachment section in the TeachEngineering Activity “Understanding Communication with a Robot”. • The process of assembling takes about 45 minutes for someone who is not familiar with LEGO kits. • TWO OPTIONS – A) This assembly can either be performed outside of class with a group of selected students, OR B) can be performed in class by the student groups. If it is to be performed in class, this will take about 45 minutes. • The slides that follow assume that the Taskbot has been assembled, and so move on to how to program it.
Activity Part II – for teacher • Create a maze with wooden planks (or any other solid objects forming walls of the maze) – increase the size of the maze (add more turns) to increase difficulty. • Use the PowerPoint slides that follow (slides 7-31) to instruct kids how to program using NXT software. • Engineering Design Challenge - Using the LEGO NXT software, ask students to create programs to get their taskbots through the maze. • Suggestion – Slides 7 through 31 can be printed and provided to the students so that they can use them to troubleshoot when they begin writing their programs.
There’s more to the program than what can be found here, but the slides that follow can get you started and give you enough information to complete this activity Getting started with LEGO NXT Mindstorms software Engineering Design Challenge Using the LEGO NXT software, create a program to get your taskbot through the maze.
Starting a Program • The NXT kit comes with a software disk that you have to install on your computer (both Windows and Mac version are available). We assume you have installed it. • When you open the NXT MINDSTORMS software, you should encounter a screen that looks like this.
Starting a Program – contd. On this screen, enter a name for your program in the “Start New Program” box, and then press go.
Starting a Program – contd. • Your screen should now look like this • Click on the small ‘x’ (NOT THE LARGE ONE) on the top right of your screen
Your screen will then open up to give you more space to place icons
Telling the robot what to do -- writing a ‘program’ This is your ‘program beam’. As you add commands to the beam, it will stretch out. The robot will only follow commands that are placed ON THE BEAM! When you add multiple commands to the beam, the robot follows them in order. First command 1, then command 2, then command 3…
The command that we will be using in this activity is called the ‘move’ command
If you put a move command on to your program beam and make sure that it has a blue outline (click on the move icon if it does not have a blue outline), you will see some options pop up at the bottom of your screen Notice the blue outline! We will now be focusing on this bottom portion of the screen
First we’ll discuss the ports – A, B, C • Simply make sure that the port that your motor is connected to are the same ports that are checked in in the figure above (default programming settings are B to your right motor and C to your left motor. If you wire it that way programming will be much easier).
Steering • This is the steering box. • If you leave the sliding bar in the middle, the command will tell the robot to go straight. If you drag the bar to one direction the command will tell the robot to turn in that direction. The farther you pull the icon to one side, the sharper your turn will be in that direction. • Helpful hint: When navigating a maze or in any other tight spaces, it is better to use really sharp turns (move the sliding icon all the way over to one side), so that you avoid running into the walls of the maze or of what ever area you’re in.
Power • This is the power box • Everyone likes to run their power up to 100 to see how fast the robot moves but BE WARNED: lower power means better control, which makes it easier to navigate sharp turns and small areas in mazes!
Duration • This is the duration box • Click on the arrow next to the word rotations to see all of the duration options • For now, ignore the unlimited option, since it only makes sense to use it with advanced programming cases.
Duration (cont) • Let’s go over all of the other duration options • Seconds just tells your robot to use this specific command for a certain number of seconds. • Rotations tells your robot to use this specific move command until the wheels have turned a certain number of times (number of rotations of the wheel – not of the robot!!) • Degrees is the same thing as rotations, except instead of number of rotations it does the number of degrees that the wheel has turned (simply the number of rotations multiplied by 360).
Duration (cont) • BIGGEST MISTAKE PEOPLE MAKE: • Degrees only refers to the number of degrees the wheels of the robot will turn, not the number of degrees that the robot itself will turn! • That is, if you tell the robot to turn right for 90 degrees it will NOT make a 90 degree turn!!! • Other important information • It’s a good idea just to use rotations to determine the duration of a move command. It is the easiest to use since you’ll know exactly how far the robot will go using that one command.
Finally, this last command simply lets you choose what the robot does after the command is over (assuming it is the last command in your program). Your robot will either completely stop (brake), or it will keep rolling until friction stops it (coast)
Some Hints • Each different part of the maze needs its own move command (each straight part should have its own command and each move should have its own move), so start by counting the total number of move commands you need. • A right angle turn is best done by moving the sliding bar for the turn of your move command all the way over and then setting the duration for 0.5 rotations (you may need to do 0.4 or 0.6).
The challenge Using the LEGO NXT software, write a program to get their robots through the maze
Issues for First-Timers • There are a lot of small issues that can put off new users to the NXT robots and software. Hopefully these pointers can help you get started. • To create a program (after the NXT software is first loaded on the computer) you need to give it a name and hit GO as shown in this picture.
Issues for First-Timers….contd • As shown in the picture on the right, there are tabs at the bottom that bring you to different palettes of programming tools. The “Common Palette” (shown as the green circle) has most of the tools a beginning student should need. • Also, if you have a lot of commands on the screen at once, you might want to move around the programming area so that you can have more room or see commands that are off the screen. You can move around the programming area with the arrow keys on the keyboard.
Issues for First-Timers….contd • “Where did my settings go?” • If you hear this, this usually means that the student has clicked away from the command for which they want to change the settings. If you put the mouse cursor over the command you want to change, it will have a blue highlight and the settings will reappear below the programming window. Click
Issues for First-Timers….contd • When you have finished building the program for the robot, it’s time to download it to the robot’s NXT computer brick. • First, make sure that the USB cable that came with the NXT kit is plugged into the back of the computer and into the top of the NXT robot. • Then, turn on the robot using the orange button on the NXT computer brick. (It doesn’t really matter whether you plug the robot in or turn it on first.)
Issues for First-Timers….contd • When you plug in the robot for the first time, the computer has to figure out how to talk to the robot before you can put the program on it. (For the computer savvy, the operation system installs the NXT drivers.) • You don’t have to do anything for this, but it’s a good idea to wait about one minute after you have turned the robot on and plugged it into the computer. If you don’t, you might get an error message. • Once the robot is on and plugged in, you can hit the “download” button (pointed out in the picture below). You should get a “Complete!” message on the computer screen if it downloaded correctly.
Issues for First-Timers….contd • Once the program is downloaded on the NXT computer brick, you use the buttons on the front of the brain to run the program. • You use the orange button to select items on the screen, and the dark gray button to back up in the menus. (They’re a little like the green and red buttons on a cell phone.) The arrow buttons move left and right in the menus. • To run the program you downloaded, you first need to find it. From the main menu, programs you download are located in My Files->Software Files. The program you downloaded should be called by the same title you gave it at the beginning. • If you press the orange button when you find your program, you will be given the option to Run or Delete the program. Choose Run to see if the program did what you wanted!
Issues for First-Timers….contd • If you are finished with the robot, you can turn it off by hitting the dark gray button from the main menu on the NXT brain. You will be asked if you want to turn the robot off. Select the checkmark to say OK. • The NXT computer brick only has a limited amount of space to store programs. It’s not a bad idea to go into the My Files->Software Files folder and delete old programs from time to time so that you won’t run out of space. • If you are running the Mindstorms software at a school, you probably have a tech specialist that installs software for you. You will probably need to ask the tech specialist to install the software for the first time. Make sure he or she knows that the students in your class are going to need to be able to run the program. • Also for the tech specialist: The LEGO Mindstorms software is not compatible with display resolutions below 1024 by 768 pixels. Before you need to use the software in your class make sure that all of the computers you will use are set to this resolution or higher.
Maze and Sample Program that works The above maze requires 9 move commands, one for each straight portion and one for each turn. Each turn should have the sliding bar pulled all the way over to the desired side and should be of a duration of 0.5 rotations, as shown in the picture below:
Sample Program (cont.) • To determine the right number of rotations for the straight portions of the maze, you need to use trial and error. Just remember to have the kids use ‘rotations’ (of wheels) for their duration, as it is the most consistent and easiest to work with.
PRE/POST-ASSESSMENT SHEET - What is a robot? • Describe in one sentence below what you understand by the term ‘robot’ • 2. What are the main parts of a robot? • What do you need to do to make a robot move?
PRE/POST-ASSESSMENT SHEET - What is a robot? • Describe in one sentence below what you understand by the term ‘robot’ • A robot is a machine that gathers information about its environment (senses) and uses that information (thinks) to follow instructions to do work (acts). • 2. What are the main parts of a robot? • Computer (to make decisions), Input ports (connected to sensors), and Outputs (connected to motors, for example). • What do you need to do to make a robot move? • They program it using software telling it precisely what to do, step by step.
SOURCES FOR THE IMAGES Slide 1: Asimov Robot: http://commons.wikimedia.org/wiki/File:Robot_asimo_cropped.jpg