Download
1 / 29
300 likes | 330 Vues
Learn the basics of observational drawing focusing on contour drawings, memory vs. actuality, basic shapes, strong compositions, and value shading with lines. Understand the purpose of observational drawing and practice blind and continuous contour drawings. Explore still life drawings using charcoal and value. Discover tips for creating a strong compositional drawing and working with light sources to achieve different values. Improve your skills by observing shapes, proportions, and mastering shading techniques in your contour drawings.

E N D
Learning to Draw the Basics Observational DrawingContour Drawings Focus: Memory vs. Actuality Contour Lines Basic Shapes Strong Compositions Value Shading with Lines
What does drawing from observation mean? • Observational drawing Drawing what you only see! (Not what you think it should look like!) • What is the purpose of observational drawing? To strengthen the amount of details and proportions you see (forces you to look closer), helps you practice the basic drawing techniques in order to get to mastery (sight measuring),helps you make what your drawing more life like or realistic.
degrees of lightness and darkness value -10 STEP SCALE -Even blended transitions READING A VALUE PENCIL H-stands for hardness (light) B-stands for blackness (dark) HB or #2 pencil is a middle grey
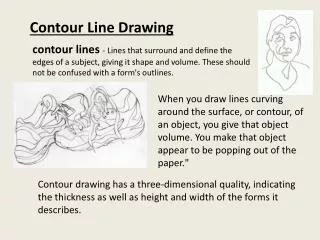
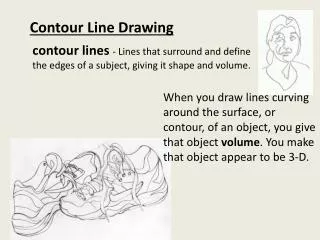
What is a contour line? • Contour Line Is NOT a line that just outlines the subject! Contour lines define the exterior and the interior part of the subject matter. • What is the purpose of contour drawings? A line drawing, drawn slowly with smooth, even, continuous lines. (NO BREAKS in the lines = NO implied line) Forces the artist to slow down and really observe what they are looking at very carefully (Details Matter!)
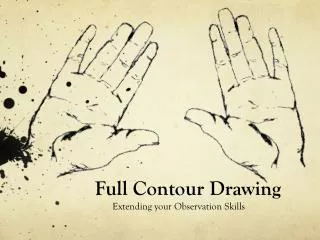
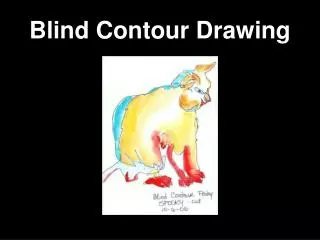
Two types of contour drawings • Blind Contour Drawing Is a drawing exercise, where an artist draws the contour of a object without looking at the paper. (Eyes only on the object!) • Continuous Contour Drawing Is a drawing exercise, where the artist looks both at the object and the paper, moving the pencil over the paper, and creating a silhouette of the object as well and the interior and exterior of the object. (Don’t pick up your pencil!)
CONTOUR DRAWINGS Practice Assessments: Bind Contour of an object of your choice (No looking at the paper!) Continuous Contour of your hand (Pencil to paper ALWAYS!) Contour Drawing of your shoe (Lightly Sketch, then add contours!)
STARTING YOUR DRAWING LIGHTLY sketch out OR mark the basic shapes of objects using a light pencil (ex: 4H). Work out the kinks now… get the perspective, composition and proportions right… GAUGE PORPORTIONS https://www.youtube.com/watch?v=Otv_l_qkML4
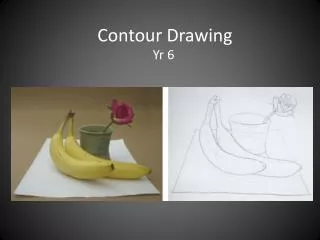
There are many different techniques and media you can use to create a still life…
What is a still life? • Still life- A still life is an arrangement of inanimate objects (usually objects that are not alive) - such as fruit, pottery, and flowers. • What is the purpose of drawing still lifes? The artist has a chance to arrange these objects (unlike a landscape) in order to work out the composition of their artwork. In addition, this is a great way to practice and develop observational drawing techniques.
TIPS BEFORE BEGINNING A STILL LIFE: • Choosing the right location: a light source is the key to a strong compositional drawing. Find a place that shows a range of values . Light is very important in a still life, this will give life and impact to your work. • View your arrangement through an empty slide frame to assess the composition and consider its placement on the paper. This will help you make right compositional decisions and help to break down the objects so you won’t become overwhelmed. • Consider compositional elements, avoiding bland central positioning and symmetry. Look for those interesting and unique view points. Make your drawing stand out and try something with a unique perspective to challenge your skills.
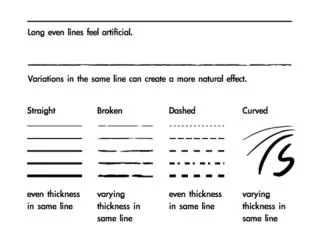
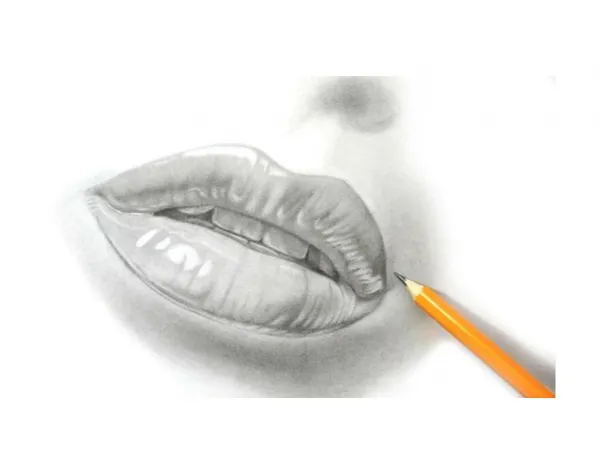
4. After observing ,working out your shapes and proportions then start concentrating to break down what each single object looks like. SLOWLY with your eyes observe all outlines, raised, and recessed areas. Begin drawing the contours of each object as you observing. (Start at a SINGLE point and work you way around the object—should be one continuous line) 5. Then add VALUE. Make sure you achieve a full range of value. Beginners tend to draw too lightly and end up with a washed-out looking drawing. See a value scale if you need reference. Add value slowly - layering to build up deep tones. DO NOT define edges with a single line, define them with shifts in value by overlapping the lines to build tones/contrast. This will take some planning. -YOU MAY USE ANY LINE MARK MAKING TECHIQUE WE PRACTICED IN CLASS TO CREATE YOUR VALUE IN YOUR CONTOUR DRAWING.
LIGHT SOURCES LEFT MUTIPLE BEHIND ABOVE
Cast Shadow -where no light hits the object (darkest value) • Core Shadow -where the object begins to recede light (dark grey value) • Half-tone -neither light nor dark (value between the shadow edge and highlight) • ReflectedLight-the rim of light reflected from a surrounding surface back on the edge of the form (slightly lighter than halftone but not as light as the highlight) • Highlight-the brightest value where the light source is the strongest ELEMENTS OF SHADING