Download
1 / 18
190 likes | 494 Vues
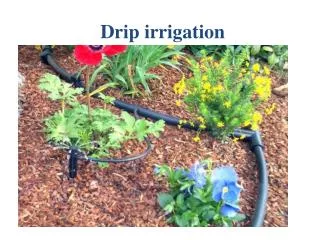
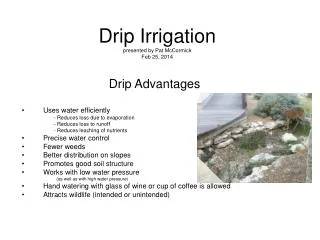
Drip Irrigation presented by Pat McCormick Feb 25, 2014. Drip Advantages Uses water efficiently - Reduces loss due to evaporation - Reduces loss to runoff - Reduces leaching of nutrients Precise water control Fewer weeds Better distribution on slopes Promotes good soil structure

E N D
Drip Irrigationpresented by Pat McCormickFeb 25, 2014 Drip Advantages Uses water efficiently - Reduces loss due to evaporation - Reduces loss to runoff - Reduces leaching of nutrients Precise water control Fewer weeds Better distribution on slopes Promotes good soil structure Works with low water pressure (as well as with high water pressure) Hand watering with glass of wine or cup of coffee is allowed Attracts wildlife (intended or unintended)
Drip Limitations • Initial costs (for parts and time) • Maintenance required • Clogging • Rodent chewing • Cutting it with a shovel • Root area watered is limited • Doesn’t cleanse foliage • Can’t see if its working without bending over
Where is drip useful? • Rose gardens • Perennial garden • Shrub area • Vegetable garden • Ground cover • Orchards • Greenhouse • New trees • Lawns • Native plants • Non-native plants • Sloped areas • Water features
Hose to drip connector Solid distribution tubing Schematic of Drip SystemSuper Simple(1) Version of Main Assembly
Schematic of Drip SystemSuper Simple(2) Version of Main Assembly Garden hose Hose to drip connector Hose to drip connector Hose to drip connector Solid distribution tubing
“Y” valve Hose to drip connector Solid distribution tubing Schematic of Drip SystemSuper Simple(3) Version of Main Assembly Timer
Types of Drip Tubing • Distribution tubing½” Used to transport water. It is solid. Other tubing of all kinds connect to it. Drip emitters connect to it where you want them. Be aware that there are 2 sizes available both calling themselves “half inch”. The Orbit brand is actually 0.7 inches in diameter. The Rainbird brand is actually 0.63 inches. • In-line emitter tubing (both ½” and ¼”) Emits water in a controlled manner. It has mini pressure controlled, self-flushing emitters imbedded so that the first emitter and the last emitter release the same amount of water. I have connected plug in emitters to these. Emitters can be 18”, 12” and 6” apart. There are sized differences in this tubing as with the distribution tubing.
Emitter Tubing Brown ½” (.63”) emitter tubing with 18” spacing by Rainbird between emitters Black ½” (.7”) emitter tubing with 12” spacing by Orbit Brown ¼” emitter tubing with 12” spacing
Types of ½” Connectors Compression Manual shutoff valve (made to fit either .7” or .63” distribution tubing, will not fit both sizes) Universal Straight Thru (works with both .7” and .63” of distribution and emitter tubing) Universal Elbow (works with both .7” and .63” of distribution and emitter tubing) Universal Tee (works with both .7” and .63” of distribution and emitter tubing) Compression Tee (made to fit either .7” or .63” distribution tubing, will not fit both sizes)
Types of ½” Termination Devices End cap with hose threaded cap Good for draining or connecting to a hose to extend. Compression Manual Shut Off Valve Used to cut off a section of the line, perhaps when certain plants are more established and require less water, or no longer requires irrigation. (But if you aren’t sure, this is a good temporary shut off before you remove the line entirely. Figure 8 Terminator Slide the tubing through one ring with about a 10-inch tail, then fold the tubing and feed it through the other ring. Inexpensive, works great, easy to remove if you want to extend the line later. Works with both sizes of half inch distribution tubing.
Types of ¼” Connectors Goof plug Straight Thru Manual Shut off Valve Tee
Types of Emitters Micro valve used with gritty water ½” distribution tubing with emitter/dripper attached Micro emitters (1/4”) .1 to 20 gallons per hours Micro emitter adjustable spray
How far can I run Dripline?It depends on your water pressure
Drip Subsystems Grid ½” Distribution tubing from faucet Elbow connector T connector End cap for draining ½” In Line emitter tubing
Drip Subsystemsother possible layouts ½” dist. tubing ¼” distribution tubing Shrub emitter with barb inserted at the end of the tube Low volume emitter with barb ¼” in line emitter ¼” T barb ¼” straight-thru connector barb Terminator (goof plug) ¼” in line emitter ½” straight through connector ½” emitter tubing Terminator end cap
Converting Spray to Drip It is possible to keep and existing underground pvc spray system in place and convert the water distribution above ground to drip. All of the uprights must be converted or capped. The timing will not work with both spray and drip in one zone. The pressure may exceed the drip component capabilities, but I have done this without changing the pressure The way I have done it is to remove the spray heads and replace with a threaded T connector (threads on all 3 sides). There are connectors design to retrofit pvc threaded uprights with drip compression. The connector is threaded on one end and ½” compression on the other end. Put one of these on each side of the pvc T and make a loop with ½” poly tubing or ½” inline emitter tubing. Alternatively, from the upright use a threaded elbow connector, then add the conversion piece and a length of ½” tubing. ½” emitter tubing Threaded pvc T connector Threaded pvc elbow ½” emitter tubing Threaded to compression connectors Existing underground pvc, T, and uprights
Resources • http://txsmartscape.com • http://aggie-horticulture.tamu.edu/ • http://urbanlandscapeguide.tamu.edu/ • http://texaset.tamu.edu/ • http://turf.tamu.edu/ • http://rainwaterharvesting.tamu.edu/ • http://irrigation.tamu.edu/ • http://earthkindroses.tamu.edu/ • “Drip Irrigation for every Landscape and all Climates” by Robert Kourik • available on Amazon.com new and used. • Dripworks.com