Patient
Patient. POSITIONING. Four basic positions include: Supine Prone Lateral Lithotomy. Variations include: Trendelenburg Reverse trendelenburg Fowler’s Jackknife High lithotomy Low lithotomy. Positions. Supine. Most common with the least amount of harm

Patient
E N D
Presentation Transcript
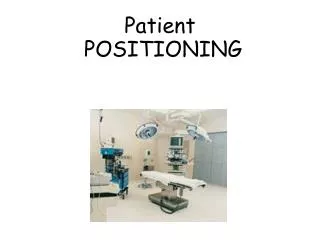
Patient POSITIONING
Four basic positions include: Supine Prone Lateral Lithotomy Variations include: Trendelenburg Reverse trendelenburg Fowler’s Jackknife High lithotomy Low lithotomy Positions
Supine • Most common with the least amount of harm • Placed on back with legs extended and uncrossed at the ankles • Arms either on arm boards abducted <90* with palms up or tucked (not touching metal or constricted) • Spinal column should be in alignment with legs parallel to the bed • Padding is placed under the head, arms, and heels with a pillow placed under the knees • Safety belt placed 2” above the knees while not impeding circulation
Prone • Face down, resting on the abdomen and chest • Chest rolls x2 placed lengthwise under the axilla and along the sides of the chest from the clavicle to iliac crests • One roll is placed at the iliac or pelvic level • Arms lie at the sides or over head on arm boards • Head is face down and turned to one side with accessible airway • Padding to bilateral feet, arms and knees • Safety strap placed 2” above knees
Lateral • Shoulder & hips turned simultaneously to prevent torsion of the spine & great vessels • Lower leg is flexed at the hip; upper leg is straight • Head must be in cervical alignment with the spine • Axillaryroll placed to the axillary area of the downside arm • Padding placed under lower leg, to ankle and foot of upper leg, and to lower arm (palm up) and upper arm • Pillow placed lengthwise between legs and between arms • Stabilize patient with safety strap and silk tape, if needed
Trendelenburg • The patient is placed in the supine position while the bed is modified to a head-down tilt of 35 to 45 degrees, the head being lower than the pelvis • In addition to a safety strap, strips of 3” tape may be used to assist with holding the patient in the position • Used for procedures in the lower abdomen or pelvis
Reverse Trendelenburg • The bed is tilted so the head is higher than the feet • Used for head and neck procedures • Facilitates exposure, aids in breathing and decreases blood supply to the area • A padded footboard is used to prevent the patient from sliding toward the foot
Fowler’s Position(Sitting/Lawnchair/Beachchair) • Foot of the bed is lowered, flexing the knees, while the body section is raised to 35 – 45 degree • Feet rest against a padded footboard • Arms are crossed loosely over the abdomen and placed on a pillow on the patient’s lap • A pillow is placed under the knees. • For cranial procedures, the head is supported in a head rest and/or with sterile tongs • This position can be used for shoulder or breast reconstruction procedures
Jackknife • Modification of the prone position • The patient is placed in the prone position on the bed and then inverted in a V position • Chest rolls are placed to raise the chest • Arms are extended on angled arm boards with the elbows flexed and the palms down • A pillow is placed under the ankles to free the feet and toes of pressure • The bed leg section is lowered, and the bed is flexed at a 90 degree angle • Used in gluteal and anorectal procedures
Lithotomy • With the patient in the supine position, the legs are raised and abducted to expose the perineal region • The legs and feet are placed in stirrups that support the lower extremities • Stirrups should be placed at an even height • Adequate padding and support for the legs/feet should eliminate pressure on joints and nervus plexus • The position must be symmetrical
High Lithotomy • Frequently used for procedures that requires a vaginal or perineal approach • The patient is in the supine position with legs raised and abducted by stirrups • Once the feet are positioned in stirrups, the footboard is removed and the bottom section of the bed is lowered • It may be necessary to bring the patient’s buttocks further down to the edge of the bed break
Low Lithotomy • All of the positioning techniques used to high lithotomy apply • Placed in supine position with the legs raised and abducted in crutch-like or full lower leg support stirrups • The angle between the patient’s thighs and trunk is not as acute as for the high lithotomy position • Used in vaginal procedures
Key Points • Use safe body mechanics during transfers and positioning – ensure adequate assistance is used • Maintain stretcher/bed in a locked position prior to patient transfers and positioning • Verify weight limit on OR table or bed to be used • Ensure that the patient is adequately secured to the OR table or bed to be used • One strap placed across the patient’s thighs and the second across the lower legs • Extra care must be taken to ensure that loose skin is protected (ielithotomy position)
Risk #1: Pressure points: occiput;scapulae;thoracicvertebrae;olecranonprocess;sacrum/coccyx; calcaneaus;knees Risk #2: Neural injuries of extremities, brachial plexus, ulna, radial nerves Safety Considerations: Padding to heels, elbows, knees Spine, head alignment with hips Legs parallel, uncrossed at ankles Safety Consideration: Arm board at less than 90 degrees Head in neutral position Arm board pads level with OR bed Supine
Risk #1: Head, eyes, nose Risk #2: Chest compression, iliac crest, breast, male genitalia Risk #3: Knees Risk #4: Feet Safety Consideration: Maintain cervical neck alignment Protection of forehead, eyes, chin Padded headrest to provide airway Safety Consideration: Chest rolls to allow chest movement and decrease abdominal pressure Breasts and genitalia free from torsion Safety Consideration: Padded with pillows Safety Consideration: Padded footboard Prone
Risk #1: Bony prominences and pressure points on dependent side Risk #2: Spinal alignment Safety Consideration: Axillary roll for dependent axilla Lower leg flexed at hip Upper leg straight with pillow between legs Padding between knees, ankles and feet Safety Consideration: Maintain spinal alignment during turning Padded support to prevent lateral neck flexion Lateral
Risk #1: Hip/knee joint injury Lumbar/sacral pressure Vascular congestion Risk #2: Neuropathy of obturator nerves, femoral nerves, common peroneal nerves/ulnar nerves Risk #3: Restricted diaphragmatic movement Pulmonary region Safety Consideration: Place stirrups at even height Elevate lower legs slowly and simultaneously from stirrups Safety Consideration: Maintain minimal external hip rotation Pad lateral or posterior knees/ankles to prevent pressure and contact with metal surface Safety Consideration: Keep arms away from chest to facilitate respiration Arms on arm boards at less than 90 degree angle or over abdomen Lithotomy
Documentation should include: • Preoperative assessments • Type and location of positioning and/or padding devices • Names and titles of persons positioning the patient • Intra-operative positioning changes • Postoperative outcome evaluation • Documentation includes nursing assessments and interventions • Documenting nursing activities provides an accurate picture of the nursing care provided as well as the outcomes of the care delivered • Document all of your findings
Don’t Forget: • Good positioning starts with an assessment • Prevent team members from leaning against patients • Cushioning of all pressure points is a priority - the correct use of padding can protect the patient • Procedures longer than 2 ½ to 3 hours significantly increase the risk of pressure ulcer formation • During a longer procedure, you should assist with shifting the patient, adjusting the table, or adding/removing a positioning device • The nurse must assess extremities at regular intervals for signs of circulatory compromise • Documentation of the positioning process should be performed accurately and completely
One last note… Positioning problems can result in significant injuries and successful lawsuits.