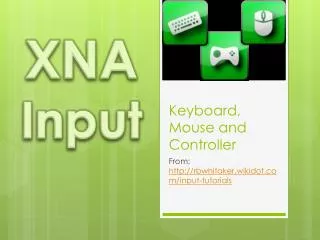
Keyboard , Mouse and Controller
XNA Input. Keyboard , Mouse and Controller. From : http ://rbwhitaker.wikidot.com/input-tutorials. Basic Keyboard Input. Player input in a game is essential. Without it, our game is simply an animation.

Keyboard , Mouse and Controller
E N D
Presentation Transcript
XNA Input Keyboard, Mouse and Controller From: http://rbwhitaker.wikidot.com/input-tutorials
Basic Keyboard Input • Player input in a game is essential. Without it, our game is simply an animation. • Thus, we need the basics of getting player input from the keyboard, mouse and controller devices.
Basic Keyboard Input • Keyboard input is actually quite easy to do. It should be fairly easy to add it into any code that you are working on. • The best place to check for player input is in the Update() method of your game. Add the following line of code there: KeyboardState state = Keyboard.GetState();
Basic Keyboard Input • The Keyboard class has a method that returns the current state of the keyboard whenever it is called. • The current state of the keyboard is stored in a KeyboardState object, which is being called state, and now contains the current state of the keyboard. • To determine whether a key is pressed down or not, use the method IsKeyDown() in the KeyboardState class, as shown below: bool leftArrowKeyDown = state.IsKeyDown(Keys.Left);
Basic Keyboard Input • Or use it as part of an if-statement, to do something special if the key is pressed down: if(state.IsKeyDown(Keys.Left)) { // do something here } • We can see in these two examples that IsKeyDown() returns a bool (true or false). For its parameter, we pass in something in the Keys enumeration. • The Keys enumeration has lots of keys available. You may have to hunt for the key you are looking for, but it is guaranteed to be there.
Checking for Key Presses • Having seen how to do the most basic form of keyboard input, consider the following: if(state.IsKeyDown(Keys.Left)) { // do something here } • Notice that this will return true at every update that the key was pressed, which is going to be something like 60 times per second, for as long as the user has the key down. • If you are trying to do something like fire a bullet when a key is pressed, the person could press the key for a half a second, and 30 bullets would be fired. Seemingly unfair.
Checking for Key Presses • To avoid this, save the old keyboard state, temporarily, and use it to help us decide whether to actually fire or not. • We can fire (or anything else) only when the key was up in the old state, and pressed in the new state - that is, only when the key is first pressed. • Start by making an instance variable to hold the old keyboard state by adding the following line: private KeyboardStateoldState;
Checking for Key Presses • Then, in the Update() method, add the following to retrieve the new state, handle it, and then update the old state: // get the newest state KeyboardStatenewState = Keyboard.GetState(); // handle the input if(oldState.IsKeyUp(Keys.Left) && newState.IsKeyDown(Keys.Left)) { // do something here // this will only be called when the key is first pressed } // set the new state as the old state for next time oldState = newState;
Checking for Key Presses • Thus, this code will only run the stuff inside of the if statement when the key is first pressed. • Lastly, it is worth mentioning that in addition to the IsKeyUp() and IsKeyDown() methods in the KeyboardState class, a GetPressedKeys() method is available. • GetPressedKeys() gets an array of all keys currently pressed: Keys[] pressedKeys = state.GetPressedKeys();
Key Modifiers • Sometimes, it is nice to be able to determine whether a modifier key (CTRL, ALT, SHIFT, FN) is pressed. • For example, you might want to do something different when the user presses Ctrl+C instead of just C. • Because these modifier keys are just simply keys to the KeyboardState class, you can read through the array provided by GetPressedKeys(), or do similar to below: if((state.IsKeyDown(Keys.LeftControl) || state.IsKeyDown(Keys.RightControl)) && state.IsKeyDown(Keys.C)) { // do something here for when Ctrl-C is pressed }
Xbox Controller Input • Xbox controllers are the preferred method of input for an XNA game, since they work on both the Xbox 360 and on Windows. • If you have an Xbox 360, then you already have a controller you can use.
Xbox Controller Input • The Xbox 360 controller has lots of buttons and controls that give the user a lot of power:
Xbox Controller Input • The left and right thumbsticks are small joysticks that can be controlled by your thumbs. These are among the more common input methods on the controller. In addition, both of them can be pressed in, and so they can also be treated as buttons. • The directional pad consists of four buttons, each of which are assigned to a specific direction—up, down, left, and right. Since we are programming a game, we can assign these to anything we want, but they are typically used for navigating menus, rather than actually controlling movement. • In the upper right part of the controller are four colored buttons that are given letters as names (A, B, X, and Y). These buttons are also commonly used for a variety of purposes, especially in game play. • In the center of the controller is a rounded button with a green ‘X’. This button is the XBox Guide button. In XNA games, the system, rather than we, decides what happens when this button is pressed.
Xbox Controller Input • On the left side of the guide button is the back button, and on the right side is the start button. Once again, we can program these buttons to do whatever we want, but they are typically used for menu navigation as well. The back button moves the player out of menus (back to a higher level, perhaps) and the start menu moves the player into deeper menus, or to start the game. • On the top of the controller are two “shoulder” buttons. These buttons are similar to the lettered buttons, and are used for a variety of things. Typically, the most commonly used features in a game are assigned to the lettered buttons, while less common features are assigned to the shoulder buttons, since they are a little harder to get to. • While we can’t see them in the image above, the XBox controller also has a left and right trigger on the top of the controller. The triggers have the useful feature of being able to be pressed part way down. The other buttons discussed (not including the thumbsticks) are either pressed or released. The triggers can be pressed all of the way, not at all, or anywhere in between.
Getting Input From the Xbox Controller • Getting input from the Xbox controller is very easy. If you've looked at doing input with the keyboard or mouse, you won't be surprised with what we are going to do. • They are all fairly similar. Probably the best place for getting player input is in the Update() method. The line of code below retrieves the current state of a controller: GamePadStategamePadState = GamePad.GetState(PlayerIndex.One); • Of course, if you want player two's input, you would just switch it to say PlayerIndex.Twoinstead of PlayerIndex.One.
Getting Input From the Xbox Controller • Now that we have the current state of the player's controller, we can check to see what state it is currently in, or if the controller is even plugged in: if(gamePadState.IsConnected){ // then it is connected, and we can do stuff here } • To check if the various buttons are being pressed, we will use the GamePadState.Buttonsproperty: if(gamePadState.Buttons.X == ButtonState.Pressed){ // do something }
Getting Input From the Xbox Controller • The directional pad (D-Pad) can be tested in a similar manner. The D-Pad has four buttons on it: Up, Down, Left, and Right. So, access the D-Pad like this: if(gamePadState.DPad.Down == ButtonState.Pressed){ // do something } • The state of the two thumbsticks can also be accessed easily. The thumbsticks, however, give us an x- and a y-coordinate that are between -1 and 1. • If the x-coordinate is -1, then the thumbstick is tilted all the way to the left. If it is 1, then it is tilted all the way to the right. • If the y-coordinate is -1, then it is tilted all the way down, and 1 means it is tilted all the way up. 0 indicates that it is at the center for either of the directions.
Getting Input From the Xbox Controller • Below is the code for updating an angle based on the position of the left thumbstick: float maxSpeed = 0.1f; float changeInAngle = gamePadState.Thumbsticks.Left.X * maxSpeed; // this variable is defined elsewhere angle += changeInAngle; • The triggers are accessed in a very similar manner, though their values range from 0 to 1, where 0 means the trigger is not pressed at all, and 1 means it is pressed all the way down. float leftTriggerValue = gamePadState.Triggers.Left;
Checking for Button Presses • Just like with other forms of input that we have seen, we might want to have something happen only when a button is first pressed, rather than happening every time that we see the button is pressed. • To do this, we will save the state of the Xbox controller, and check to see if the new state is pressed, and the old state wasn't. This would occur when the button is first pressed, and not happen again until the button is released. • We could do this by adding an instance variable to the class to store the old state like below: private GamePadState oldState;
Checking for Button Presses • And then setting up our update function like the code below: GamePadState newState = GamePad.GetState(PlayerIndex.One); if(newState.Buttons.X == ButtonState.Pressed && oldState.Buttons.X == ButtonState.Released) { // the button has just been pressed // do something here } // At the end, we update old state to the state we grabbed at the start of this update. This allows us to reuse it in the next update. oldState = newState;
Xbox Controller Vibration • Once again, the XNA people have made a possibly complicated task very easy to do. Setting a controller to vibrate is very easy. The line of code that will allow us to do this is shown below: GamePad.SetVibration(PlayerIndex.One, 1.0f, 1.0f); • The values in this function are, from left to right, the index of the player whose controller you want to vibrate, the amount of vibration that should happen in the left vibration motor, and last, the amount of vibration that should happen in the right vibration motor. • For these two parameters, the values can range from 0 to 1, where 0 means no vibration at all, and 1 means full vibration.
Xbox Controller Vibration • The values of the two different motors do not have to be the same. In fact a lot of games use this to their advantage. If you get hit on the left side, the left motor vibrates more. • If you get hit on the right side, the right motor vibrates more. • One thing to remember is that once a controller is told to vibrate, it won't stop until you set it back to 0. • Make sure you set it up so that after a little while, the vibration gets set back to 0 or you will drive players crazy.
Showing the Mouse • By default, the mouse is not displayed, which should be the case if you are using a game controller. • However, the mouse should be visible when using, say, the keyboard or mouse.
Showing the Mouse • One solution would be to draw an “arrow” image or animation at the location of the mouse, which will allow you to create very custom mouse icons. • An easier solution, for those not interesting customizing mouse appearance, would be to tell the game to show it, which can be done with one simple line: this.IsMouseVisible = true; • You can put the following line in just about any method of your main game class and it will work, though it may get called every frame, when it only needs to happen once. • Generally, this particular line should be in either the constructor, or perhaps set in some kind of a settings class.
Doing Mouse Input • The mouse location and button click states are kept up to date in your XNA game, just as the keyboard state is, and you may access mouse states nearly identically to the keyboard. • Again, the natural place to query all input is in the Update() method. And, get the current mouse state with: MouseState mouseState = Mouse.GetState(); • Once again, the MouseState class contains all of the information that we could possibly want to know about the current state of the mouse. • To do something when the mouse is clicked, simply query state as you did with the keyboard state: if(mouseState.LeftButton == ButtonState.Pressed) { // Do whatever you want here }
Doing Mouse Input • To wrap the mouse click, such that you can tell when a new click occurs, we need to store the previous mouse state like we did with the keyboard. • Now, when it is time to update, we can check to make sure that the button was released before, and pressed now. That would constitute a mouse click. • Start by adding the following line as an instance variable in your class: private MouseState oldState;
Checking for Key Presses • Then, in the Update() method, add the following to retrieve the new state, handle it, and then update the old state: // get the newest state MouseState newState = Mouse.GetState(); // handle the input if(oldState.IsKeyUp(Keys.Left) && newState.IsKeyDown(Keys.Left)) { // do something here // this will only be called when the click is first pressed } // set the new state as the old state for next time oldState = newState;
Changing the Mouse Location • Occasionally, you may also want to set the mouse location in your game. I'd recommend not doing this very often. • It can be kind of irritating to the user to have the mouse randomly change locations, but there are a few good times to do it. Just use it sparingly. • To set the mouse location, simply use the static SetPosition method in the Mouse class: Mouse.SetPosition(x, y);
Summary of Mouse States • LeftMouseButton: The state of the left mouse button. This is the primary mouse button, and it should be used for the most common actions. • MiddleMouseButton: The state of the middle mouse button. Not all mice have a middle mouse button, but most do. Often, this is accomplished by pressing (not rotating) the mouse wheel, which counts as the middle mouse button. • RightMouseButton: The state of the right mouse button. This should be used for secondary actions and context menus.
Summary of Mouse States • XButton1: Some fancy mice have this extra button. It, along with XButton2, are often used for forward and backward in web browser. But, assuming you have a mouse that has this button, you can use it in your game for anything you want. Just be warned that many mice do not have this button. • XButton2: This button, along with the XButton1 above, are found on some mice, and are typically used for navigating forward and backward in browsers. Like XButton1, most mice do not have this button. If you happen to have a mouse with this button, you can assign it to do anything you want, just like the other mouse buttons.
Summary of Mouse States • X: This stores an integer which contains the x-coordinate of the mouse in window coordinates. That is, this value is the number of pixels over from the left edge of the game window that the mouse is currently located at. • Y: This stores an integer which contains the y-coordinate of the mouse in window coordinates. this means it is the number of pixels that the mouse is down from the top of the game window.
Summary of Mouse States ScrollWheelValue: • This stores an integer value that contains the cumulative mouse wheel scroll value since the game was started. As you rotate the mouse wheel up, this number increases, and as you rotate it down, the number decreases. • This value does not contain the total number of times that the mouse wheel was "clicked," however. It contains the number of "detents" that the mouse wheel has moved. • My mouse, for example, changes by 120 detents every time I move the mouse wheel. I'm sure it isn't always the same for every mouse or every computer - it is probably user configurable to allow for more or less sensitive mice.
The Basic Picking Method • One of the most important uses of a mouse is to be able to click on a rendered object. This is called picking. • The first step to picking is to create a vector, called a Ray, in the scene that starts at the near clipping plane and goes into the scene. • This ray will indicate the line along the Z axis that the mouse is currently over. • Once we have this ray, we intersect it with all bounding spheres contained within each of the parts of the model to determine whether an intersects occurs. • If an intersection exists, then the mouse is currently over one or more objects in question, at which point we “select” the object nearest the near clipping plane.
Picking Code • Add the following code to construct a ray based on mouse location and current clipping planes: public Ray CalculateRay(Vector2 mouseLocation, Matrix view, Matrix projection, Viewport viewport) { Vector3 nearPoint = viewport.Unproject(new Vector3(mouseLocation.X, mouseLocation.Y, 0.0f), projection, view, Matrix.Identity); Vector3 farPoint = viewport.Unproject(new Vector3(mouseLocation.X, mouseLocation.Y, 1.0f), projection, view, Matrix.Identity); Vector3 direction = farPoint - nearPoint; direction.Normalize(); return new Ray(nearPoint, direction); }
Picking Code • In addition to the mouse location on the screen and the clipping planes, you will also need the projection and view matrices, as well as the current viewport in use. • This is because in order to determine where the ray is in the scene, you need to know how the scene is set up. This is determined by these three parameters. • The creation of the point at the near clipping plane and the point at the far clipping plane requires the use of the Viewport.Unproject method. • These points are used to calculate the direction of the ray, by traking the difference of the farPoint and nearPoint. • The ray returned is constructed from the normalized direction and the near point, which can be used to eventually “select” the closest object.
Picking Code • The next thing required is for a method that will take a BoundingSphere object and determine if a collision sphere is intersected, as shown below: public float? IntersectDistance(BoundingSphere sphere, Vector2 mouseLocation, Matrix view, Matrix projection, Viewport viewport) { Ray mouseRay = CalculateRay(mouseLocation, view, projection, viewport); return mouseRay.Intersects(sphere); }
Picking Code • Notice the return type of this method is float?. It returns the distance to the intersection point, if an intersection exists, or null otherwise. • In C#, the types that end in ‘?‘are types that are allowed to be null – we call them nullable. • For instance, type float has to be an actual floating point value, but the type float?is nullable, and can be null. • Also notice that instead of returning a Boolean value (true or false), a floating point value is returned. • At first, this may seem like kind of an annoying feature, (we will have to convert this to true or false ourselves), however this makes it easy to find the closest object that the mouse is over.
Picking Code • The last step is to create a method that takes a model, its transformation world matrix, and the rest of the stuff needed to build the ray, and determine whether or not the ray intersects the model, as shown below: public bool Intersects(Vector2 mouseLocation, Model model, Matrix world, Matrix view, Matrix projection, Viewport viewport) { for (int index = 0; index < model.Meshes.Count; index++) { BoundingSphere sphere = model.Meshes[index].BoundingSphere; sphere = sphere.Transform(world); float? distance = IntersectDistance(sphere, mouseLocation, view, projection, viewport); if (distance != null) { return true; } } return false; }
Picking Code • This method goes through each model and gets the bounding sphere for its mesh. • Each bounding sphere is transformed to the appropriate location in the 3D world coordinates using the model's world matrix, and then the distance to the intersection point is calculated. • If an intersection does not exist, the distance to the intersection point will be null and false is returned by the method. • If you are moving the meshes around individually, like we did in the tutorial on mesh-by-mesh animation, then you will need to transform the bounding spheres appropriately and the bounding sphere needs to be moved to the same location that the mesh is drawn in.
Picking Code • With these three methods completed, we use it as follows from the Update() method: Vector2 mouseLocation = new Vector2(Mouse.GetState().X, Mouse.GetState().Y); Viewport viewport = this.GraphicsDevice.Viewport; boolmouseOverSomething = false; if(Intersects(mouseLocation, asteroid, asteroidWorld, view, projection, viewport)) { message = "Mouse Over: Asteroid"; mouseOverSomething = true; } if(Intersects(mouseLocation, smallShip, smallShipWorld, view, projection, viewport)) { message = "Mouse Over: Small Ship"; mouseOverSomething = true; } if(Intersects(mouseLocation, largeShip, largeShipWorld, view, projection, viewport)) { message = "Mouse Over: Large Ship"; mouseOverSomething = true; } if (!mouseOverSomething) {message = "Mouse Over: None"; } }
Picking Code • This determines the mouse location and viewport in use, and then checks each of the models in the scene. • If it is over a ship (or even if it isn’t), it notifies us via a message. This is enough to show that picking works. • You should now be able to run the game and see all the messages as you move the mouse over particular objects. • Of course, this is set up only to detect what the mouse is over (information you would want to keep locally for future use). It does not check to see if the mouse is being clicked or anything, which is done in Update(). Put the two together for selection.