Download
1 / 35
370 likes | 622 Vues
Introduction to Digital Cameras. Principles of Information Technology. Knowing Your Camera. Digital cameras can seem like a complex piece of equipment. Knowing some of the basics of your camera will help you choose the right camera and produce quality photos. What is a Digital Camera?.

E N D
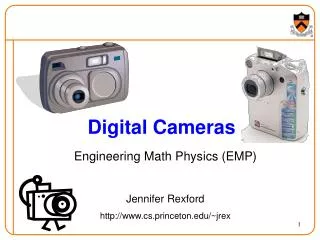
Introduction to Digital Cameras Principles of Information Technology
Knowing Your Camera Digital cameras can seem like a complex piece of equipment. Knowing some of the basics of your camera will help you choose the right camera and produce quality photos.
What is a Digital Camera? • A camera that takes video or still photographs (or both) digitally by recording images on a light-sensitive sensor.
Digital Photos Overview • Digital photos are made up of pixels (picture elements). • DPI vs PPI • DPI – Dots Per Inch (How a printer prints the image) • PPI – Pixels Per Inch (How a monitor displays an image) • The resolution of a digital photo is its pixel dimensions. • Digital cameras use megapixels to specify the pixel dimensions of its photos.
Megapixels • A higher megapixel rating does not always mean higher quality photos. • A camera’s megapixel rating will help you determine the largest size of prints you can expect to make without sacrificing the quality of the image.
Megapixels The following guide will help you know what size of high-quality print you can expect from each megapixel rating. Multiplying the pixel dimension will give you the exact megapixel rating. The rating stated by the manufacturer is usually rounded.
Megapixels 4 megapixel The 8 megapixel will not produce a better quality 8” x 10” print than the 4 megapixel. 2400 x 1800 8 megapixel 8” x 10” print 4000 x 2000
LCD • A liquid crystal display (LCD) is a thin, flat display device made up of any number of color or monochrome pixels arrayed in front of a light source or reflector.
Optical Viewfinder • A window on the back of the camera you look through to position the shot • The primary drawback to the optical viewfinder is the parallax, the displacement or difference in the apparent position of an object viewed along two different lines of sight.
Electronic Viewfinder • An electronic viewfinder, or EVF, is a viewfinder in which the image captured by the lens is projected electronically onto a miniature display. The viewfinder shows exactly what the lens sees.
OSD • An on-screen display (OSD) is information about the camera’s settings displayed on the LCD screen.
Types of Digital Cameras • Ultra compact digital cameras • Compact digital cameras • Advanced digital cameras • Digital single lens reflex (DSLR) cameras
Ultra Compact Digital Camera • Typically a small and inexpensive camera • Can easily be carried in a pocket or purse • Usually has fewer features than the higher end cameras
Compact Digital Cameras • The typical digital camera used for taking most pictures by consumers • Includes most of the features the average person would need
Advanced Digital Camera • Designed for the more skilled or hobbyist photographer • Usually has higher quality lens and zoom
DSLR Camera • Top-of-the-line camera; primarily used by professionals • Include high quality, interchangeable lenses • Often accepts other accessories such as filters • Produces very high-resolution photos
Taking Digital Photos There are 4 primary points to consider that impact the quality of a digital photo: • The quality of the recording device (camera's optics & sensor) • The size (in pixels) of the digital image • The digital format used to store it • The technical proficiency and the "eye" of the photographer
Rule of Thirds • The rule of thirds is a compositional rule of thumb in photography and other visual arts such as painting and design.
The Rule of Thirds • An image can be divided into nine equal parts by two equally spaced horizontal lines and two equally spaced vertical lines. • The four points formed by the intersections of these lines can be used to align features in the photograph. • Proponents of this technique claim that aligning a photograph with these points creates more tension, energy, and interest in the photo than simply centering the feature would.
Focusing on the Subject • Fixed Focus • Found on lower end cameras and phones • The focus is fixed and can’t be adjusted • Auto Focus • Most consumer cameras are equipped with auto focus cameras • The auto focus activates as you start to press the shutter button • Manual Focus • Found on most professional-level cameras • The photographer focuses the camera on the lens
Zoom • Most digital cameras are capable of some type of zoom. Many will have one or both types of zoom
Zoom • Optical Zoom • The subject is magnified through the camera's optics, or lens • Produces a higher quality image • Image quality is maintained in optical zoom • Digital Zoom • Artificial zoom • Crops your image and magnifies the result of the cropping • Image quality is lost in digital zoom
Transferring Pictures • Once a picture is taken on a digital camera, it can be easily transferred to any computer using the USB port and a USB cable.
Transferring Pictureswith USB • Plug USB cord into camera and computer. • Windows will detect your camera. • Copy folder to your computer.
Transferring Pictureswith USB • Select the digital photos you want to transfer. • You will then be asked for a folder name to save the pictures in. • The wizard will then save the photos to your computer.
Transferring Pictureswith memory cards • Some cameras store photos on a memory cards. • Remove the memory card from your camera and insert it to your computer. • The memory card will appear as another drive on your computer. • You can manually copy the pictures from the card to your computer.
Editing Your Pictures • Once you get your pictures from your camera to your computer, you can edit them for their intended purpose. • You may also need to adjust the color settings of digital photos. • When emailing digital photos, you should resize them so they can easily be sent and opened by your receiver.
Editing Your Picturesadjusting color • Depending on your camera and the lighting situation when you take your digital photo, sometimes you may be able to improve the quality of your photo by adjusting its color, brightness, and contrast levels. Original image from camera Image after adjusting
Editing Your PicturesResizing with GIMP • Most digital photos are very large, and some people may have problems downloading large images. • Many email services may limit the size of attachments. • You can use any graphic editor to resize photos. • GIMP is another free image editor that can be used to edit photos. • Gimp can be downloaded for free from www.gimp.org.
Editing Your PicturesResizing with GIMP • Open your image in GIMP. • From the Image menu, select Scale Image.
Editing Your PicturesResizing with GIMP • From the Scale Image window, enter a new width or height. • Keep the chain link between the two connected to keep the image in proportion. • An appropriate size for email would be around 500px. • Click Scale to apply the setting.
Editing Your PicturesCropping with GIMP • You may also want to only use part of your image. • Cropping will allow you to trim away unwanted parts of your picture. • GIMP will also allow you to easily crop your photos.
Editing Your PicturesCropping with GIMP • Open the picture you want to crop in GIMP. • From the toolbar, click on the crop tool. It looks like a small knife.
Editing Your PicturesCropping with GIMP • Using the crop tool, select the portion of the image you want to keep. • The portion to be cut away will be darker. • You can drag the edges to adjust the crop area. • When satisfied, double click in the center to apply the crop.