A50 Plus Advanced Configuration
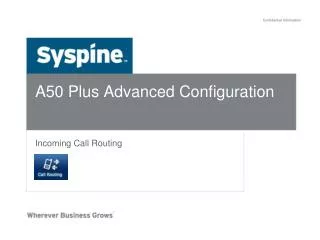
A50 Plus Advanced Configuration. Outgoing Call Routing. Physical Connection. Internet. PSTN. LAN Switch. A50 Plus. Router. IP Phone 310. Administrator. IP Phone 310. Trunk Group. Syspine A50 Plus supports 10 Trunk Groups


A50 Plus Advanced Configuration
E N D
Presentation Transcript
A50 Plus Advanced Configuration Outgoing Call Routing
Physical Connection Internet PSTN LAN Switch A50 Plus Router IP Phone 310 Administrator IP Phone 310
Trunk Group • Syspine A50 Plus supports 10 Trunk Groups • Customer can use different Trunk Group for different purpose in dialing the outbound call. • Trunk Group number can be assigned in Voice Service configuration ITSP PSTN Trunk Group 1 Trunk Group 2 NAT Router A50 Plus
Routing Rule • Routing Rule allows user to specify which trunk can be used based on the dialed number • Example for the following pages • Customer Condition • Customer has 2 Trunk Group setup already. Group 1 for analog connection, and Group 2 for VoIP connection • Customer Requirement • If the dialed number is local call, long distant and mobile, use Trunk Group 1 (analog) • If the dialed number is International, use Trunk Group 2 (VoIP) • If all lines from VoIP were busy, overflow to use Trunk Group 1 (analog)
Routing Table • Local number will be started at 2 – 9. For example, 2221111, 3331111, 4441111. Those numbers will be sent via Trunk Group 1 • Long Distant and Mobile number will be started at 1. For example, 1 408 2221111, 1 425 3331111. Those numbers will be sent via Trunk Group 1 • International number will be started at 011. For example, 011 8862 33331111. Those numbers will be sent via Trunk Group 2. If all lines of Trunk Group2 are busy, then the call will be overflowed to Trunk Group 1.
Configure Routing Rule • Navigate to Call Routing Outgoing Call Routing Configure Outgoing Routing Rules • Click Add to add new Call Routing Rule, see next page
Configure Routing Rule • In this page, enter the necessary value for creating routing rule (Local, Long Distant and International) • The right page is for creating International routing rule • Enter 011 on both digit from and to • Select Trunk Group 2 on the Send the Call though option. • Check the enable back route option • Select the Trunk Group 1 on the Send the Call through option • For the rest item, fill in if necessary. Normally left it blank. • Click OK to finish the adding.
Configure Routing Rule • Add 3 routing rules, and then click OK to finish.
Local Call Test ITSP PSTN 555-1111 Trunk Group 1 Trunk Group 2 NAT Router A50 Plus Dial 9 5551111
Long Distant Call Test ITSP PSTN 408-2221111 Trunk Group 1 Trunk Group 2 NAT Router A50 Plus Dial 9 1408 2221111
International Call Test ITSP PSTN 8862-33331111 Trunk Group 1 Trunk Group 2 NAT Router A50 Plus Dial 9 011 8862 33331111
Toll Restriction • Toll Restriction allow Admin user to set privilege for each user. • Navigate to Call Routing Outgoing Call Routing Configure Toll Restriction • There are few Toll Restriction pre-defined as default based on US numbering plan. User may change it as their preference by marking the item and click Edit. • To add new Toll Restriction, click Add
Add/Edit Toll Restriction • Either click Add or Edit on the Configure Toll Restriction, another page will be displayed to configured. • Specify the Toll Restriction Type from the 3 options, Local, Operator/International, and Special • Enter the digits from and to for the Type selected. • Click OK to finish the setting.
Edit User • Click Advanced tab, and check Assign Custom Dialing Privileges. Specify the Privilege for this user. • In the right example, this user was given Local Privilege. • Each user need to be specified the Toll Restriction. The default is No Restriction, so user can make any outbound number. • To change the Toll Restriction, navigate to Phone Settings Users Edit User, and then select the user who need to be edited.
Toll Restriction Test ITSP PSTN 8862-33331111 Trunk Group 1 Trunk Group 2 NAT Router A50 Plus Dial 9 011 8862 33331111 Toll Restriction --- Local
Block List • Outbound numbers dialed which correspond with any entry in the Block List will be treated as NOT PERMITTED, regardless of any other programmed custom dialing privileges or user unrestricted. • To set the Block List, navigate to Call Routing Outgoing Call Routing Configure Block List • There are 2 types of Block List can be configured • Block the phone number mapped completely. • Block the phone number mapped to the leading digits.
Block List • In the right example, there are 2 Block Numbers. • The 1st number indicates the 5551111 will be blocked • The 2nd number indicates that any leading digits mapped to 66 will be blocked.
Block Call Test ITSP PSTN Trunk Group 1 Trunk Group 2 NAT Router A50 Plus Dial 9 5551111
Block Call Test ITSP PSTN Trunk Group 1 Trunk Group 2 NAT Router A50 Plus Dial 9 661234567