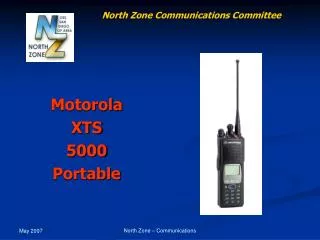
Motorola XTS 5000 Portable
550 likes | 1.19k Vues
North Zone Communications Committee. Motorola XTS 5000 Portable. Antenna Install/Removal. 1. Screw the antenna into the antenna receptacle on top of the radio 2. Tighten the antenna firmly with your fingers 3. Reverse to remove antenna.

Motorola XTS 5000 Portable
E N D
Presentation Transcript
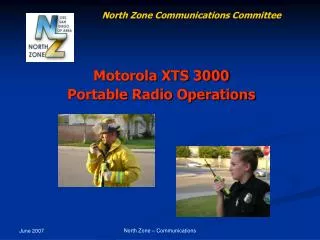
North Zone Communications Committee Motorola XTS 5000 Portable North Zone – Communications
Antenna Install/Removal 1. Screw the antenna into the antenna receptacle on top of the radio 2. Tighten the antenna firmly with your fingers 3. Reverse to remove antenna North Zone – Communications
Battery Install/Removal NOTE: The battery must be charged before use. Memory effect is a phenomenon that causes a loss in battery capacity or voltage due to repetitive shallow discharging or long-term overcharging. This memory effect has been greatly reduced in your batteries through the use of new cell technology. North Zone – Communications
Battery Install 1. Turn OFF the radio 2. Place the notched tabs, at the top of the battery, into the slots at the top on the back of the radio 3. Press the bottom of the battery into the radio until the battery clips into place North Zone – Communications
Battery Removal 1. Turn OFF the radio 2. Press and hold the battery release button on the bottom of the radio 3. Hold the radio with the battery side tilted down. The bottom of the battery should fall away from the radio 4. Remove the battery from the radio North Zone – Communications
Battery Feature The XTS 5000 has a Battery Status feature that works with the “Smart” battery. To utilize this feature when using the “Smart battery”, follow the instructions below 1. Press the 4-Way Navigation Button to the right or left to display the BATT softkey 2. Press the softkey under BATT and the battery status will be displayed 3. Press the Home Button to exit North Zone – Communications
Belt Clip Install NOTE: Remove the battery from the radio before installing or removing the belt clip 1. Hold the battery with the back of the battery facing you, slots at the top 2. Hold the belt clip with the top facing forward, and align the metal slides on the back of the clip with the slots on the battery back 3. Slide the metal slides on the clip down- ward into the slot until it clicks into place North Zone – Communications
Belt Clip Removal 1. Hold the battery with the back facing you, slots at the top 2. Using a flat-beaded screwdriver, push the small metal tab at the top of the metal slide upward 3. Slide the slip out of the battery North Zone – Communications
Universal Connector The Universal Connector Seal covers the side connector near the antenna To install the seal: 1. Turn OFF the radio 2. Place the top portion of the seal into the slot at the top of the radio 3. Rotate the seal down alongside the connector 4. Press the middle of the seal until it clips into place over the connector North Zone – Communications
Universal Connector To remove the seal: 1. Turn OFF the radio 2. Carefully insert a flat-bladed screw- driver between the bottom of the cover and the connector 3. Push the screwdriver gently downward to pry the cover away from the radio. Store the cover in a safe place North Zone – Communications
Extended Microphone To install extended microphone: 1. Remove the Universal Connector Seal as a described previously 2. Place the bottom of the extended microphone connector into the lower slot of the radio connector 3. Clip the top of the extended microphone connector to the top of the radio 4. Secure the connector by screwing the set screw located at the top of the connector into the radio North Zone – Communications
Extended Microphone NOTE: Do not over-tighten the set screw. One or two rotations of the screw are all that is needed to hold it in place North Zone – Communications
Extended Microphone To remove extended microphone: 1. Unscrew the set screw from the top of the connector 2. Using your index finger, pull the small slip at the top of the connector toward the microphone cable 3. Pull the connector away from the radio North Zone – Communications
Radio ON/OFF 1. Turn the radio ON by rotating the ON/OFF/Volume Knob clockwise 2. Turn the radio OFF by rotating the ON/OFF/Volume Knob counterclockwise until you hear a click North Zone – Communications
Set Volume 1. Turn the ON/OFF Volume Knob clockwise to increase the volume, counterclockwise to decrease the volume North Zone – Communications
Setting the Clock 1. Press the 4-Way Navigation Button to the right or left to display the CLCK softkey 2. Press the CLCK softkey to display the EDIT softkey 3. Press the EDIT softkey to change the date and time. Use the 4-Way Navigation Button to move through the selections 4. Press the SAVE softkey to exit North Zone – Communications
Select A Talkgroup/Mode 1. Turn the Mode Selector Knob to the desired mode. The new talkgroup/mode will appear in the display. Notice the zone name does not change North Zone – Communications
Select a Zone 1. Press the 4-Way Navigation Button to the right or left until ZONE appears on the display, if it is not already visible 2. Press the softkey button on the keypad below ZONE. Notice the current zone name begins flashing on the display North Zone – Communications
Select a Zone 3. To change zones, you can either: 3a. Press the 4-Way Navigation Button to the right or left until the desired ZONE name appears on the display, or 3b. Enter the number of the desired zone on the keypad (usually 1-16). The zone associated with that number will appear in the display 4. Press the HOME key to exit North Zone – Communications
Transmit & Receive To Transmit: 1. Turn the radio ON and select the desired zone & talkgroup/mode. The selected zone & talkgroup appear on the display 2. Listen for ongoing conversation. When the talkgroup becomes available, proceed with your call 3. Press the PTT and wait for the Talk Permit Tones (3 quick beeps). Begin speaking with the microphone approximately 1” from your mouth North Zone – Communications
Transmit & Receive 3a. If you hear a phone-type busy signal, release the PTT and wait for the system to call you back with the Call Back Tones (similar to the Talk Permit) 3b. If you hear a steady low-pitched tone, (someone has keyed their radio before you) release the PTT and wait until the talk-group is available 4. Release the PTT button to receive North Zone – Communications
Scan ON/OFF Note: If you turn the scan on and hear a continuous low tone with the words “EMPTY LIST” on the display, turn the scan off and program a scan list. Each “System” (e.g. County RCS, San Diego City, and Conventional) requires its own scan list. Remember that you can not scan between “Systems” North Zone – Communications
Scan ON/OFF 1. Place the Three Position Scan ON/OFF switch to “A” to turn scan ON. The scan symbol “ ” will appear in the display 2. Place the Three Position Scan ON/OFF switch to B or C to turn the scan off North Zone – Communications
Scan List Program 1. If the word PROG is not in the display, press the 4-Way Navigation button to the right or left until PROG appears 2. Press the softkey button directly below PROG. A new softkey titled SCAN will appear 3. Press the softkey button directly below SCAN. The scan programming symbol “ “ will appear flashing in the display, along with the softkeys SEL & DEL & RCL North Zone – Communications
Scan List Program 4. Use the 4-Way Navigation Button (or keypad) and mode selector knob to display the zone and talkgroup you wish to scan 5. Press the softkey button under SEL once to add the displayed talkgroup to the scan list as a Non-Priority talkgroup 5a. When the talkgroup is added as a Non-Priority, the scan symbol “ ” will appear in the display North Zone – Communications
Scan List Program 5b. To increase the priority of that talkgroup to a priority 2, press the softkey button SEL again. You will notice a small dot appear next to the scan symbol “ ” (Only one talkgroup can be priority 2, so this should be your dispatch or HOME channel) Note: Your radio has been pre-programmed to have whichever talkgroup you are selected to transmit on as your priority 1 talkgroup. As you switch talkgroups to transmit, the new talkgroup becomes priority 1 North Zone – Communications
Scan List Program 5c. To remove the talkgroup, press the softkey button under DEL 6. To add more talkgroups to the scan list, go back to step 4. Your radio can scan up to 10 talkgroups in each “system” 6a. If you attempt to program an extra talkgroup into your scan list, the radio will emit a low-pitched tone. You must remove a talkgroup to add any others to the scan list North Zone – Communications
Scan List Program 7. To view talkgroups you have in your current scan list while programming, press the RCL softkey. You need to press the RCL softkey repetitively to view each channel programmed North Zone – Communications
View Scan List 1. If the word VIEW is not in the display, press the 4-Way Navigation Button to the right or left until VIEW appears 2. Press the softkey button directly below VIEW. A new softkey titled SCAN will appear 3. Press the softkey button directly below SCAN. The scan programming symbol “ “ will appear steady (non-flashing) in the display North Zone – Communications
View Scan List 4. Use the 4-Way Navigation Button to scroll through the talkgroups currently programmed into your scan list 5. Press the HOME key to exit North Zone – Communications
Nuisance Delete 1. While scanning, wait until the talkgroup you wish to “Nuisance Delete” is receiving and is displayed 2. Press the Nuisance Delete button on the side of the radio 3. To resume scanning that talkgroup, turn the scan OFF, then back ON again. You may also turn the power off and on again. All programmed talkgroups will now be scanned North Zone – Communications
Display Light ON/OFF 1. Press the Light Button to turn the display light on 2. The light will automatically turn off after approximately 15 seconds. To manually turn the light off prior to the 15 seconds, press the light button again North Zone – Communications
Mute Keypad Tones 1. Press the 4-Way Navigation Button to the right or left until MUTE appears in the display if it is not already 2. Press the softkey button below MUTE 3. The display will indicate the current state of the radio. The display will also show two softkeys, ON & OFF 4. Press the softkey button below ON or OFF. The radio will automatically return to normal operation North Zone – Communications
EMERGENCY Operation Some radios have an optional EMERGENCY button at the top Note: EMERGENCY only operates on trunked RCS talkgroups. It MAY or MAY NOT work on talkgroups from another system, such as talkgroups you have from the City of San Diego’s system North Zone – Communications
EMERGENCY Operation 1. To initiate an alarm, press the orange EMERGENCY button on top of the radio. (If you are on a talkgroup which doesn't allow EMERGENCY alarms, you will hear a single low tone. If possible, switch to your dispatch talkgroup and re-try) 1a. After pressing the EMERGENCY button, your radio will emit a single beep tone. Your radio will then display EMERGENCY, alternating with the talkgroup you are on North Zone – Communications
EMERGENCY Operation 1b. When the system acknowledges your EMERGENCY, you will hear 5 more beep tones 1c. If the system does not acknowledge your EMERGENCY due to being out of range, you will hear a single low tone 2. To cancel the alarm, press and hold the EMERGENCY button until you hear a continuous beep tone North Zone – Communications
EMERGENCY Receive Feature Your radio has the ability to be notified if another user presses the EMERGENCY button When another user on your talkgroup presses their EMERGENCY button and then presses their PTT button: 1. Your radio will emit a single beep tone, and will display EMER RCVD alternating with your talkgroup North Zone – Communications
EMERGENCY Receive Feature 2. Your radio will clear the EMER RCVD only when: 2a. The user that initiated the EMERGENCY cancels it, or, 2b. You switch to another talkgroup North Zone – Communications
Paging Feature Your radio has the ability to receive a page from a dispatch console or base station North Zone – Communications
Paging Feature 1. When your radio is paged by another radio or dispatch console, you will hear 4 beep tones. The radio will display the Call Received icon “ “ and the display will alternate between the talkgroup you have selected and “PAGE RECEVIED.” The radio will beep at you every 5 seconds until you clear the page 2. To clear the page, switch to your dispatch or HOME talkgroup and contact your dispatcher North Zone – Communications
SITE Switch Note: Your radio is programmed to automatically allow you to roam throughout the county, much like a cell phone system. Generally, you should allow your radio to operate without using the SITE Switch feature, unless it is needed. There may be times, such as when the system goes into SITE TRUNKING, when you may wish to have your radio affiliate with a different mountaintop repeater site. North Zone – Communications
SITE Switch 1. Press the SITE Switch button briefly to display the current site with which your radio is affiliated 1a. The radio will display the repeater site for approximately 2 seconds 1b. The radio will then display the Received Signal Strength Indicator, or RSSI, and a number between 0 and 150. Above 50 is good 1c. After approximately 2 seconds, the radio will return to normal operations North Zone – Communications
SITE Switch 2. To affiliate with a different repeater site, press and hold the SITE Switch button until SCANNING appears in the display. The radio will affiliate with a repeater site. This could be the same site, or a different site 3. Repeat step 1 to confirm which site you are now affiliated with. If you need to affiliate with a different site, repeat this procedure until you affiliate with a different site North Zone – Communications
DIRECT Operation Your radio has the ability to operate directly with other radios on a conventional channel, without going though the repeaters Note: Remember that while in DIRECT, you will not be able to speak with your dispatcher or units a long distance away. DIRECT is only good for approximately 1-5 miles, depending on terrain, etc. North Zone – Communications
DIRECT Operation 1. Switch your radio to a conventional talkgroup 2. Press the softkey button below DIR. The display will show what configuration the radio is currently in. DIR and RPTR will also be displayed. Press the softkey below DIR for Direct Mode. The DIR indicator will appear in the display. Use the RPTR softkey to place the radio in Repeater Mode. 3. To exit, press the Home key or one of the softkey options North Zone – Communications
Monitor When you are on a conventional frequency, you should press the monitor button (prior to transmitting) to ensure no one else is using the same frequency. This is especially important when you are using your radio in a different state or county North Zone – Communications
Monitor 1. Press the Monitor button, also the Site Switch button, to determine if the talkgroup is busy, or 1a. Press and hold the Monitor button for about 2 seconds to lock the squelch open 1b. The Monitor symbol will appear in the display. Press again to disable the feature 2. When the talkgroup is clear, press the PTT button and speak into the microphone North Zone – Communications
Secure/Clear Transmission 1. To switch your radio to a secure-enabled talkgroup: 1a. Turn the Secure/Clear Encryption Switch to the “Secure” position 2. When you wish to return to normal, or “Clear”, operation, turn the Secure/Clear Encryption Switch to the “Clear” position Note: This is a programmable feature and may not be activated in your radio North Zone – Communications