Renishaw touch-trigger probing technology
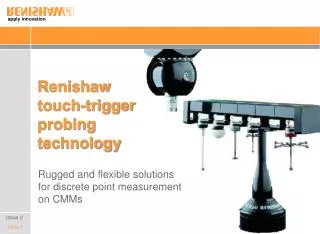
Renishaw touch-trigger probing technology. Rugged and flexible solutions for discrete point measurement on CMMs. Issue 2. Touch-trigger probe technologies. Resistive simple compact rugged. Strain-gauge solid-state switching high accuracy and repeatability long operating life. Piezo

Renishaw touch-trigger probing technology
E N D
Presentation Transcript
Renishaw touch-trigger probing technology Rugged and flexible solutions for discrete point measurement on CMMs Issue 2
Touch-trigger probe technologies • Resistive • simple • compact • rugged • Strain-gauge • solid-state switching • high accuracy and repeatability • long operating life • Piezo • three sensing methods in one probe • ultra-high accuracy • quill mounted
Pivots about these contacts Contacts separate Reactive force • stylus makes contact with component • contact force resisted by reactive force in probe mechanism resulting in bending of the stylus • stylus assembly pivots about kinematic contacts, resulting in one or two contacts moving apart • trigger generated before contacts separate • machine backs off surface and probe reseats Contact force Kinematic resistive probe operation All kinematics in contact • probe in seated position Motion of machine
Kinematic resistive probe operation Kinematic attached to stylus Electrical switching • electrical circuit through contacts • resistance measured • contact patches reduce in size as stylus forces build Section through kinematics: Current flows through kinematics Kinematics bonded to (and insulated from) probe body Close-up view of kinematics: Resistance rises as area reduces (R = /A) Elastic deformation Contact patch shrinks as stylus force balances spring force
Kinematic resistive probe operation Electrical switching • resistance breaches threshold and probe triggers • kinematics are still in contact when probe triggers • stylus in defined position • current cut before kinematics separate to avoid arcing Resistance Force on kinematics when stylus is in free space Trigger threshold Trigger signal generated Force on kinematics
Factors in measurement performance Pre-travel • stylus bending under contact loads before trigger threshold is reached • pre-travel depends on FC and L • trigger is generated a short distance after the stylus first touches the component FC x L = FS x R L and FS are constant FC is proportional to R
High force direction: Low force direction: Pivot point Pivot point Factors in measurement performance Top view Pre-travel variation - ‘lobing’ • trigger force depends on probing direction, since pivot point varies • FC is proportional to R • therefore, pre-travel varies around the XY plane R1 > R2 FC1 > FC2
Factors in measurement performance Pre-travel variation - ‘lobing’ • trigger force in Z direction is higher than in XY plane • no mechanical advantage over spring • FC = FS • kinematic resistive probes exhibit 3D (XYZ) pre-travel variation • combination of Z and XY trigger effects • low XYZ PTV useful for contoured part inspection Test data: ISO 10360-2 3D form TP20 with 50 mm stylus: 4.0 m (0.00016 in)
Factors in measurement performance Probe calibration • pre-travel can be compensated by probe calibration • a datum feature (of known size and position) is measured to establish the average pre-travel • key performance factor is repeatability Limitations • on complex parts, many probing directions may be needed • low PTV means simple calibration can be used for complex measurements • if PTV is significant compared to allowable measurement error, may need to qualify the probe / stylus in each probing direction
Factors in measurement performance Typical pre-travel variation • XY plane
Factors in measurement performance Hysteresis • error arising from the direction of the preceding probing move • maximum hysteresis occurs when a measurement follows a probing moves in opposite directions to each other in the probe’s XY plane • hysteresis errors increases linearly with trigger force and stylus length • kinematic mechanism minimises hysteresis Repeatability • the ability of a probe to trigger at the same point each time • a random error with a Normal distribution • for a given probe and probing condition, repeatability is equal to twice the standard deviation (2) of the Normal distribution • 95% confidence level that all readings taken in this mode will repeat within +/- 2 from a mean value
Factors in measurement performance Ranked in terms of importance • repeatability • key requirement of any trigger probe • fundamental limit on system measurement performance • hysteresis contributes to measurement repeatability • pre-travel variation • can be calibrated, provided all probing directions are known • measurement accuracy will be reduced if probe used in un-qualified direction and PTV is high • increases rapidly with stylus length • hysteresis • small error factor for probes with kinematic mechanisms
Kinematic resistive probe technology Simple electro-mechanical switching • resistive probes use the probe kinematics as an electrical trigger circuit • pre-travel variation is significant due to the arrangement of the kinematics
Kinematic resistive probe characteristics • Extremely robust • Compact • good part access • suitable for long extensions • Good repeatability • excellent performance with shorter styli • low contact and overtravel forces minimise stylus bending and part deflection • Universal fitment • simple interfacing • Cost-effective • Finite operating life • electro-mechanical switching
TP20 stylus changing probe Concept • direct replacement for TP2 • ultra-compact probe at just Ø13.2 mm • TP20 features fast and highly repeatable stylus changing • manual or automatic • enhanced functionality through extended force and extension modules
TP20 stylus changing probe Benefits • reduced cycle times achieved by fast stylus changing without re-qualification • optimised probe and stylus performance with seven specialised probe modules • easily retrofitted to all Renishaw standard probe heads (M8 or Autojoint coupling) • compatible with existing touch-trigger probe interfaces • metrology performance equivalent to industry proven TP2 system but with greater flexibility of operation
TP20 stylus modules Optimal measuring performance • seven specialised probe modules allow optimisation of stylus arrangement for best accuracy and feature access in all user applications • module attaches to probe body via a quick release, highly repeatable kinematic coupling • module range covers all forces supported by TP2 • 6-way module replaces TP2-6W TP20 probe body
Comparative module and stylus lengths Soft materials General use Longer or heavier styli Grooves and undercuts Reach up to 125 mm (5 in)
Strain-gauge probe technology • Solid state switching • silicon strain gauges measure contact forces transmitted through the stylus • trigger signal generated once a threshold force is reached • consistent, low trigger force in all directions • kinematics retain the stylus / not used for triggering
Strain-gauge probe operation Force sensing • four strain gauges are mounted on webs inside the probe body • X, Y and Z directions, plus one control gauge to counter thermal drift • low contact forces from the stylus tip is transmitted via the kinematics, which remain seated at these low forces • gauges measure force in each direction and trigger once force threshold is breached (before kinematics are unseated) Silicon strain gauges mounted on webs (1 out of 4 shown) Kinematics remain seated at low FC
Strain-gauge probe operation Low lobing measurement • trigger force is uniform in all directions • very low pre-travel variation
Strain-gauge probe operation Lobing comparison • plots at same scale Strain-gauge XY PTV = 0.34 m Kinematic resistive XY PTV = 3.28 m
Strain-gauge probe characteristics • High accuracy and repeatability • probe accuracy even better than standard kinematic probes • minimal lobing (very low pre-travel variation) • Reliable operation • no reseat failures • suitable for intensive "peck" or "stitch” scanning • life greater than 10 Million triggers • Flexibility • long stylus reach • suitable for mounting on articulating heads and extension bars • stylus changing available on some models
TP7M strain-gauge probe • Concept • 25 mm (1 in) diameter probe • Autojoint mounted for use with PH10M • multi-wire probe output • Benefits • highest accuracy, even when used with long styli - up to 180mm long ("GF" range) • compatible with full range of multi-wired probe heads and extension bars for flexible part access • plus general strain-gauge benefits: • non-lobing • no reseat failures • extended operating life • 6-way measuring capability
TP7M performance Specification Test results from 5 probes
TP7M performance Specification Test results from 5 probes
TP200 stylus changing probe • Concept • TP2-sized probe, with strain gauge accuracy • stylus changing for greater flexibility and measurement automation • 2-wire probe output (like TP2) • Benefits • long stylus reach - up to 100mm long ("GF" range) • match stylus to the workpiece using high speed stylus changing • improve accuracy for each feature • no re-qualification • manual or automatic changing with SCR200 • compatible with full range of heads and extension bars
TP200 stylus modules Optimal sensor performance • 6-way operation ±X, ±Y and ±Z • two types of module: • SF (standard force) • LF (low force) provides lower overtravel force option for use with small ball styli and for probing soft materials • detachable from probe sensor via a highly repeatable magnetic coupling • provides overtravel capability • suitable for both automatic and manual stylus changing • module life of >10 million triggers
Piezo shock sensing Shock sensing • piezo sensors generate a voltage when subjected to pressure • piezos can detect the mechanical shock signal generated when the stylus ball impacts the workpiece • they can respond to frequencies higher than those detected by many other sensors • the result is that piezo probes "hear" the stylus ball touch the surface Piezo ceramic sensor detects shock of impact Stylus changing kinematics Shock wave travels up stylus and is transmitted through kinematics
Piezo shock sensing Ultra-sensitivity • shock travels at speed of sound through the stylus and probe • 800 m per second (2,600 ft/sec) • response time is 1.25 sec / mm High performance • pre-travel depends on stylus length and probing speed • pre-travel is the same in all directions since mechanical signal path is constant • lobing effect limited to ball sphericity! Piezo ceramic sensor detects shock of impact Stylus changing kinematics Shock wave travels up stylus and is transmitted through kinematics
Multi-sensor operation Kinematic and strain sensing • shock sensing is not 100% reliable • speed sensitive • surface contamination • workpiece hardness • small stylus ball diameters are not reliable • shock can be backed by kinematic and strain sensing to confirm triggers generated by shock sensor • life of piezo probes are limited by electro-mechanical elements
TP800 piezo probe Unprecedented performance • quill mounted probe featuring unique multi-sensor design • ultra-high accuracy • repeatability specification: 0.25 m with 50 mm stylus 1 m with 250 mm stylus • low trigger force < 1 gf • pre-travel variation << 0.5 m • typical values for 150 mm stylus: 0.15 m repeatability 0.25 m PTV • support for very large stylus clusters • 350 mm straight • 200 mm star
TP800 piezo probe Application limitations • cannot measure small bores • probe works best with larger stylus balls (e.g. 6 mm) • machine may not reach calibrated probing speed without sufficient clearance • surface condition is critical • dirt on the surface can reduce shock and prevent a clean trigger • soft surfaces such as plastics do not generate sufficient shock • probing speed must be controlled to within 1 mms-1 • large probe size prevents use with articulating heads or extension bars
Questions? apply innovation

