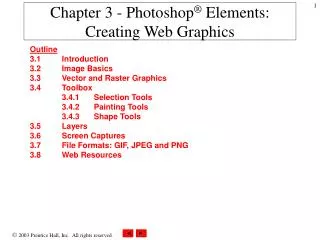
Essential Adobe Photoshop Guide: Overview of Functions and Features
270 likes | 386 Vues
This comprehensive guide by Andrew Conard offers an in-depth overview of Adobe Photoshop, covering its common uses such as graphic creation for the web, photo modification, and texture production for games. Learn about essential functions like resizing images, supported file formats (PSD, GIF, JPG), and advanced features such as filters, selection tools, and layers. Additionally, discover practical tips for applying effects, using the type tool, and creating visual styles through tutorials. Ideal for beginners and intermediate users seeking to enhance their Photoshop skills.

Essential Adobe Photoshop Guide: Overview of Functions and Features
E N D
Presentation Transcript
Adobe Photoshop: Overview Author: Andrew Conard
Common Uses of Photoshop • Creating graphics for the web. • Modifying photos. • Creating textures and other 2-D backgrounds for games. • Note: No 3-D modeling features supported.
Resizing/Formats/Cropping • Resize Images • Reduce or expand size of picture. • Resolution can not be added to an image. • File Formats Allowed • PSD, GIF, JPG • Cropping • Removing parts of an image off of the canvas.
Gradients/Patterns • Useful for textures or backgrounds.
Filters • About Filters • Filters are plug-ins in Photoshop. This means that you can download new plug-ins online for specific filtering effects. • Artistic Filters (Examples: Colored Pencil, Plastic Wrap, Watercolor) • Blur Filters (Examples: Gaussian Blur, Radial Blur)
Filters (Continued) • Brush Strokes (Examples: Angled Strokes, Ink Outlines) • Distort (Examples: Glass, Ripple, Wave)
Filters (Continued) • Noise • Pixelate • Render (Examples: Lens Flare, Lighting Effects) • Sharpen Image
Filters (Continued) • Sketch (Examples: Chalk, Chrome, Plaster) • Stylize (Examples: Glowing Edges, Tiles) • And much more…
Type Tool • Placing text in images. • Anti-aliasing makes the edges of your type look nice and smooth instead of all jagged. • Font size and type can be changed. • Crisp/Strong/Smooth Types
Layers • All images in Photoshop are produced in layers. • Starting with the background layer, you can add or delete as many layers as you need to. • Layers can be combined.
Layers (Continued) • All layers contain: • Opacity (Transparency) Value • Layer Mode (Examples: Normal, Overlay, Color Burn, Color Dodge)
Selection Tools • Used to select certain parts of a layer (Example: Someone’s head or a particular building in a photo) and modify it. • Marquee Tool • Rectangle • Oval • Row of Pixels • Column of Pixels
Selection Tools (Continued) • You usually want to select a more complicated shape than that, so… • You can add or subtract from certain areas of the selection. • For example, to add, simply hold down shift and make another selection. • To subtract, simply hold down ALT and make another selection.
Selection Tools (Continued) • Lasso • Allows you to make the selection by manually drawing it out with a pencil tool.
Selection Tools (Continued) • Magic Wand • Select all of the same-color or similarly-colored adjacent pixels. • Tolerance Level
Example Tutorial: Chrome • From: http://www.nk-graphix.com/index.php?page=chrom • Step 1: Start with a blank white canvas. • Step 2: Select the ellipse tool. Turn on the Draw Circle option under the ellipse options.
Chrome Tutorial • Apply a gradient overlay by going to layer styles and then “Gradient Overlay”. Apply the following settings: • Fill Method: NormalOpacity: 100%Gradient Colors: 1. #999999 | 2. #424242 | 3. #999999Style: LinearAngle: 90°
Chrome Tutorial • Should look like this: • Step 3: Apply a smooth, black outer glow (also under Layer Options). Then apply the following settings for an inner glow:
Chrome Tutorial • Settings: • Fill Method: Normal • Opacity: 30% • Noise: 0% • Color: Black • Technique: Softer • Source: Edge • Choke: 0% • Size: 10px
Chrome Tutorial • Should look like this at this point: • Step 4: Now apply the following Bevel & Emboss settings (also under Layer Options):
Chrome Tutorial • Settings: • Style: Inner Bevel, Technique: Smooth, Depth: 461, Direction: Down, Size: 13, Smooth: 0, Angle: 90°, Altitude: 55, Global Light: Off, Highlight Mode: Color Dodge, Color: White, Opacity: 0%, Shadow Mode: Color Dodge, Color: #696969, Opacity: 56%
Chrome Tutorial • Should look like: • Step 5: Use the following “Satan” settings (also under Layer Options):
Chrome Tutorial • Settings: • Fill Method: Color Dodge • Color: White • Opacity: 35% • Angle: 144° • Distance: 44px • Size: 40px • Smooth: Off • Invert: On
Chrome Tutorial • Will eventually look like this after finishing touches:
Sources/Other Tutorials • http://www.good-tutorials.com/ • http://www.absolutecross.com/tutorials/photoshop/ • http://www.phong.com/tutorials/ • http://www.photoshopcafe.com/tutorials.htm • http://www.nk-graphix.com/index.php?page=chrom