Advanced Intersection Design with Roadway Designer
210 likes | 470 Vues
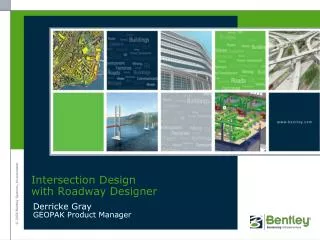
Advanced Intersection Design with Roadway Designer. Chuck Lawson GEOPAK Product Engineer. Intersection Design.

Advanced Intersection Design with Roadway Designer
E N D
Presentation Transcript
Advanced Intersection Design with Roadway Designer Chuck Lawson GEOPAK Product Engineer
Intersection Design Designing an intersection can be a complex and iterative process. There are an abundance of criteria to consider such as min/max slopes, stopping sight distance, drainage and R/W constraints – just to name a few. There are many techniques in Roadway Designer that can be used to model intersections. This presentation will cover the workflow used to model a skewed intersection. In addition, this method may be used to model an intersection where the mainline roadway is within the limits of a horizontal curve. This method will ultimately work for most intersection types.
Project Review Before we begin, let’s review our project data and the template that we’ll be using. U.S. 301 New Construction Template
Project Review Drive RT New Construction Template
Creating Corridors The first step in the process is to create separate corridors for the mainline and the side road.
Intersection Design Now that we have created our corridors, we are ready to begin work on our intersection. First, we need to produce our radius return geometry, both horizontally and vertically using the Multi-Center Curve application.
Creating Radius Return Alignments There are several ways to calculate radius return elevations. • Vertical Offset from PGL • Pavement Slope from PGL • Elevation • Calculate from Surface Model For this exercise, we’ll demonstrate how to calculate the beginning and ending elevations of the of the returns from a model.
Design Horizontal/Vertical Returns Through the use of the Multi-Center Curve application, we can have GEOPAK design our preliminary Horizontal and Vertical curb return geometry.
Design Horizontal/Vertical Returns The Multi-Center Curve application can create one-center, two-center or three-center compound curves at the intersection of two alignments. The applications creates a new horizontal alignment in the geometry database and, if desired, a vertical alignment as well.
Integrate Returns into Side Road Now that we have the horizontal and vertical geometry for our curb returns, we can integrate this geometry into the design of the intersection.
Integrate Returns into Side Road • Change the template drop location of the side road corridor DriveRT to not include the radius returns • Create corridors of both radius returns • Drop templates into each new corridor and modify to only use half sections • Use a point control to target the edge of the mainline corridor • Use a point control to target the side road baseline and profile
Combining the Corridors • Turn on “Target Aliasing” for both radius return corridors to target and clip the mainline corridor • Create a combine surface clipping off the end conditions along the mainline corridor
Fine Tuning the Model Lastly, we look for any issues or problems with the intersection that may need to be corrected. Some examples may include: • Fill slope transitions • End Condition Exceptions • Parametric Constraints • Ditch width transitions • Adjusting Corridor limits for tolerance issues • Transitioning Shoulder Widths / Slopes • Etc.
Advanced Intersection Design with Roadway Designer Chuck Lawson GEOPAK Product Engineer