Download
1 / 73
730 likes | 929 Vues
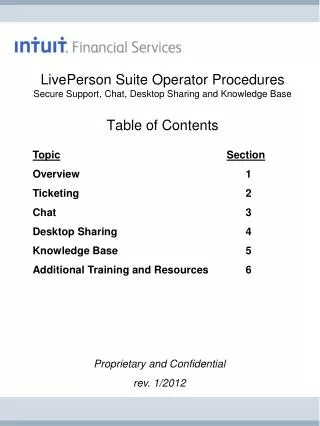
LivePerson Suite Operator Procedures Secure Support, Chat, Desktop Sharing and Knowledge Base Table of Contents. Topic Section Overview 1 Ticketing 2 Chat 3 Desktop Sharing 4 Knowledge Base 5 Additional Training and Resources 6. Proprietary and Confidential rev. 1/2012.

E N D
LivePerson Suite Operator ProceduresSecure Support, Chat, Desktop Sharing and Knowledge BaseTable of Contents TopicSection Overview 1 Ticketing 2 Chat 3 Desktop Sharing 4 Knowledge Base 5 Additional Training and Resources 6 Proprietary and Confidential rev. 1/2012
Section 1:Overview Intuit Financial Services University LivePerson Suite Operator Procedures Certification Training
Overview - Objectives By the end of this section, you will learn: • how to determine what training should be provided for each of your financial institution employees • key terms for Secure Support, Chat, Desktop Sharing & Knowledge Base • how to access the Admin Console • what fields should be customized when setting up the product
Training Overview • Training consists of two certification courses and manuals – Administrator Procedures and Operator Procedures. • Operators/front-line staff will only need to cover the Operator Procedures training. • If your institution has not contracted for Support, Chat, Desktop Sharing or Knowledge Base, you may disregard all references to these features and sections in this manual. • All training courses and corresponding materials are available through the resources page provided at the end of this course.
What are Secure Support and Chat? • Secure Support allows customers/members to send the financial institution emails through a secure channel. Secure Chat allows customers/members to securely communicate with the financial institution in a real time environment. In both cases, the response from the financial institution is also sent through a secure channel. • Desktop Sharing allows the financial institution to view and control a consumer’s screen (with permission) in order to provide support. • Secure Support consumers will have a message inbox to manage their emails within Internet Banking, Business Banking and Business Financial Solutions. • Emails stay in the message inbox for 13 months and then are automatically deleted. • Secure Chat consumers can initiate real time communication with the financial institution within Internet Banking, Business Banking and Business Financial Solutions. • Desktop Sharing may be initiated by the operator from within a chat session. • The financial institution can place Secure Support and Chat behind Internet Banking, Business Banking, Business Financial Solutions and/or on their public website.
Things to Ask • Your manager or project lead should have let you know how your financial institution has set up the following: • Does your financial institution offer email and chat behind the secure login only or will you also offer these options on your public website? • Are all email messages (secure and non-secure) routed through Secure Support? • Are there different skill groups and are operators assigned to different skill groups? • Who will the operators be and what permissions will they have? • Does your financial institution offer Desktop Sharing and/or Knowledge Base?
Email and Chat Access Options 1. Secure Email and Chat Behind the Login – Secure email and chat may be accessed from within Internet Banking, Business Banking and Business Financial Solutions. The consumer or corporate user has been authenticated and a secure icon will display to the operator in the operator console. 2a. Secure Email on the Public Website – Secure email may be provided to the consumer after a separate registration process is completed. This secure inbox would remain separate from the inbox located behind the IB/BB/BFS login.
Email and Chat Access Options 2b. Secure or Non-Secure Chat on the Public Website – Chat may be placed securely or non-securely on the public website. The HTML code used to place chat on the public site may be modified to include https://. In either case, the consumer has not been authenticated and a secure icon will not display to the operator in the operator console. The operator should follow established procedures to verify the consumer’s identity similar to verification during a phone conversation. 3. Non-Secure Email on the Public Website – A financial institution may choose to build a contact form through the Live Person suite and use this form on the public website. Responses from the form will be read in the operator console, but will not be secure. The operator would respond to the consumer’s standard, non-secure email address. 4. Non-Secure POP3 Email Routing – A financial institution may choose to route all standard email through the Live Person system. Responses from the form will be read in the operator console, but will not be secure. This allows for one location to view and respond to all email communications. The operator would respond to the consumer’s standard, non-secure email address.
Terms to Know • LivePerson – vendor that powers Secure Support and Chat • Seat License - determines the number of operators that can be online answering emails or chats at one time • Agent/Operator – the person at the financial institution who is responding to emails and chats from the consumers • Admin – the person(s) at the financial institution who manages the Secure Support and Chat set-up and operators • Ticket– email message (can be secure or non-secure) • Desktop Sharing – a means to securely view a consumer’s computer screen for troubleshooting and support purposes
Administrative Overview Your administrator has set up Secure Support, Chat, Desktop Sharing and/or Knowledge Base for your financial institution. When you start using each of these tools, they will already have: • Set up system defaults for your FI • Created skills and operator IDs • Customized the chat window appearance • Customized email templates for secure tickets • Entered canned responses • Established rules on incoming tickets and chats for automatic handling • Administrators can also: • View and schedule reports • View real-time operator statistics • View transcripts of chat sessions
Agent Console Login The Financial Institution may access the Agent Console from any computer with a connection to the Internet. It is recommended to make this a favorite in an operator’s browser or a desktop shortcut. http://solutions.liveperson.com/agent-console/launch/ The Agent Console requires Java to be enabled in the web browser. When loading for the first time, accept all security warnings presented in the browser from Live Person.
Agent Console Login After clicking on the Secure Support icon you receive a login box. Your implementations Project Manager will provide you with the Site ID, user name, and initial password to access your account. The Site ID is shared by all administrators and operators at your financial institution. If you offer Secure Support or Chat for Internet Banking, Business Banking and/or Business Financial Solutions, you will have a separate Site ID for each product. Operators supporting both retail and business may log in to simultaneous sessions of the operator console using different Site IDs.
Ticket and Chat Routing Using Secure Support and/or Chat, an administrator can configure how email and chat messages are routed and managed. Once a message is received, it is automatically loaded into the shared queue for all operators with permissions to that skill group. • Ticket Statuses: • Not Started – Ticket has been created but no work has been done • Resolved – consumer issue successfully resolved • Pending Customer – Need more information from the consumer to resolve the issue • Pending Internal – Operator needs more information internally to resolve the issue • Chat Agent States (all states use seat license): • Online – Agent is available to receive chat messages from consumers. The “Online” image is displayed online. • Back in 5 Minutes – Agent is unavailable to receive chat messages from consumers, but may receive chat transfers from other agents. The “Occupied” image is displayed online. • Away – Agent is unavailable to receive chat messages from consumers or transfers from other agents. The “Chat Unavailable” image is displayed online.
Agent Console Main Menus File Menu Log on or off, change the chat state, set console preferences, change nickname, email address or password and exit the console. Note: Only closing the window will not completely exit the console. Control Menu Take the next chat or ticket message and perform other ticketing actions such as transferring, adding attachments or trashing. View Menu Enable toolbars, set sort criteria, enable the search tool, customize or remove desired column headers, hide tickets from the workspace, refresh the screen and enable display filters. Tools Display key tools in the agent and admin consoles. Access to some tools require permissions to be enabled by an administrator. Canned Modify canned messages in the admin console (permissions required), view all canned messages in a pop up window and quickly access canned message categories for chats or tickets. Help View online help topics, access the Customer Center, report an issue and view version information for the agent console.
Agent Console Preferences The agent console may be customized with each operator’s individual preferences by selecting File > Preferences. General Tab Set basic preferences such as layout, chat selection, initial chat status after login and away status with screensaver activation. Visitor Window Work Mode – View multiple chats/emails in a single window or open a new window for each chat/email message. Login – Grayed out if the administrator has restricted these settings
Agent Console Preferences Chat Tab Set chat preferences such auto pop up, view timestamps, verify before stopping a chat and translating line breaks. Connection Tab Use for custom network settings that require a proxy server.
Agent Console Preferences Sounds Tab Enable or change sound settings for different events in the console. Colors Tab Customize the colors displayed in the agent console. These settings do not affect colors used for visitor interaction.
Agent Console Preferences Formatting Tab Enable in order to override the formatting selected in the agent console while chatting with a visitor. This is helpful in keeping all chat messages consistent. Alert Tab Set how operator alerts (generated from custom rules in the admin console) display in the agent console.
Agent Console Preferences Language Tab Set the default agent console language and enable real-time spell check for chat, email and note messages.
Section 2:Ticketing Intuit Financial Services University LivePerson Suite Operator Procedures Certification Training
Workspace – Ticket List Section The Ticket List Section lists the tickets that are currently open in the operator’s workspace. The Ticket button and number in brackets represents the number of tickets in the general skill queue available to all operators with access to that particular skill. To accept a ticket into the queue of an operator, the operator must click on the Ticket [#] icon. Once accepted into the operator’s workspace, they are removed from the original skill queue. Secure Mode icon - displays next to secure emails i.e. from within Internet Banking, Business Banking and/or Business Financial Solutions.Do not reply with sensitive information for any tickets where this icon is not displayed.
Workspace – Ticket Tab The Ticket tab presents all communication between the consumer and an operator that is related to the ticket. This includes the initial inquiry submitted by the consumer. Operators may View Correspondence & Notes or View Entire Ticket History.
Workspace – Contacts Tab The Contacts tab contains information about the consumer. If the consumer is behind Internet Banking, Business Banking and/or Business Financial Solutions, SSO account details are displayed based on your DPV. If the consumer is on the public website it will display the IP address. Data is populated when the ticket is first created and does not refresh on each log in. Add contact: Allows the operator to register a new consumer for access to secure email outside of Internet Banking, Business Bakning and/or Business Financial Solutions (if offered by the FI). This does not affect access to secure email through IB. View History:Searches through Secure Support for previous tickets from this consumer. A new tab is opened to view the results.
Workspace – Release Tab The Release tab gives the operator options to release the ticket from the workspace, transfer the ticket or mark the ticket as trash. The operator survey is also on this tab. These features are used after responding to a ticket and will be discussed in more detail later in the training materials.
Responding to a Ticket – Take Ticket In order to resolve a consumer’s issue using Secure Support, an operator must take the ticket into the workspace. • Step 1: Highlight the ticket in the Ticket List Section that you wish to respond to. Review the details from the ticket. • Note the Secure Mode icon to confirm that you may include sensitive information in the message. • Review the Ticket tab and Contacts tab to research the consumer’s request and other pertinent information.
Responding to a Ticket – Compose Step 2: Compose the response email as desired. You can format the font, size, color and other properties using the formatting bar. Email recipient: To and CC fields may not be edited for secure tickets Subject: the ticket ID automatically fills and should never be deleted Body: the opening and signature pre-fill based on the administrator settings. You can edit or delete this text as desired. The ‘Enter message body here’ is a placeholder only and will not display on the sent email. Step 3: Attach documents (if enabled by the administrator) using the Attachment button. The recommended maximum file size is 5 MB. Step 4: Click the Send Email button to send the response to the consumer.
Canned Answers Canned Answers allow operators to insert commonly used replies created by the Financial Institution and stored in Secure Support. Step 1: Click on the Canned Answers icon in the formatting bar to access the canned answers database. Step 2: Select the category or search for keywords to find the canned answer(s) you wish to add. Click Add to insert the answer into your message. You can edit or delete text as desired. The window may remain open in order to add additional answers. Note: If your institution has contracted for the Knowledge Base the operator can use the Knowledge Base icon in the formatting toolbar to insert information from the Knowledge Base. This includes entries marked as ‘Inhouse’ content.
Suggesting Canned Responses You may suggest for the administrator to add new content to the canned responses tool. Step 1: Click on the Tools menu and select Suggest Content. Step 2: Enter the question and answer that you wish to suggest. Enter any remarks to the administrator if desired. Step 3: Select the response type(s) that you recommend and click OK. Note: Your administrator must approve suggested content before it will be added to the Canned Answer, Canned Letter or Knowledgebase database.
Using the Note or Log Call A Note is a message similar to an email, which can include file attachments. Notes are not viewed by the consumer. Operators use notes internally to add comments to a ticket. Log Call will allow an operator who took a phone call from a consumer to attach notes from the call to a ticket the consumer submitted. This form can be customized in the Admin area. Note: You can view previous notes and call logs on the Ticket Tab.
Using the Search Tool Use the search tool to locate a ticket or consumer anywhere in the system. Step 1: Select Search from the main toolbar. Step 2: Select the Tickets Search or Contacts Search tab. To search for all tickets from the last 24 hours, leave the Ticket ID field blank and click the Search button. Alternatively, you may entersearch filters by expanding the Filters menu and setting parameters. Step 3: Highlight a ticket and select Take to move it to your queue. Click the Workspace button to exit the search tool.
Linking a Non-Secure Ticket If two tickets are received that contain the same content, the second ticket may be linked to the original ticket and then be released.Tickets that are secure or are not all located in the operator’s queue may not be linked. In addition, a maximum of five tickets may be linked or unlinked to an original ticket. Step 1: Open the original ticket that will be linked to the new ticket and copy the Ticket ID from the subject line.Step 2: Open the new ticket and select the Release tab.Step 3: Paste the original Ticket ID in the Link to ticket box and proceed as normal with releasing the ticket (covered next).
Transferring a Ticket On occasion it may be necessary to transfer a ticket you are working on to a different operator or skill group. Step 1: Select the Transfer/Reassign section from the Release tab.Step 2: Select an agent or skill reassignment and enter a reason for the transfer. Only online operators are available for transfer.Step 3: Click Transfer. If transferred to another operator, they must take the ticket to their queue before the transfer is complete. Transferred tickets will appear in the My Next Ticket section (down arrow) in the Ticket button on the toolbar.
Trashing/Recovering a Ticket On rare occasions, it may be necessary to send a ticket to the trash. Trashed tickets will be automatically purged after 13 months. Step 1: Select the Send to Trash section from the Release tab.Step 2: Click the Trash button. To recover a trashed ticket, click the Search button on the toolbar and select Tickets Search > Filters > Trashed Tickets > Find Only. Confirm that the Date Range is correct and click the Search button. After the trashed ticket is located, highlight the ticket and select Control > Ticket Actions > Remove Ticket from Trash.
Releasing a Ticket After clicking the Send Email icon to send a response back to the consumer, the operator must release it from the system. There are several options for releasing a ticket depending on how the ticket should be handled in the system. Step 1: Choose the status for releasing the ticket.Step 2: If you selected either Pending Customer Action or Pending Internal Action, you must also select how the ticket should be returned to the queue.Step 3: Select how to Route future messages and the Skill for future processing for future replies from the consumer.Step 4: Click Release.
Operator Release Survey If enabled, upon resolution of a ticket the operator is presented with a Release Form on theRelease tab. This form is used to track any concerns with the resolution of the ticket. The release form is called the Ticket Operator Survey and may be enabled/hidden, customized and set to required in the administrator console.
Tickets - Practical Applications How can you tell if an incoming ticket is secure? Describe the steps taken to respond to a ticket. True or False? When replying to a ticket, you must delete the place holder message so it will not appear in sent messages. True or False? A second operator must be online and must take the ticket to their queue before it can be transferred from the original operator’s queue. Describe the steps taken to release a ticket that requires further detail from an consumer before it can be resolved.
Section 3:Chat Intuit Financial Services University LivePerson Suite Operator Procedures Certification Training
Workspace – Chat Visitor List The Chat Visitor List displays the chats that are currently open in the operator’s workspace. Once accepted into the operator’s workspace, they are removed from the original skill queue. • Status • Online – Agent is available to receive chat messages from consumers. The “Online” image is displayed online. • Back in 5 Minutes – Agent is unavailable to receive chat messages from consumers, but may receive chat transfers from other agents. The “Occupied” image is displayed online. • Away – Agent is unavailable to receive chat messages from consumers or transfers from other agents. The “Chat Unavailable” image is displayed online. Secure SSO Icon Displays next to a secure chat initiated from within Internet Banking, Business Banking and/or Business Financial Solutions. Note: You may need to make this column visible under the View > Customize Columns menu
Workspace – Info Tab The Info tab displays the consumer’s or visitor’s information. The order of information displayed may be customized by an administrator. If the chat originates from behind the secure login, Single Sign-On data is displayed from your DPV. If the chat originates from the public website, basic visitor and ISP data will still display. The pre-chat survey displays the consumer’s responses/concerns prior to starting a chat session.
Workspace – Page Viewer Tab The Page Viewer tab displays the pages the visitor has viewed on your website. For Internet Banking, Business Banking and/or Business Financial Solutions consumers, Page Viewer will only show the URL of your home page.
Responding to a Chat – Take Chat In order to resolve a consumer’s issue using Secure Chat, an operator must take the chat into the workspace. Step 1: Highlight the chat in the Chat List Section that you wish to respond. Step 2: Click on the Take icon.
Responding to a Chat – Compose and Send Step 3: Compose the response as desired. You can format the font, size, style, color or add a hyperlink as necessary. Step 4: Then, as described in the following slides, you can Push a Page,send an HTML code,add Knowledge Base content (if applicable) or add a Canned Response. Step 5: Click the Send button to send the response to the consumer.
Working with Links and HTML Use the Push Page button to send a link or push a web page to a consumer during a chat session. In either case, the link/page is sent immediately. Simple Link will send a clickable hyperlink, while Push Page will force the page to open automatically in the consumer’s browser. Be sure to enter the full URL (such as www.myfi.com). Use the icon to insert a hyperlink in a message. This will not send the link immediately and a new page will not open automatically. Use the Send HTML button to send HTML code to a consumer. Code may be created in the visual editor or pasted from a web site.
Canned Responses Canned Responses allow operators to insert commonly used replies created by the Financial Institution and stored in Secure Chat. Step 1: Click on the Canned Responses icon in the formatting bar to access the canned responses database. Step 2: Select the category or search for keywords to find the canned response(s) you wish to add. Click Add to insert the response into your message. You can edit or delete text as desired. The window may remain open in order to add additional responses. Note: If your institution has contracted for the Knowledge Base the operator can use the Knowledge Base icon in the formatting toolbar to insert information from the Knowledge Base. This includes entries marked as ‘Inhouse’ content.
Suggesting Canned Responses You may suggest for the administrator to add new content to the canned responses tool. Step 1: Click on the Tools menu and select Suggest Content. Step 2: Enter the question and answer that you wish to suggest. Enter any remarks to the administrator if desired. Step 3: Select the response type(s) that you recommend and click OK. Note: Your administrator must approve suggested content before it will be added to the Canned Answer, Canned Letter or Knowledgebase database.
Blocking Credit Card Patterns in Chats This feature detects credit card patterns in chats and surveys. The detected number is replaced by a masking pattern which is viewed by the visitor and the agent. This is an optional feature that is disabled by default – it may be enabled by your administrator.
Transferring a Chat On occasion it may be necessary to transfer a chat you are working on to a different operator or skill group. Step 1: From the formatting toolbar click the button. Use Reassign to transfer to the queue of another skill group. Step 2: Select an operator or a skill to transfer the chat. Only online operators are available for transfer. Step 3: Type a message to do a “warm” transfer to another operator (optional). Step 4: Click OK. If transferred to another operator, they must accept before the transfer is complete.
Stopping a Chat After clicking the Send icon to send a response back to the consumer, the operator can stop the chat if the conversation is over. If the consumer or visitor closes their chat window it will automatically stop the chat and release it from the Operator’s window. Step 1: From the formatting toolbar click the button to stop the chat. Step 2: A confirmation window will appear. Click Yes to confirm.