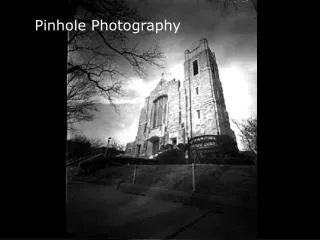
Pinhole Camera
Pinhole Camera. Mrs. Doering. Photo Gallery 3 Introduction 4 Objectives 5 Vocabulary 6 History of Pinhole Cameras 7 What is a Pinhole Camera? 8. Making a Pinhole Camera 9 Supplies 9 Precutting Matt Board 10 The Removable Camera Back 11 The Front of the Camera 12

Pinhole Camera
E N D
Presentation Transcript
Pinhole Camera Mrs. Doering
Photo Gallery 3 Introduction 4 Objectives 5 Vocabulary 6 History of Pinhole Cameras 7 What is a Pinhole Camera? 8 Making a Pinhole Camera 9 Supplies 9 Precutting Matt Board 10 The Removable Camera Back 11 The Front of the Camera 12 The Box of the Camera 13-14 Taping the Box of the Camera 15 Drill the Pinhole/Aperture 16 Attach the Pinhole to the Camera 17 Taking Pictures with a Pinhole Camera 18 Exposure Table 19 Glossary 20 Contents
Pinhole Camera Gallery Oatmeal Box Pinhole Camera Photos by Stewart L. Woodruff
Introduction How does a tiny hole make a picture? As you learn about pinhole cameras, you will understand how it is possible to make a picture from a tiny hole. Not only will you learn about the pinhole camera, you will be given instructions on making your own pinhole camera.
What will you learn? • What is a pinhole camera? • The history of pinhole cameras. • How to construct a pinhole camera. • Creating a negative on photographic paper.
Vocabulary • Aperture • Brass shim stock • Emery Paper • Foam Core • Paper Negative • Photographic Paper • Pierced • Pinhole Camera • Shutter
History of Pinhole Cameras “The first photograph taken with a pinhole camera was the work of Scottish scientist Sir David Brewster back in 1850, the technique became more established in photography during the late 19th century when it was noted for the soft outlines it produced, as opposed to lenses generating perfect, sharp images. The pinhole camera was later abandoned and it wasn't until the end of the 1960s that several artists began using it in their experiments, thus awakening renewed interest in this simple photographic apparatus which endures to this day” (Summarized from Pinhole Photography, Rediscovering a Historic Technique, Focal Press 1995, by David Balihar ).
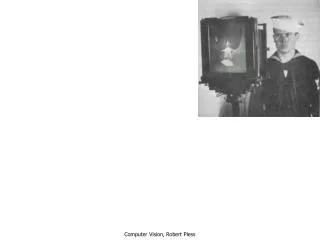
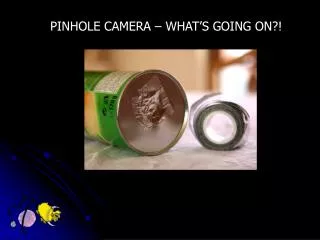
What is a Pinhole Camera? • A camera without a lens which uses a very small hole pierced in one end to allow light to pass through. An upside down image is formed on the back of the camera which can be covered with photography paper or film. Light rays from an object passes through a small hole to form an image. (File provided by Wikimedia Commons)
Making a Pinhole Camera To make a pinhole camera you will need the following supplies: • Matt board, black on one side • Brass shim stock • 10mm pin • Pencil • Emery paper • Electrical tape • Utility knife • Foamcore Mrs. Doering’s First Pinhole Camera
Precutting Matt Board The black side of the matt board will be the inside of the camera to prevent light from being scattered. Cutting accuracy is important. • Cut the following sizes from you matt board: • Three 4” x 5” rectangles • Two 5” x 5” squares • One 5” x 6” rectangle • Two 1” x 5” strips • Two 1” x 4” strips
1” Strips (Gray) Black Electrical Tape 5” x 6” Rectangle The Removable Camera Back • The removable back is constructed from the 5” x 6” rectangle and the 1” strips. • Centered on the back (black side), trace a 4” x 5” rectangle. • Lay the edges of the 1” strips against these lines and tape them with small pieces of electrical tape. Fold the strips up and tape the corners by folding the tape in half with the sticky side out and pressing tightly into the inside corners. • Tape all the seams to make them light tight. Fold the strips up and tape.
Cut Opening in Center The Front of the Camera • In the center of a 4” x 5” rectangle cut a small ¼” x ½” rectangle with the utility knife. • You will complete your aperture later.
5” x 5” Rectangle Black Electrical Tape 4” x 5” Rectangle The Box of the Camera • Lay the front of the camera, black side up, with the two other 4” x 5” rectangles in a line with the 4” edges touching. • Next lay the 5” x 5” squares next to the center 4” x 5” rectangle, forming a cross. • Tape the seams together.
Back inside camera sides Rubber band to hold sides to back for a tight fit Small pieces of tape to temporarily hold it together Sides folded up to make the box The Box of the Camera • Fold the sides up. • Put the back of the camera inside. • Put a rubber band around the camera so it holds together tightly. • Put a few small pieces of tape to hold it together.
Split the tape at the corner and fold along edge of box Taping the Box of the Camera • Tape the inside and outside seams of the camera. • The corners are made by using a strip of tape slightly longer than the seam. • Split the tape where it extends beyond the seam. • Fold one part of the tape in one direction and the other part in the other direction to form a tight corner.
Spin the pencil while pushing down firmly but gently Pencil Brass 10mm Needle Foamcore Drilling the Pinhole/Aperture • Place a one inch square of brass shim stock on top of a piece of foamcore. • Stick the eye of a 10mm needle into the pencil’s eraser. • Using slight pressure and rotating back and forth, drill a hole in the brass. The rotating will keep the hole smooth. • With a piece of fine emery paper, polish off the hole so there are not any rough edges.
Attach the Pinhole to the Camera • Place the brass pinhole/aperture over the open rectangle on the outside of the camera front. • Using electrical tape, attach the brass pinhole/aperture securely. • Make sure the pinhole is visible through the opening. • For a shutter, take a piece of tape and cover the hole.
Taking Pictures with a Pinhole Camera • In the dark room, tape photographic paper to the inside, back cover. • Go outside and aim your pinhole at the object you would like to photograph, securing your camera by setting it on something. • Open the shutter by pulling down the tape covering the pinhole/aperture. • Following the exposure table in the next slide, count the number of seconds you need the aperture to receive light. • Close the shutter. • Remove the photographic paper in the dark room and develop the paper negative.
Exposure Table Adjustments should be made depending on the light or darkness of the scene. For example, a person with a very light complexion in a white shirt will require less exposure, or an arrangement of bushes with green leaves would require longer exposure for any given level of illumination. (david.a.heberlein@uwrf.edu)
Glossary • aperture a hole or an opening through which light is admitted • brass shim stock a very thin piece of brass to use as the aperture • emery paper an abrasive paper used for sanding • foamcore lightweight material made of three layers – tag board, foam, tag board • paper negative uses photography paper to create a reversed image which light areas appear dark and dark areas appear light • pierce to make a hole through • photographic paper is paper coated with light sensitive chemicals • pinhole camera a camera that uses a pinhole instead of a lens • shutter is like a door that opens and closes to let light through the aperture for a determined period of time
Self Evaluation Precut Matt Board Fill in the Steps-in-Process Chart Take pictures using Exposure Table
Self Evaluation Answers Precut matt board Construct camera back Cut hole for aperture How did you do? Drill pinhole and attach to camera Tape box to prevent light from entering Construct camera box Take pictures using Exposure Table Make shutter Tape photographic Paper to back of camera