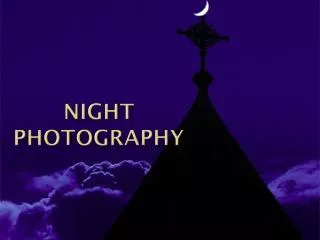
NIGHT PHOTOGRAPHY TECHNIQUES
NIGHT PHOTOGRAPHY TECHNIQUES. by Amber Koskela. May 7, 2013 . Common Obstacles.

NIGHT PHOTOGRAPHY TECHNIQUES
E N D
Presentation Transcript
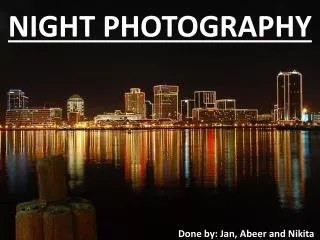
NIGHT PHOTOGRAPHYTECHNIQUES by Amber Koskela May 7, 2013
Common Obstacles Most photographers have been put off by night photography because of how highly technical it can be. So we put our camera away once the sun has set, and therefore miss out on the beauty we could capture at night. What we don’t realize is night photography really isn’t much different than daylight photography, as we still utilize the aperture, shutter speed and light sensitivity. The biggest difference is that night photography is often pushed more to the extreme. Many earlier photographers avoided night photography because of the long exposures needed to create the necessary depth of field, or it would produce undesirable image noise. Not to mention, you then had a long wait while the film developed, before you could find out if the image was even to your liking. By Dave Morrow
Common Obstacles Most photographers have been put off by night photography because of how highly technical it can be. So we put our camera away once the sun has set, and therefore miss out on the beauty we could capture at night. What we don’t realize is night photography really isn’t much different than daylight photography, as we still utilize the aperture, shutter speed and light sensitivity. The biggest difference is that night photography is often pushed more to the extreme. Many earlier photographers avoided night photography because of the long exposures needed to create the necessary depth of field, or it would produce undesirable image noise. Not to mention, you then had a long wait while the film developed, before you could find out if the image was even to your liking. Cambridge in Colour
Common Obstacles • Of course with the onset of the digital camera, you no longer had to wait and got instant results. Less time invested meant that more photographers ventured into the realm of night photography. • This doesn’t mean that digital night photography doesn’t come without technical limitations. You are still limited to the following exposure choices: • Depth of field • Exposure time • Image noise • The diagram to the left shows you every available option for a typical night photo when taken under a full moon, with constant exposure. Cambridge in Colour
Moonlight Moonlight is just as important to night photography, as the sun is to daylight photography. The moonlight, however, has curtain things to take into consideration. Such things as, where the moon is in it’s waxing and waning cycle, greatly effect the amount of exposure time. The full moon is great for reducing such exposure times and can allow for further depth of field. Gauging these exposure times can be tricky. Example: use f/2.0 and 30 seconds at ISO 100 if subject is diffuse and directly lit. A good tool for planning your night photo is Cambridge in Colour’sMoon & Night Photo Calculator, which allows you to plan for desired conditions that you might only find a few times a year. Creative Commons
Light Metering The problem that comes with lighting, when photographing at night, is that the light meter on most cameras max out at or become inaccurate at 30 seconds. This can be problematic and trying to account for this can be tricky. For exposure times longer than 30 second, your camera needs to be set to “bulb mode” and an external light metering device needs to be used. If you are using an artificial light source during your night shoot, you should always have low-key histograms or you might have a large amount of brown highlights. If the camera’s auto-metering fails while using artificial lighting, try aiming at a diffuse object that is being fully lit by the artificial lighting, and bracket each image to get the correct exposure. Creative Commons
Depth of Field • Being able to get the proper focus for a night shot is critical as it is often difficult to get the even the smallest amount aperture. Making getting the correct depth of field a challenge. You often can’t use auto-focus and even manual focus can be a challenge. For this there is a few solutions however. • Focus on point light sources at a similar distance to your subject. • If you wish to focus on infinity, aim your camera at the moon and autofocus. • A small flashlight can be used by shining it on the object and then removing it before the exposure begins. • If all those are impractical, you can always manual focus by using distance markings on the lens. By m’sieurrico
RESOURCES: Cambridge in Colour http://cambridgeincolour.com/tutorials/night-photography.htm http://cambridgeincolour.com/tutorials/night-photography.htm