Download

1 / 65
650 likes | 772 Vues
Dive into the essentials of digital imaging with Dr. Philip Lawson's comprehensive guide. This resource covers the fundamental aspects of scanning, printing, and working with layers, channels, and color to create stunning visual outcomes. Learn about luminosity, resolution, and how to maintain the highest quality through the entire imaging process. Discover the nuances of film emulsion, monitors, and printers, ensuring your digital creations are faithful to your vision. Ideal for photographers and artists seeking to elevate their digital techniques.

E N D
Digital Imaging By Dr. Philip LawsonFRPS DPAGB By Philip Lawson
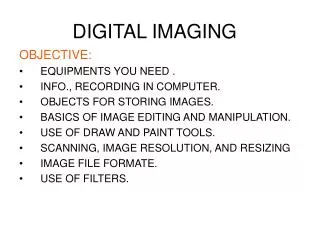
Digital Imaging The Basics - Scanning and Printing The Master Image Working with Layers Working with Channels Black and White
Digital Imaging 1 The Basics - Scanning and Printing The Master Image Working with Layers Working with Channels Black and White
Luminosity Resolution Colour The Basics
Infinitely Bright No Light Light • In the real world, Luminosities range from:
Bright EV 17 1 EV = x 2 Dark EV 5 Light meter • The light meter can only measure a middling range of Luminosities:
Max Min High Key 1 Film Emulsion • The Film Emulsion can record only a narrower range of Luminosities7 Evs to 9 EVs
2 Film Emulsion • But it is our choice which range to expose on Max Min Low Key
3 Film Emulsion • If the film stock has a dynamic range of 7 EVs it has a tonal range of 27 = 128 levels • If the film stock has a dynamic range of 8 EVs it has a tonal range of 28 = 256 levels • If the film stock has a dynamic range of 9 EVs it has a tonal range of 29 = 512 levels
Film Scanners • The Film Scanner converts these into Numbers in the range 0 -255 255 128 0 • It might not be able to record the full range of Film Luminosities
Print Scanners • The Print Scanner suffers in that it • Is scanning a print that already has a reduced luminosity range • Is scanning the print by reflection 255 128 0
The Monitor 1 • The monitor, being a light source is capable of a large dynamic range 255 128 0
The Monitor 2 • This is adjustable via: • Brightness • Contrast • Gamma all of which must be calibrated, set and never again adjusted for consistent results.
The Print • The Print, being a reflective medium is only as bright as the base paper and the light source • And as dark as the minimum reflectance
Luminous Range • Strive to retain the highest range of luminosities at EACH conversion.
Luminous Range • Transparent Film has a higher latent DMAX than Print, so use a FILM SCANNER, min DMAX = 3.6 • Use the best image sources • IF possible scan to 16-bit greyscale and retain for a.l.a.p. • Ensure scanner settingsdeliver a histogram showing even distribution over the full range.
Caution • Care when modifying the image • BRIGHTNESS • CONTRAST • A pixel cannot be brighter than 255 • Burn out • A picture cannot possess a greater dynamic range than 256
Infinitely Bright No Light Colour • In the real world, Colour is absolute and of infinite variation • Each Primary R, G & B, may be thought of as a Colour Luminosity and follows similar degradation
Colour Gamut • The Gamut of visible colours is described by the LAB space in the Chromaticity diagram
Max Min Film Emulsion • Film Emulsions record colour differently (CYM) • Manufacturer/Stock • Reciprocity Failure
Film Gamut • The Gamut of the Film Emulsion is described by the EKTA space in the Chromaticity diagram
255 128 0 255 128 0 255 128 0 Film Scanners • The Film Scanner converts Red, Green and Blue into Numbers in the range 0 - 255
255 128 0 255 128 0 255 128 0 The Monitor 1 • The monitor, being a light source is capable of a large dynamic range
255 128 0 255 128 0 255 128 0 The Monitor 2 • Provided that you’ve got it set right!
The Monitor 3 • 256 Colours or “High Colour (16-bit)” will give you a Posterised representation • Must use “High Colour (24-bit)”
Monitor (RGB) Gamut • The Gamut of the Monitor is described by the RGB space in the Chromaticity diagramNote the mismatch
Your Phosphors and selected colour temperature The Monitor 4 • However the colour that you get is influenced by:
Your Gammasettings The Monitor 5 • However the colour that you get is influenced by:
The Monitor 6 • However the colour that you get is influenced by: • Your Profiles
The Monitor 7 • The colour that you SEE is influenced by: • Any funny desktop coloursor artificial light
The Programperforms the RGB -> CYMKTranslation The Print • The Print, being a reflective medium has Cyan, Yellow and Magenta translucent inks applied
Print (CYMK) Gamut • The Gamut of the Printer is described by the CMYK space in the Chromaticity diagramAlthough this is very dependant upon the light under which it is viewed
Colour Range • Whilst modifying colour balance, ensure that you do not create an OUT OF GAMUT colour
The Printer 1 • The Printer makes numerous Necessary and Unnecessary Corrections • Colour Space
The Printer 2 • The Printer makes numerous Necessary and Unnecessary Corrections • Transferand • Bleed
The Printer 3 • The Printer makes numerous Necessary and Unnecessary Corrections • Mode
The Printer 4 • The Printer makes numerous Necessary and Unnecessary Corrections • Quality • Media • Halftoning • Adjustment
The Printer 5 • Basic Advice • Print at highest Quality (1440 dpi) • Select the Correct Media Type • Use “Error Diffusion” Halftoning • Use “Photo-realistic” Colour Adjustment • Not “Automatic”!!
MonitorICC Profile ScannerICC Profile PrinterICC Profile Kodak CDICC Profile Characterisation • Colour Management requires each device to be Characterised (by an ICC Profile)
Profiles • Each Device is Characterised by a PROFILE that in turns needs Calibration
Your Gammasettings for the Monitor Calibration Calibration requires • Consistent Conditions • A Known Calibration Source
Profiles • Photoshop manages your Profiles
Colour Range • Use a scanner that Optimises the dynamic range of each colour independently. • Colour Casts can easily be eliminated • Take care when modifying the image • BRIGHTNESS • CONTRAST • Ink is not permanent. Protect from extreme light sources and Save data files.
Resolution • In the real world, the resolution that we achieve is governed by: • Focus • Resolving power of lens • Camera Shake • Heat Haze
Film Emulsion • The Film Emulsion is limited by the clumping of the grains. • Typical Resolving power is <50 lpmm Max = 1750 lines 24mm 35mm
Film Scanners • Typical Film Scanners can detect 2700 d.p.i. • This is sharper than the finest level of detail but not enough to see the individual grains. Max = 4000 pixels 24mm 35mm
Print Scanners • Typical Print Scanners can detect 600 d.p.i. • On a 5” x 7” Printthis would produce4200 pixels and a38Mbyte file. Max = 4200 pixels 5” 7”
The Monitor 1 • The monitor resolution can be a number of prescribed settings LESS than the number of Phosphor dots on the screen. • Choose the highestas this gives youmore desktopspace for all thosepalettes
The Monitor 2 • Always Zoom In or Out and Pan around. • Learn to use the quick keys: • Ctl-0 • Z followed bydrag a rectangle • Ctl + drag a rectanglein the Navigator • Space Bar
The Monitor 3 • NEVER change the Image Size down • This throws vital information away!