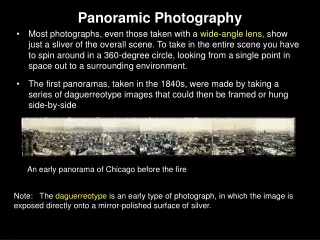
Panoramic Photography
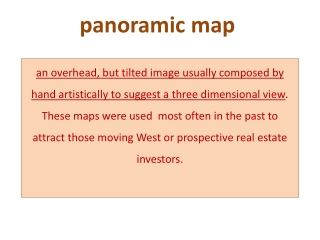
Panoramic Photography. Chloe Crane Marie-Laurence Demers Kayla Incollingo. Panoramic Photography. Panoramic photography refers to the area of photography dedicated to taking pictures with a wide field of view or a wide aspect ratio (i.e., a longer horizontal reach than vertical height).


Panoramic Photography
E N D
Presentation Transcript
Panoramic Photography Chloe CraneMarie-Laurence DemersKayla Incollingo
Panoramic Photography • Panoramic photography refers to the area of photography dedicated to taking pictures with a wide field of view or a wide aspect ratio (i.e., a longer horizontal reach than vertical height). • Landscapes and cityscapes are the most common subjects for panoramic pictures. • Theoretically, panoramic photography seeks to capture images within a greater field of view than the human eye can take in. • While a human eye can take in only 70 degrees to 160 degrees of a given scene, a panoramic shot generally includes 180 degrees of a field of view. • However, while this is a more traditional definition, simpler explanations define panoramic photography as pictures that present a panorama, or a comprehensive, unbroken view of a scene. • Panoramic Pictures History • From the beginning photographers wanted to be able to show city scenes which could not be encompassed in a satisfactory way by one view from a normal camera. • Photographers started making panoramas by photographing the city skyline in a series of images which were then shown placed next to each other to create one image. • There were many panoramic format prints produced from 1840 onwards including prints made by the calotype and daguerreotype process. • Some views in the 1850s used as many as eleven full size (8 1/2" x 61/2") daguerreotype plates to create the scene. • Later in the 1860s, panoramas were printed onto paper from large glass plate negatives which were sometimes as big as 20"x 24." • One later master of the panoramic print was H.H. Bennett, who could print three or four 20" x 24" sized negatives onto an enormous sheet of paper with almost no indication of where the negative edges met. • Bennett's photographs were of the scenery along the river in the Wisconsin Dells.
Panoramic Photography • There were two types of cameras for panoramas, one had a lens that rotated while the film remained still and the other had both rotating lens and rotating film. • The earliest "true" photographic panoramas using a specialized rotating lens camera and a curved daguerreotype plate date from the 1840s. • The No. 1 Panoram Kodak was introduced in 1900 and discontinued in 1926. Kodak produced two additional panoramic camera models, the No. 3A and No. 4. Each model produced a different size image and covered a different angle of view. • In 1899, Kodak introduced the #4 Kodak Panoram panoramic camera for amateur photographers. • These photographs were about 12” long and had a field of view that was 180°. • In 1904, the Cirkut camera was introduced. • This camera was based on the principles that had been established in the 1840s. • It became a popular format for commercial photographers and was used to make large group portraits and city scenes. • It used large film that ranged from 5” to 16” wide and could be as long as 20 feet! • Both the camera and the film rotated and the view could be as wide as 360°. • This type of panorama however, produced a distorted the view of the scene. • Panoramas made from a series of negatives placed together do not have this distortion.
Panoramic Photography 1st Annual Picnic of Henderson motorcycle riders, Granite Falls, Washington, May 20, 1918 st Annual 1st Annual Picnic of Henderson motorcycle riders, Granite Falls, Washington, May 20, 1918
Panoramic Photography Seattle looking north and east from the Seattle Electric Company plant on Post St., February 23, 1913 The Reunion banquet of the International Sourdoughs in Vancouver in 1948
Taking Panoramic Shots with Digital Digital cameras have changed how many photographers take panoramic pictures. With a digital camera, a series of individual pictures are “stitched’ or “segmented” together using an image editor that produces a panorama. Taking panoramic shots with a digital camera takes some practice. Professionals recommend using a tripod to prevent subtle changes in the height of the camera as the pictures are taken. Each picture in the series should overlap with or “connect to” the picture before it. Digital panoramic pictures work best if the areas of overlap include obvious landmarks. This helps the imaging software stitch the photos together seamlessly. Try to avoid placing overlap in areas without obvious landmarks. With practice, digital panoramic pictures can turn out perfectly seamless!
Create a Panorama with Photomerge • Here are the tools we use to create panoramic photos: • 1. A digital camera2. A tripod or a stable surface or platform to take pictures from that allows some horizontal rotation3. A computer and Adobe Photoshop and the Photomerge utility PHOTOMERGE The Photomerge™ command combines several photographs into one continuous image. For example, you can take five overlapping photographs of a city skyline, and then merge them into a panorama. The Photomerge command can assemble photos that are tiled horizontally as well as vertically. • Source images (top), and completed Photomerge composition (bottom) • To create Photomerge compositions, choose File > Automate > Photomerge and then choose your source files and then specify layout and blending options. Your option choice depends on how you photographed the panorama. For example, if you’ve photographed images for a 360 degree panorama, the Spherical layout option is recommended. This option stitches the images and transforms them as if they were mapped to the inside of a sphere, which simulates the experience of viewing a 360 degree panorama. • For video overview of Photomerge, see www.adobe.com/go/vid0013