Download

1 / 20
230 likes | 680 Vues
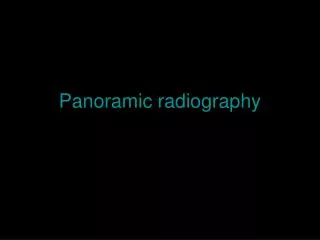
Panoramic Technique. DHY 202 Clinical Dental Hygiene I Dental Hygiene Department William Rainey Harper College. Introduction. All panoramic machines work essentially the same, although they vary in appearance. Panoramic technique can be described in 5 generic steps.

E N D
Panoramic Technique DHY 202 Clinical Dental Hygiene I Dental Hygiene Department William Rainey Harper College
Introduction • All panoramic machines work essentially the same, although they vary in appearance. • Panoramic technique can be described in 5 generic steps.
Steps in Panoramic Technique • Stand the client upright • Position client’s chin • Close client’s teeth on bite stick groove • Close the side guides • Provide client instructions
Client Preparation • Remove metallic & other objects from head & neck region • Place panoramic lead apron (no thyroid collar) • Check for interference from bulky clothing
Use next highestkVp setting for any of the following client characteristics: Obese Large bone structure Use next lowestkVp setting for any of the following client characteristics: Frail or small bone structures Edentulous Exposure Considerations
Steps in Panoramic Technique Step 1 : Stand Client Upright • Guide client with gentle hand pressure in small of back • Instruct client to: • Stand erect with shoulders down & relaxed • Position feet as far forward as possible • Hold machine to avoid falling backward • Adjust head planes: • Midsaggital perpendicular to floor • Frankfurt parallel to floor • Purpose: straighten cervical spine
Steps in Panoramic Technique • Rest chin on chin rest • Purpose: • Ensure chin is tilted down -4 to -7 degrees to counter upward angle of beam • Support & steady client head Step 2 : Position Client’s Chin
Steps in Panoramic Technique • Client bites end-to-end in bite stick groove • Purpose • Anterior teeth in anterior part of focal trough • Separate dentition in the image • Center client in machine Step 3: Bite in Groove
Focal Trough • Known as the image layer • A three-dimensional zone in which structures are reasonably well-defined • Determines where dental arches must be positioned to achieve clearest image
Steps in Panoramic Technique • Close side guides against client’s temples • Purpose: • Position posterior teeth in middle of focal trough layer on both sides • Stabilize client head position Step 4: Close Side Guides
Steps in Panoramic Technique • Tongue on roof of mouth-swallow or suck cheeks • Hold still (22 secs.) • Warn about cassette rotation • Don’t follow machine with eyes Step 5: Client Instructions
Client Instructions • Swallow, • Hold • Expose
Cassette Design • 5-6” x 12” rigid or flexible
Cassette Intensifying Screens • Phosphor crystal on plastic base • Fluorescence reduces radiation to client • Fast rare earth/Lanex screens emit green light • Film and screen must be compatible
Infection Control Procedures • Use clean, ungloved hands to handle cassette and film • Use disposable bite stick • Other infection control procedures (draping, disinfecting) if deemed necessary