Download

1 / 40
400 likes | 535 Vues
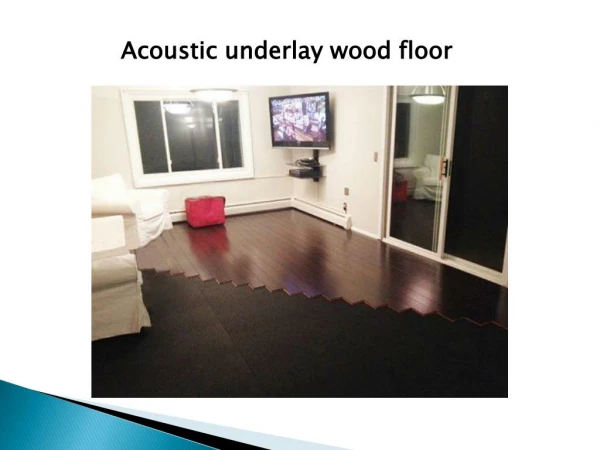
Installation Instructions. On Wooden Construction. A free floating, super leveling dual underlay system for stuck-down decorative floor coverings such as linoleum, vinyl and cork. The substrate must not have surface irregularities exceeding 1/8” across 6 feet.

E N D
Installation Instructions On Wooden Construction A free floating, super leveling dual underlay system for stuck-down decorative floor coverings such as linoleum, vinyl and cork
The substrate must not have surface irregularities exceeding 1/8” across 6 feet
Make sure that the wooden base floor is ventilated from underneath.Before you start, your base floor must be clean and free of dust.
Install a damp proof membrane (DPM) poly-sheet of 4 mil onto the double sided tape. In case of a sub floor heating system, use a 6 mil
The edges must overlap one another by at least 6 inches. The joints must be sealed along their entire length with aluminum tape
Jumpax tiles must acclimate in their sealed packaging for 24-48 hours, in the room where they are going to be installed
Base Board Foil side faces floor Top Board 4 Top Boards & 4 Base Boards per package – 31 SF package Board size 23.6” x 47.25” The Jumpax System consists of base-boards and top-boards, both provided with a layer of interactive adhesive
Cut the first row of base-boards in half over their total lengths
Cut the first row of base-boards in half at approximately 11 13/16”
The first base-board of this row has to be shortened from 47¼” to 35 ½”
11 ¾” The first base-board of this row has to be cut to 35 ½” or cut-off 11¾” off board
35 ½” 47 ¼” Start the first row with the base-board of 35 ½” long, followed by the 47 ¼” board, always with the adhesive facing up
Remove the protective foil from the base-boardsto reveal the interactive adhesive
Place the second row of full-size base-boards in brick-fashion against the first row
¾ ¼ 1/1 1/1 See to a clean job and never walk on the interactive adhesive
Place the first row of top-boards with the adhesive facing down onto the base-boards
The top-board overlaps the joints of the base-boards in length and width by approximately 11 13/16”
Press firmly or roll all the top-boards using a rubber mallet or roller.
Now slide the whole construction into the corner and place spacers, leavingexpansion of 5/16” to 3/8” from all walls and fixed obstacles in the room
Now place the 2nd row of top-boards in brick fashion against the 1st row of top-boards
Full size top-board opening for half size top- board Full size top-board
Flex the top-boards into position securing a perfect fit and no joints
Always check the JUMPAX floor for irregularities. Any irregularities of joints can easily be sanded away with a 120-grain fine sand paper
After sanding, vacuum clean the finished JUMPAX sub floor before gluing the finished floor covering
Make sure that during fitting the floor does not slide against the wall.
JUMPAX as well as the floor covering is to be kept 5/16” to 3/8” away from the wall. So the floor covering stops and starts where JUMPAX stops and starts.
Hold base molding 1/16” to 1/8” off floor to avoid flanking paths Neatly finished off with base molding*