Download

1 / 19
190 likes | 285 Vues
Discover how oral histories preserve personal stories through interviews and transcription. Learn guidelines, interview tips, transcribing techniques, and structuring an oral history effectively.

E N D
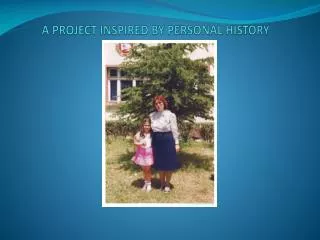
Retelling a personal history. . . From Reading to Writing Do you ever wish you knew more about the lives of your parents, grandparents, or friends? Although Rita Dove and Rudolfo Anaya are writers who chose to remember their grandparents in poetry and prose, some people share memories by creating oral histories.
Retelling a personal history. . . An oral history uses a person’s own words, gathered from an interview, to record stories and information about that person’s life. Counselors, reporters, and anthropologists also use specific types of oral histories in their daily work.
B a s i c s i n a B o x GUIDELINES & STANDARDS Oral History A successful interview should • include open-ended and follow-up questions to draw out the person’s interests • last no longer than 90 minutes per interview session • be guided by questions and research about the person, prepared before the interview • be recorded accurately through notes and a tape recorder, used with the person’s permission A successful oral history should • offer a well-rounded portrait of the person • present a clear focus and logical organization • include any necessary background information about the person in an introduction • feature accurately transcribed quotations
Conducting Your Interview 1 Creating an Oral History The first step is to choose the person you want to interview. You might choose someone who lived through an important historical event or who knows about something that interests you. After you pick a person to interview, follow these steps.
Steps for a Successful Interview 1. Compose your questions. What do you want to learn about the person you are interviewing? Prepare a list of questions that focus on a few subject areas, such as early life, work life, and social life. Avoid questions with yes/no answers. Instead, ask questions that begin with words such as how, what, why, when, where, or who.
Steps for a Successful Interview 2. Research your subject. You can learn more about your subject by talking to people who know him or her. If the person you plan to interview is a public person, such as politician, you can use library resources to learn about the person. Use your research to help you prepare more in-depth questions.
Steps for a Successful Interview 3. Set up the interview. Set a date, time, and place for the interview. If you plan to use recording equipment, practice beforehand. Always ask permission before you begin recording. 4. Listen carefully. Even if you use a tape recorder, it’s important to jot down notes and questions as you listen. You may need to ask follow-up questions later to get more information or to make something clear.
Transcribing the Interview 2 Creating an Oral History Transcribe your interview verbatim, using the subject’s exact words and the questions you asked. Your transcript may look similar to this example.
Transcribing the Interview 2 Creating an Oral History Question: What kind of work did you do as a teenager? • Answer: . . . I left school early in May to take this job at the J Company. Some friends of Ma knew that these men, Mr. Anthony and Mr. Joseph, needed a girl Friday. I took dictation and wrote letters and all that. . . .
Transcribing the Interview 2 Creating an Oral History Question: It sounds like they expected you to be able to do a lot of things at that job. What else do you remember about working there? • Answer: The building where I worked was at Clinton Street and Jackson and I’d be looking out at this clock on Union Station. And a clock never moved so slowly. There’s a very nice building on that corner now, not like the rickety thing I worked in.
Planning Your Oral History 3 Creating an Oral History After you create your transcript, decide how you want to present the oral history. Here are some steps to help you.
Using Your Notes and Transcript 1. Choose a focus. Reread the transcript and decide which parts will be the focus of your oral history. For example, if the person you interviewed talked about childhood memories, choose the most interesting memories for your focus.
Using Your Notes and Transcript 2. Structure your material. How will you present the focus of your oral history? You can structure your oral history as a running narrative or story. You can also use the question-and-answer structure of an interview.
Drafting 2 Creating an Oral History Begin drafting your oral history by editing the transcript. You have already found the sections of the transcript that fit your focus. Now you must decide how much of these sections to use for the body of your oral history.
Drafting 2 Creating an Oral History Introduction Draft an introduction that includes background information about the subject, such as the name and age of the person and the focus of the oral history.
Drafting 2 Creating an Oral History Conclusion You might end your oral history where your subject finishes telling a story. If this is not possible, write a concluding paragraph that summarizes or restates information from the oral history. Go back to your subject to fill in any gaps, to add more details, and to verify accuracy. Never make up missing details.
Revising 4 Creating an Oral History Target Skill ACHIEVING UNITY AND COHERENCE Sometimes a person being interviewed gets off the main topic, speaks without making clear transitions, or gives important details out of order. You may need to rearrange some of your material to create a unified and coherent oral history.
Editing and Proofreading 5 Creating an Oral History Target Skill PUNCTUATING QUOTED MATERIALS When you transcribed the interview or took notes, you may have skipped quotation marks, commas, and other punctuation. Your final draft should use punctuation that reflects the speaker’s meaning.