Oracle Discoverer Desktop 4i
810 likes | 1.2k Vues
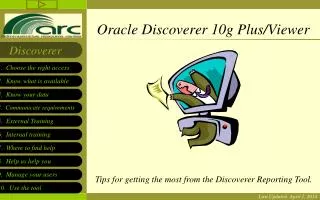
Oracle Discoverer. Oracle Discoverer Desktop 4i. A presentation by Jayashree Satapathy Krishna Mohan. Introduction. What is Discoverer Desktop . Oracle Discoverer Desktop/Plus is a data access tool.

Oracle Discoverer Desktop 4i
E N D
Presentation Transcript
Oracle Discoverer Oracle Discoverer Desktop 4i A presentation by Jayashree Satapathy Krishna Mohan
Introduction What is Discoverer Desktop • Oracle Discoverer Desktop/Plus is a data access tool. • You use it to view the information in your company’s databases. • The whole purpose of Discoverer is to help you—the business professional—view the data you want from a database, analyze it to support your business decisions, and create reports to keep track of things.
How Discoverer Desktop Works • We use it to view the information in your company’s databases. • The whole purpose of Discoverer is to help you — the business professional—view the data you want from a database, analyze it to support your business decisions, and create reports to keep track of things. • View data in a familiar format that is easy to read and understand. • Prepare reports of your analytical results and findings. Share data with others, and in other applications (such as Excel).
The Discoverer Method of Data Access Your company’s Database Administrator identifies all the data needed by separate business areas —accounting, human resources, sales, manufacturing, projects, finance, and so forth. The Database Administrator then organizes the data for each business area. Workbooks in the business areas contain the specific data needed for your various analysis tasks.
Connectivity Connections can be made in two modes Normal Mode Apps Mode
What You See on the Screen Workbook Window : The workbook window is where you will do most of your work with Discoverer Desktop. It shows the data in the workbook. Four Types of Display (Layout) Table Page-Detail Table Crosstab Page-Detail Crosstab
Layout Details Table Layout The most familiar layout for data, a table, lists data in rows and columns. Typical data for tables includes lists, such as a mailing list of customers sorted by zip code or customer name, lists of income or profit from various departments, lists of products sorted by part number or part name, and so on.
Layout Details --- Contd Table Layout with Page Details A table layout with page details is a table with multiple pages of data, where each page shows various portions of the data in detail. You set the criteria for displaying portions of data in order to see exactly what you want on each page. Usually you use this type of layout to study data details in a specific, recurring way. For example, in the Video Store data you may always want to see monthly profits per region. In that case, each page would show one region’s profits each month.
Layout Details --Contd Crosstab Layout A crosstab, short for “cross-tabulation,” relates two different sets of data and summarizes their interrelationship in terms of a third set of data. Every crosstab has at least three dimensions of data—rows, columns, and data points. In Discoverer, crosstabs can show the interrelationships between many dimensions of data on the various axes. A crosstab layout has three axes: side axis, Because each axis can hold several data items, a crosstab can display many dimensions of data.
Layout Details --Contd Page Detail Crosstab Layout A page detail crosstab layout is a crosstab with multiple pages of data, so you can group the data on separate pages. You set the criteria for displaying portions of data in order to see exactly what you want on each page,
Layout Details --- Contd Crosstab Layout with Page Items • Page Axis. In this sample it contains a single data item--Department. (b) Top Axis. This top axis contains two data items--Year and Profit. (c ) Side Axis. This side axis also contains two data items--Region and City.
Layout Details --- Contd Axis Items The page axis, top axis, and left axis on the workbook window represent the data in your database that have a relatively few, discrete values associated with them. Axis items represent data that you can pivot on a crosstab worksheet or that can be column headings on a table When creating a new worksheet, you identify the data that become axis items. Data Points The data points of a table or crosstab are the data in the "body" of the worksheet. Data points are the data that you want to use for analysis purposes or to see listed on a table.
Workbook & Worksheet • Think of a workbook as a binder file with specific data for specific tasks. • The workbook has pages, or worksheets, that contain data for the specific tasks. • For example, if the workbook is for sales and profit data, one worksheet in it might be a table listing your profit for sales versus rentals. Another worksheet might be a comparison of your profit over the last two years by sales region. • To simulate with Excel, Excel file is Workbook and Sheets in the excel file are Worksheets
Building Workbook/Worksheet The basic steps to create a new workbook or worksheet are as follows: Navigation • File > New RequiredSteps • Select the type of display for the new worksheet or workbook. • Select the data that belongs on the worksheet or in the workbook. OptionalSteps • Arrange the data on a table or crosstab layout. • Sort the data (for tables only). • Select conditions to apply to the data. • Select calculations to apply to the data.
Building Workbook/Worksheet -- Contd Open an existing Workbook Open an existing workbook will prompt you to open from • My Computer • Database • Scheduling Manager • Recently Used List
Building Workbook/Worksheet -- Contd Selecting The Data This dialog box lists the data in the business area that you can use to build the new worksheet. To include data on the new worksheet, you move it from the Available column to the Selected column. Select relevant columns from the table for sample report
Building Workbook/Worksheet -- Contd Aggregations Mathematical functions to aggregate the data Text Items- Such as Customer Name, the typical aggregations are Count, Max, and Min. That is, you can count the number of text items, or find the highest or lowest (where A might be the highest and Z the lowest). Numeric Data- The typical aggregations are Sum, Count, Max, Min, Average, and Detail. For example, you can find the Sum or Average of the numeric data with the aggregation. The aggregation in boldface type is the default. The database administrator sets which aggregation is the default.
Building Workbook/Worksheet -- Contd Arranging Layouts To change the layout of items in your worksheet click and drag them to the desired location.
Building Workbook/Worksheet -- Contd Conditions Press button ‘New’ to add conditions. Our sample report does not have any conditions.
Building Workbook/Worksheet -- Contd Data Sorting- Tabular Layout • Specifies how data in the current table should be ordered. • This step only applies to tables. Apply sorting type in the sample report for tabular layout
Building Workbook/Worksheet -- Contd Calculation • Calculations defined for the items added to the Selected list appear in the final dialog box. • You can select the calculations as part of the new worksheet or workbook, or create new calculations.
Building Workbook/Worksheet -- Contd Calculation- Contd.. • Used to define a new calculation or edit an existing calculation. • Use this window to create or edit Items using EUL elements, Functions, and Operators. Calculate total price in Sample Report
Workbook Window Workbook Window a) Tool Bar b) Analysis Bar c) Formatting Bar d) Page Axis e) Top Axis f) Left Axis g) Data Points h) Worksheet Tabs i) Tab Scroll Buttons j) Page Scroll Bar (Horizontal) k) Page Scroll Bar (Vertical)
Workbook Window- Contd. a. Tool Bar- To use Discoverer’s features quickly, for example, opening a new workbook, editing a worksheet, drilling data, or sorting data. b. Analysis Bar- To analyze data quickly, such as adding two sums together or finding the maximum value in a column. c. Formatting Bar- To format a selected item quickly, such as aligning text in a column or changing the font and background color of a column. d. Page Axis, e. Top Axis, f. Left Axis- Represent the data in your database that have a relatively few, discrete values associated with them. g. Data Points- Data in the “body” of the worksheet. Data points are the data that you want to use for analysis purposes or to see listed on a table. h. Worksheet Tabs— Click to open or view the various worksheets in the workbook. You can rename these tabs. i. Tab Scroll Buttons j. Page Scroll Bar (Horizontal)
Workbook Window- Contd. i. Tab Scroll Buttons- Click to scroll through the worksheet tabs in the workbook j.k. Page Scroll Bar- If the worksheet is larger than the screen, it extends off the edges of the screen. Click the scroll bars to see the rest of the worksheet.
Edit Title- Text • Use this step to Format Worksheet title text a- Text style and alignment options. b- Text color and background color icons. Right Click> Edit Title
Edit Title- Bitmap • Use this step to Format Worksheet title Bitmap Right Click> Edit Title
Group by Org_id Drag the item to be grouped and place it at the page items Grouping
Bars to Numeric Data Add graphic bars to numeric data in tables or crosstabs to provide a quick visual comparison of the relative amounts displayed. Example in screen print: Larger the Ordered quantity, the larger the graphic bar
Adding Bars to Numeric Data Clicking ‘Show Graphic Bars’ displays a bar indicating each cell’s percentage of the total value for that column. Setup in this window also specifies how numbers should be displayed. Depending on the category you choose Format > Data
Presenting Data in Graphs Discoverer Plus can convert tables and crosstabs to graphs or charts Graphs and charts of tables and crosstabs are especially effective for presentations of results
Graphs- Types Select the type of graph you want to display your data. An example of the graph type you have selected is displayed at the left. Graph> Show
Graphs- Titles and Legends • To add titles to the graph, enter them in the appropriate boxes. • To add a legend to the graph, click Show Legend. • To format the axes labels, click the formatting button next to each feature to see the Font dialog box for that element. Graph> Show
Running Discoverer Workbook Right Click> Edit Title • Use this step to Format Worksheet title Bitmap
Grouping • Group by Org_id Drag the item to be grouped and place it at the page items Group by org_id
Bars to Numeric Data Add graphic bars to numeric data in tables or crosstabs to provide a quick visual comparison of the relative amounts displayed. Example in screen print: Larger the Ordered quantity, the larger the graphic bar
Adding Bars to Numeric Data Format > Data Clicking ‘Show Graphic Bars’ displays a bar indicating each cell’s percentage of the total value for that column. Setup in this window also specifies how numbers should be displayed. Depending on the category you choose
Presenting Data in Graphs Discoverer Plus can convert tables and crosstabs to graphs or charts Graphs and charts of tables and crosstabs are especially effective for presentations of results
Graphs- Types Graph> Show Select the type of graph you want to display your data. An example of the graph type you have selected is displayed at the left.
Graphs- Titles and Legends Graph> Show • To add titles to the graph, enter them in the appropriate boxes. • To add a legend to the graph, click Show Legend. • To format the axes labels, click the formatting button next to each feature to see the Font dialog box for that element.
Graphs- Options Graph> Show • Compare the options shown in the figure
Exception to Data Right Click on Cell A typical analysis task is to find numerical data that meets or exceeds a particular amount In sample report, diff_order_ship_qty greater than 0 are highlighted as exception
Totaling Numeric Data Using the Totals tool you can sum rows and columns of numbers, find averages and standard deviation, compute subtotals and Grand Totals, and so on. Sample report shows freight terms code sub total and grand total for all data points
Totaling Numeric Data Tools > Totals Totals tool automatically places the summations at the appropriate positions on the display. The dialog box is used Used to apply totals to selected item(s).
Totaling Numeric Data- contd.. Tools > Totals > Edit Create a ‘total’ for the data you choose and place it in the worksheet
Percentages A typical data analysis task is to calculate Item percentages. In sample report, refer % of ordered quantity against total quantity in the screen shot. Due to rounding of data, percentages may not add up exactly to 100. The amount of rounding depends on the number of decimal places that you specify for data. Use the Format Data dialog box to set the number of decimal places for your data.
Percentages -- Contd This dialog displays a list of Percentages that you have available for use in your Worksheets. The Percentages displayed in the list are dependent on the Item display option selected From here, you can also manage your Percentages, by adding, editing, and deleting them. Tools > Percentages
Percentages -- Contd Tools > Percentages This dialog displays a list of various options of the percentage calculation
Sending Reports with e-mail File > Send You can send worksheets, graphs, and selections of a table or crosstab as part of an e-mail message. You can send all or part of your workbook in an email.
Exporting to other Application File > Export You can export tables and crosstabs in a variety of formats to open them in other applications.