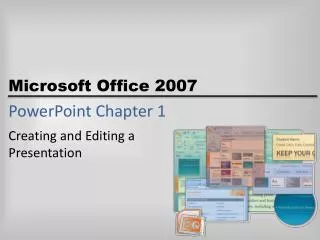
Advanced PowerPoint Techniques for Engaging Presentations
Learn how to apply design, add animations, use slide sorter, and print handouts in PowerPoint Level 2. Discover how to create custom slides and transitions to enhance your presentation skills effectively.


Advanced PowerPoint Techniques for Engaging Presentations
E N D
Presentation Transcript
PowerPoint: Level 2 State of Michigan Service Unit Administrative Staff
Objectives • How to … have bulleted text come across the screen…………………………………….. 3 … apply a design……………………. 4-6 … add to your applied design and/or change it……………………….…. 7 ... use the slide sorter……………...... 8-10 … print your show for handouts…... 11-12 … slide transitions………………...... 13 … use custom animation………….... 14
How to Add Bullets • On the menu bar select Format. • Then select Bullet and Numbering. • Click on tab that says Bullet. • The default is a normal bullet like the ones I am using or you can choose a different style. • Under Wingdings you have a lot to choose from. • You can choose a different color or size for your bullet.
How to Have Bulleted Text Come Across the Screen • Type your text • You can put bullets in front of your sentences or opt not to • Make sure you have the box with handles around your text • Click on Slide Show on Menu bar and then click on custom animation. • Choose the animation you would like to make a point from the Add Effect ~ Entrance, Emphasis, Exit or Motion Paths.
How to Apply a Design to Your Show • Click on Format on the Menu bar and click on Slide Design. • There are many designs to choose from! • Choose a design and click on Apply. It will put a design throughout your show.
How to Add to Your Applied Design and/or Change It • Under format select Background. • You can change the color of your background, text, shadow etc. • To change the color of a background select it, then click on change color. It is much easier to use the standard versus color palate to change color. • You will want to make sure that your text colors and designs all match. • To easily change a font color at any time highlight your text and click on the large A at the bottom of the screen and choose a color.
How to Use the Slide Sorter and Put Your Show Together • Under View select Slide Sorter. You may drag the slides to the position you would like them in the show. • To view your slide show you may select Slide Show on the Menu Bar and View Show. To get out of the show at any time just press escape. • If you want to see a previous slide when you are in the middle of a show use your up and down keys on your keyboard.
How to Use the Slide Sorter (Continued) • If you want your show to loop continuously you must select Slide Show on the Menu Bar and then select Set Up Show. Click on loop continuously and then OK. • Then go to Slide Show on the menu bar and click on Slide Transition. Then check in the box Automatically After. Put 5-8 seconds in the box depending on how much text you have for people to read.
How to Print Your Show for Handout Use • Select File from Menu Bar and then Print. • There are a number of options to choose from. • Slides without animations will print one slide per piece of paper. • Handouts 2 slides per page saves paper and is easy to read. • Handouts 3 slides per page has an area to take notes on the right hand side of the page next to each slide. • Handouts 6 slides saves paper but the slides are very small.
Handout 3 slides per page
Slide Transitions • Click on Slide Show on the menu bar and pull down to slide transition. • Choose a transition. You can apply a transition between each slide. You can also apply the same transition to all slides at the same time. • This is where you choose how to advance by mouse click or automatically with a timing inserted. (if you loop your show you need to choose the automatic timing and choose a timing. • Choose a sound if you want sounds between slides.
How to Use Custom Animation • Under Slide Show on the Menu Bar select Custom Animation. • Select the text and animation. You can change the order of graphics and text at this screen. • You can select timings. • It has a nice preview option so you an adjust it as you are working.
PowerPoint Draft Design your PowerPoint
Practice Time • Each staff member has completed a Questionnaire. From a blind draw, pick a staff member. • Design a PowerPoint Presentation of that staff member using information from the Questionnaire. • Each frame can have information describing that person. • Refer to the handout to begin your presentation. • Presentations need to be at least 6 frames.