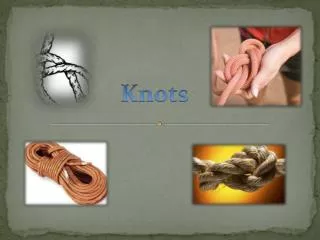
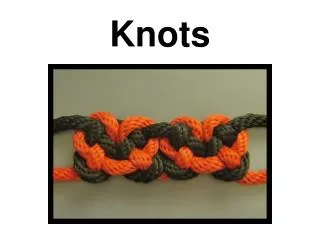
Knots
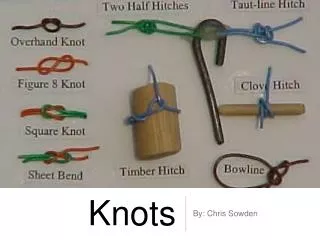
Knots. Rope Characteristics. Bowline. T he bowline has been called the king of knots. It is a useful knot for forming a loop and it is easy to untie, even after putting it under stress. It will never slip or jam if properly made. Bowline. Origin

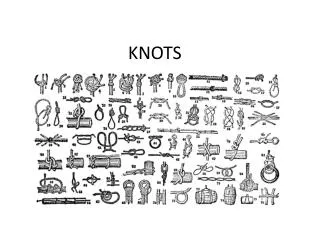
Knots
E N D
Presentation Transcript
Bowline The bowline has been called the king of knots. It is a useful knot for forming a loop and it is easy to untie, even after putting it under stress. It will never slip or jam if properly made.
Bowline Origin Bowline was used to refer to a rope that ran from the forward end of a ship to a square-sail yard so as to prevent it being accidentally blown inside out.
Bowline Step 1
Bowline Form a loop a short distance from the end - allow for the size of the loop and the knot itself. Step 2
Bowline Form a loop a short distance from the end - allow for the size of the loop and the knot itself. Pass the end of the rope through the loop Step 3
Bowline Form a loop a short distance from the end - allow for the size of the loop and the knot itself. Pass the end of the rope through the loop as though making a simple knot (a half-hitch). Step 4
Bowline Form a loop a short distance from the end - allow for the size of the loop and the knot itself. Pass the end of the rope through the loop as though making a simple knot (a half-hitch). Pull the end through, Step 5
Bowline Form a loop a short distance from the end - allow for the size of the loop and the knot itself. Pass the end of the rope through the loop as though making a simple knot (a half-hitch). Pull the end through, then round Step 6
Bowline Form a loop a short distance from the end - allow for the size of the loop and the knot itself. Pass the end of the rope through the loop as though making a simple knot (a half-hitch). Pull the end through, then round the standing end, Step 7
Bowline Form a loop a short distance from the end - allow for the size of the loop and the knot itself. Pass the end of the rope through the loop as though making a simple knot (a half-hitch). Pull the end through, then round the standing end, and then back Step 8
Bowline Form a loop a short distance from the end - allow for the size of the loop and the knot itself. Pass the end of the rope through the loop as though making a simple knot (a half-hitch). Pull the end through, then round the standing end, and then back through the loop Step 9
Bowline Form a loop a short distance from the end - allow for the size of the loop and the knot itself. Pass the end of the rope through the loop as though making a simple knot (a half-hitch). Pull the end through, then round the standing end, and then back through the loop to finish the bowline. Step 10
Square (reef) Knot A square knot is used to tie two lines (ropes) together that are of a similar size. The two ends of the line which carry the load are on the same side. This knot is also called a reef knot.
Square (reef) Knot Origin The name comes from its use on older sailboats for reefing sail, by folding or rolling lower sections of canvas and then securing them with a pair of cordage reefing points.
Square (reef) Knot Step 1
Square (reef) Knot Take the two bitter ends, cross them over Step 2
Square (reef) Knot Take the two bitter ends, cross them over and tie the first half knot (half hitch). Step 3
Square (reef) Knot Take the two bitter ends, cross them over and tie the first half knot (half hitch). Maintain the same rope on top (red) as you cross them over a second time to tie the second half hitch. Step 4
Square (reef) Knot Take the two bitter ends, cross them over and tie the first half knot (half hitch). Maintain the same rope on top (red) as you cross them over a second time to tie the second half hitch. Pull the ends evenly to form a Reef Knot. Add extra half hitches for safety. Step 6
Sheet Bend A Sheet Bend is used to tie two ropes together of unequal or equal size.
Sheet Bend Origin The name comes from its use in “bending” ropes to sails (sheets). Neolithic people used a know with an identical layout to tie the meshes of fishing nets.
Sheet Bend Step 1
Sheet Bend Form a loop in the thicker rope and hold it in one hand. Step 2
Sheet Bend Form a loop in the thicker rope and hold it in one hand. Pass the thinner piece of rope Step 3
Sheet Bend Form a loop in the thicker rope and hold it in one hand. Pass the thinner piece of rope through the loop Step 4
Sheet Bend Form a loop in the thicker rope and hold it in one hand. Pass the thinner piece of rope through the loop then round the loop. Step 5
Sheet Bend Form a loop in the thicker rope and hold it in one hand. Pass the thinner piece of rope through the loop then round the loop. Take care to go round the short end first Step 6
Sheet Bend Form a loop in the thicker rope and hold it in one hand. Pass the thinner piece of rope through the loop then round the loop. Take care to go round the short end first then round the long end. Step 7
Sheet Bend Form a loop in the thicker rope and hold it in one hand. Pass the thinner piece of rope through the loop then round the loop. Take care to go round the short end first then round the long end. Finally, tuck the smaller rope Step 8
Sheet Bend Form a loop in the thicker rope and hold it in one hand. Pass the thinner piece of rope through the loop then round the loop. Take care to go round the short end first then round the long end. Finally, tuck the smaller rope back under itself Step 9
Sheet Bend Form a loop in the thicker rope and hold it in one hand. Pass the thinner piece of rope through the loop then round the loop. Take care to go round the short end first then round the long end. Finally, tuck the smaller rope back under itself to finish the Sheet Bend. Step 10
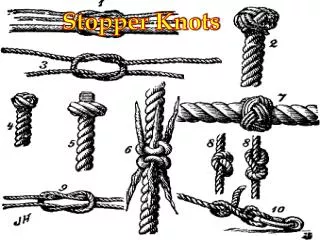
Figure Eight The Figure Eight Knot is a stopper knot that is easy to untie after using.
Figure Eight Origin The nautical name for the figure eight know is Flemish Knot, implying some kind of western Germanic source.
Figure Eight Step 1
Figure Eight In the rope end, form a loop by twisting a bight of the rope. Step 2
Figure Eight In the rope end, form a loop by twisting a bight of the rope. Then pass the rope end round the rope, i.e., take the longest journey not the shortest, Step 3
Figure Eight In the rope end, form a loop by twisting a bight of the rope. Then pass the rope end round the rope, i.e., take the longest journey not the shortest,and through the loop to make the Figure Eight. Step 4
Alpine Butterfly The Alpine Butterfly Knot or Lineman’s Loop provides a secure loop in the middle of a piece of rope.
Alpine Butterfly Origin The Alpine Butterfly Knot is a classic old knot, with a name of obvious European origin.
Alpine Butterfly Wrap the rope around your hand. Step 1
Alpine Butterfly Wrap the rope around your hand. At the end of turn one, Step 2
Alpine Butterfly Wrap the rope around your hand. At the end of turn one, position the rope close to your fingertips. Step 3
Alpine Butterfly Wrap the rope around your hand. At the end of turn one, position the rope close to your fingertips. Continue round Step 4
Alpine Butterfly Wrap the rope around your hand. At the end of turn one, position the rope close to your fingertips. Continue round and complete turn two back near your thumb. Step 5