Visual Propaganda:
Visual Propaganda:. The Bayeux Tapestry. The Bayeux Tapestry. 231 feet long, 20 inches high Actually an embroidery, not a tapestry Produced around 1080 to dedicate a cathedral. Vital Statistics.

Visual Propaganda:
E N D
Presentation Transcript
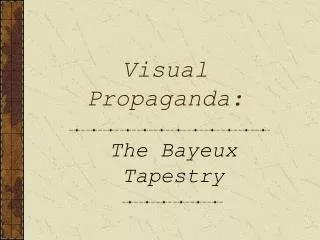
Visual Propaganda: The Bayeux Tapestry
The Bayeux Tapestry • 231 feet long, 20 inches high • Actually an embroidery, not a tapestry • Produced around 1080 to dedicate a cathedral Vital Statistics
“The most important relic to survive from the eleventh century.” “A stitched chronicle of the battle.” Who commissioned it? How and where was it made and how did it manage to survive, when so little else did from those times? What does it tell us of the Battle of Hastings?
Edward the Confessor in 1064, informing Earl Harold that he must leave for Normandy to pay homage to Duke William and to confirm the agreement made between Edward and William in 1051 that William shall be king of England on Edward's death.
William and Harold discussing matters of relevance. William would have tried to persuade Harold of his rightful claim to the English throne whilst Harold using all his political astuteness and guile would attempt to avoid this ultimate admission.
Harold realized that he had no choice but to pay homage to William. This plate depicts the act of homage over holy relics.
The body of Edward the Confessor being carried to Westminster to be laid to rest in the abbey that he himself had built.
The day following the death of Edward the Confessor, Harold's coronation took place in Westminster Abbey. He was the first king to be enthroned there
The news of Harold being crowned King of England angered and infuriated William. After persuading his Counts and Barons to join him on this crusade, of which he had also managed to acquire Papal support, he sets about constructing ships to invade England.
Loading of the ships prior to crossing the English Channel. Note the chain mail hauberks carried on poles which gives some idea of how heavy they must have been. Swords are also being carried by the men. The wagon on the right contains a barrel of water or even wine. Above this are the spears and helmets.
William joining his fleet that would probably now be at St Valery sur Somme, awaiting ideal conditions to sail across the English Channel and the start of the invasion.
Haley's Comet, first seen on the 24th April 1066 and considered by the Saxons to be a bad omen. Omens were taken very seriously in those days.
William's invasion force landing at Pevensey. A landing party disembarked to survey the area including William who fell on his face in the mud ( which was considered a bad omen, but was quickly dismissed by him.) It was seen that Pevensey was totally unsuitable to unload his ships being a flood plane and very marshy. It is now thought that only a small contingent of his force stayed on land and headed for Hastings. The rest stayed on their ships and sailed 20 km east to rendezvous with them there.
A charge by the Norman Cavalry on the Saxon shield wall. The spears were held above the shoulder for a more efficient throwing action.
The Saxon shield wall that William and his men found so hard to break down. The closely joined shields created a barrier to arrows and spears. William had never met this form of resistance before and was at a loss at some stages.
A vivid illustration of the effectiveness of the Danish battle axe. This long handled axe had the ability, with one swing, to kill the rider and the horse.
When things were not going well for William after the collapse of his left flank. Word spread around that he had been killed. To show his men that he in fact was still alive, he raised his mask and rode along his bedraggled line so that his men could see his face. If he had not done this, the battle would have been over.
Following the alleged successful implementation of the feigned retreat tactic, William decided for an all or nothing charge on the Saxon line. His archers had had very little to do after shooting of their arrows because within a few minutes they had run out. Saxons rarely used archery in battle and so no arrows were returned. William decided to bring them forward and use them as a barrage weapon by firing just over the shield wall whist his foot soldiers and cavalry would advance head on. The depleted Saxon wall broke down under this tactic and signaled almost the end of the battle.
This part of the tapestry depicts the death of Harold's brothers, Gyrth and Leofwin.
The death of Harold. He is pictured holding or trying to remove an arrow from his eye. Not content with his injury, the Normans proceeded to hack him further until there was no question.
This is the final part of the tapestry that survives and shows the remains of the Saxon army in retreat.