Download
1 / 44
440 likes | 650 Vues
With Logic (https://www.logic.ky) DVR you have the power! Pause to get a snack, rewind then fast-forward live TV, even create your own instant replays or watch in slow motion. Record your favourite shows and watch them when you want. You never have to miss a game, episode, movie premiere or season finale again! Read this manual carefully before using the product. The cautions described below contain important information about safety. Visit our website know about Cayman Internet, TV and Phone services and packages.

E N D
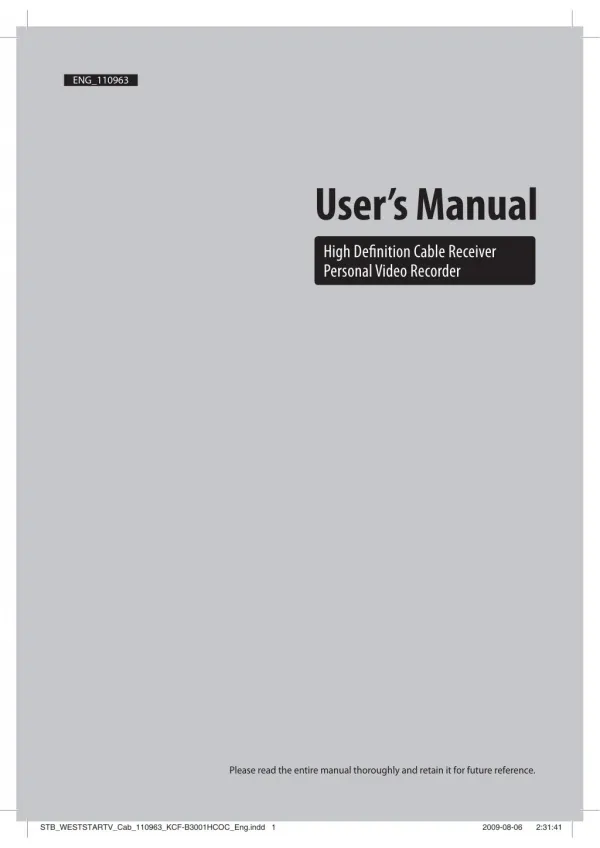
ENG_110963 User’s Manual High Definition Cable Receiver Personal Video Recorder Please read the entire manual thoroughly and retain it for future reference. STB_WESTSTARTV_Cab_110963_KCF-B3001HCOC_Eng.indd 1 2009-08-06 2:31:41
Important safety instructions Safety Warnings CAUTION RISK OF ELECTRIC SHOCK DO NOT OPEN CAUTION : To reduce the risk of electrical shock, do not remove the cover. No user serviceable parts inside. Refer any servicing to qualified Service personnel. This symbol indicates that dangerous voltage consisting a risk of electric shock is present within this unit. This symbol indicates that there are important operating and maintenance instructions in the literature accompanying this unit. Read this manual carefully before using the product. The cautions described below contain important information about safety, and are categorized into: Danger, Warning and Notice. The company will not take any responsibility for accidents or damage resulting from careless handling by the user. Danger If the user mishandles the product, there is a risk of loss of life or critical injury. ? Connect the power cord only to A/C outlets as specified by the user manual or product specification. If the power code is connected to a non-specified A/C outlet, it could result in fire or electric shock. ? The product must not be exposed to water or liquid of any sort, or be exposed to drips or splashes. It could result in fire or electric shock. ? Do not place heavy objects, including the product itself, on top of the power cord. If it is damaged, it could result in fire or electric shock. ? Do not place metal objects on top of the apparatus. If metal objects fall into the apparatus, it could result in fire or electric shock. ? Do not repair, disassemble or modify this apparatus yourself. It might cause fire or electric shock. If internal checking or maintenance is needed, please contact your service center or agency. ? Do not block or cover any ventilation opening. A fire might result from overheating. ? Turn off and unplug the power as quickly as possible during electric storms. Failure to do so could result in fire or electric shock. ? Remove the antenna’s power plug from the outlet as quickly as possible during electric storms. Failure to do so could result in fire or electric shock. ? Do not drop the apparatus (for example by putting it in a place where it may fall) or subject it to impact. The product might be damaged. If it is damaged, please turn off the power and remove the plug from the power outlet, or fire or electric shock may result. ? Never touch the power cord with wet hands. It could result in an electric shock. 2 - ENG STB_WESTSTARTV_Cab_110963_KCF-B3001HCOC_Eng.indd 2 2009-08-06 2:31:42
Warning If the product is mishandled, the user might receive a serious or minor injury. Damage or loss to the user’s property might also result. ? The product must not be exposed to water or liquid. If the apparatus is exposed to drips or splashes, it might cause a problem that cannot be repaired. ? Do not repair, disassemble or modify this apparatus yourself. It might be seriously damaged, possibly beyond repair. ? Turn off the power and unplug the power cord as quickly as possible during electric storms. They might damage the apparatus. ? Remove the antenna’s power plug from the outlet as quickly as possible during electric storms, or the apparatus might be damaged. ? Data recorded in the HDD might be lost due to a shock, lightening or electricity failure. The user must back up his or her own data, and the company does not take any responsibility for failure to do so. Notice If the product is mishandled, it might cause minor damage. ? If the apparatus becomes marked, clean it gently with a soft cloth or towel. Never use chemical solvents such as benzene, thinner, acetone or other solvents. The surface of the apparatus might become discolored and the paint might peel. ? Do not place or keep the apparatus in the following situations. Doing so might cause problems. - Where it is too hot or cold. - Where there is high humidity. - Where there are excessive temperatures, for example in front of airconditioners or heating vents. - Where there is dust or soot. - In confined areas where the heat cannot be released. - Where it is exposed to direct sunlight. ? Turn the apparatus off or unplug the power cord if it is to remain unused for a long period of time. ? Do not place heavy objects on top of this apparatus. It might cause malfunction or damage. ? If the apparatus is so seriously damaged that it cannot be repaired, or has stopped working altogether, dispose of it properly in accordance with the local laws or regulations in your area. Disposal Batteries and packaging material do not belong in domestic waste. The batteries must be delivered to a collection center for old batteries. The separate disposal of packaging materials protects the environment. Disposal old electrical & electronic equipment (Applicable in the European Union and other European countries with separate collection systems) This symbol on the product or on its packaging indicates that this product shall not be treated as household waste. Instead it shall be handed over to the applicable collection point for the recycling of electrical and electronic equipment. By ensuring this product is disposed of correctly, you will help prevent potential negative consequences for the environment and human health, which could otherwise be caused by inappropriate waste handling of this product. The recycling of materials will help to conserve natural resources. For more detailed information about recycling of this product, please contact your local city office, your household waste disposal service or the shop where you purchased the product. ENG - 3 STB_WESTSTARTV_Cab_110963_KCF-B3001HCOC_Eng.indd 3 2009-08-06 2:31:43
Contents 1. Introduction 1.1 Package Contents .............................................................................................................................................6 1.2 Front Panel ...........................................................................................................................................................6 1.3 Smartcard ............................................................................................................................................................7 1.4 Rear Panel ...........................................................................................................................................................8 1.5 Remote Control .................................................................................................................................................9 2. Setup 2.1 Connecting the Antenna ............................................................................................................................11 2.2 Connecting Your Equipment.....................................................................................................................11 3. Easy installation 3.1 Language ..........................................................................................................................................................15 3.2 TV ..........................................................................................................................................................................15 3.3 Screen Type ......................................................................................................................................................15 3.4 Resolution .........................................................................................................................................................16 3.5 Time .....................................................................................................................................................................16 3.6 Search .................................................................................................................................................................16 4. Basic Functions 4.1 Changing the Channel.................................................................................................................................17 4.2 Volume Control ...............................................................................................................................................17 4.3 Audio...................................................................................................................................................................17 4.4 Subtitle ...............................................................................................................................................................18 4.5 Teletext ...............................................................................................................................................................18 4.6 Sleep Time ........................................................................................................................................................18 4.7 Channel List .......................................................................................................................................................18 4.8 Channel Banner ..............................................................................................................................................19 4 - ENG STB_WESTSTARTV_Cab_110963_KCF-B3001HCOC_Eng.indd 4 2009-08-06 2:31:43
5. Menu Guide 5.1 PVR .......................................................................................................................................................................20 5.2 Program Guide ................................................................................................................................................23 5.3 Edit Channel List .............................................................................................................................................24 5.4 Installation ........................................................................................................................................................25 5.5 System Setting ................................................................................................................................................26 5.6 CA System .........................................................................................................................................................31 6. PVR Guide 6.1 Recorded List ...................................................................................................................................................32 6.2 Progress Bar ......................................................................................................................................................33 6.3 Playback .............................................................................................................................................................33 6.4 Time Shift Recording ....................................................................................................................................36 6.5 Instant Recording ..........................................................................................................................................36 6.6 Multi Channel Recording ............................................................................................................................36 6.7 Stop Recording ...............................................................................................................................................36 6.8 MP3/Photo........................................................................................................................................................37 7. Supplement 7.1 Troubleshooting .............................................................................................................................................38 7.2 Technical Specification ................................................................................................................................39 7.3 Menu Map.........................................................................................................................................................40 7.4 Remote Control TV Setting ........................................................................................................................41 ENG - 5 STB_WESTSTARTV_Cab_110963_KCF-B3001HCOC_Eng.indd 5 2009-08-06 2:31:43
1. Introduction 1.1 Package Contents Make sure that the following accessories are supplied with your receiver. Remote control AAA Batteries (2 EA) Video/Audio cable User’s manual 1.2 Front Panel 1 2 3 4 7 8 9 0 5 6 / Channel (Program) / Volume Press to change the channel or select a menu item. Press to adjust the volume or select a menu item. Press to select a menu, or confi rm the selected operation. Press to stop a recording or playback. Press to turn the receiver power on or off . Press to record a program. Press to display the main menu on the screen or return to the previous menu. Press to exit and return to the previous menu and screen. Displays the current state such as channel, time, and massage. Press to change resolution of HD picture. (1080i (default), 720p, 480p). Connect the USB memory with USB cable. Insert a Smartcard. 1 OK STOP STANDBY (Power) REC 2 3 4 5 MENU 6 7 8 9 10 Smartcard Slot B The front of the product is subject to change without notice. EXIT Display window V-Format USB 6 - ENG STB_WESTSTARTV_Cab_110963_KCF-B3001HCOC_Eng.indd 6 2009-08-06 2:31:45
1.3 Smartcard Caution Please do not plug in the main power supply cord until you have finished all of the connections! Inserting a Smart card A Smart card looks similar to a credit card and entitles you to view and listen to all the channels you choose to subscribe to. The Smart card slot on the receiver can be used for Smart cards only. 1. Open the right-hand cover on the front panel of the receiver. 2. Hold the Smart card horizontally with the electronic chip (small square-shaped, gold in color) facing upwards. 3. Insert the Smart card into the top slot. Smartcard ENG - 7 STB_WESTSTARTV_Cab_110963_KCF-B3001HCOC_Eng.indd 7 2009-08-06 2:31:45
1.4 Rear Panel 1 3 5 6 0 ! @ 2 4 7 8 9 1 2 3 4 5 ANT IN LOOP OUT RF IN TV OUT VIDEO/AUDIO Connect a CATV signals. Connect to other receiver. Connect to television antenna input. Connect a television via a coaxial cable. Connect to the TV or other equipment with Video/Audio cable. Connect to the TV an external device with Component input, such as DVD. Connect a digital amplifi er output Use the HDMI cable to connect this jack to the HDMI jack on your TV for the best quality picture. Connect the USB memory with USB cable. Connect the LAN cable. Turn on and off the receiver. 90~250V AC, 50/60Hz 6 Y/Pb/Pr (Component) 7 S/PDIF (OPTICAL) 8 HDMI/DVI 9 10 RJ45 11 ON/OFF (Power switch) 12 Power supply B The rear of the product is subject to change without notice. USB 8 - ENG STB_WESTSTARTV_Cab_110963_KCF-B3001HCOC_Eng.indd 8 2009-08-06 2:31:46
1.5 Remote Control All the functions can be controlled with the remote control. Some function can also be adjusted with the buttons on the front panel of the receiver. Before you use the remote control, please install the batteries. Basic functions 1. STANDBY Press to switch between operation and standby mode. 2. SUB-T Press to enable or disable subtitle. 3. TV/STB Press to switch between TV and Receiver mode. 4. TEXT Press to see the teletext by OSD. 5. TV/RADIO Press to switch between TV and Radio. 6. GUIDE Press to display the TV/Radio program guide. 7. VOL (+/ -) Press to increase or decrease the volume. 8. MENU Press to display the main menu on the screen or return to the previous menu. 9. Color buttons Red: Press to perform functions in "PVR", “Program Guide” or “Edit Channel List” menu. Green(SORT): Press to sort channel list. Yellow: Press to perform functions in "PVR", “Program Guide” or “Edit Channel List” menu. Blue(INFO): Press to display the information box on the screen, or to perform functions in “Program Guide” or “Edit Channel List” menu. 10. Numeric buttons Press to select the channel and enter the PIN code. 11. AUDIO Press to select the audio language or the sound mode. (Mono, Left, Right, Stereo). 12. PRE-CH Press to return to the previous channel. 13. SLEEP Press to select a present time interval for automatic shut off . 14. Mute Press to enable or disable audio temporarily. 15. ?/?/?/? (Arrow buttons) Press to move the cursor to the up, down, left or right menu option. OK Press to selects a menu, or confi rms the selected operation. 16. CH (+/-) Press to change channel up and down. 17. EXIT Press to return the normal viewing mode from a menu. 1 2 3 ! @ # $ 4 5 6 % ^ 7 8 & 9 0 ENG - 9 STB_WESTSTARTV_Cab_110963_KCF-B3001HCOC_Eng.indd 9 2009-08-06 2:31:46
TV Control Buttons 1. TV STANDBY Press to turn on and off your TV. 2. TV Volume Press to increase or decrease the TV volume. 3. TV MUTE Press to enable or disable the TV audio temporarily. 4. INPUT Press to check the TV’s external connection status and select an external device. 5. TV Channel Press to change the current TV channel. 3 1 4 2 5 PVR Functions 6. Progress bar Press to display the progress bar during playback or Time Shift. 7. Record Press to record the current channel to the HDD. 8. Pause Press to pause. 9. Fast rewind Press to rewind at high speed. Each time you press this button the rewind speed is increased. 10. Play Press to play at normal speed or resumes. 11. Recorded List Press to display the recording list. 12. Stop Press to stop a recording or playback. 13. Fast forward Press to fast forward at high speed. Each time you press this button the fast forward speed is increased. 14. Instant replay Press to jump back and plays from that location. 15. Commercial Skip Press to jump ahead in a recording. 6 ! 7 8 9 0 @ # Installing Batteries in the Remote Control When inserting batteries, make sure that the polarity (+/-) is correct. B The design of the remote control may be changed without any notice in advance. $ % 10 - ENG STB_WESTSTARTV_Cab_110963_KCF-B3001HCOC_Eng.indd 10 2009-08-06 2:31:47
2. Setup There are several ways of connecting the receiver to your TV, VCR and Hi-Fi system. Consult your local supplier for assistance in setting-up your system that is best suited to your requirements. 2.1 Connecting the Antenna Connect the antenna cable (RF cable) from cable system to the ANT IN jack of the receiver. Cable system HD PVR receiver 2.2 Connecting Your Equipment 2.2.1 Connecting a TV (AV jack) Connect the receiver to a TV with AV jack, if your TV is equipped for it. HD PVR receiver Audio/Video cable TV ENG - 11 STB_WESTSTARTV_Cab_110963_KCF-B3001HCOC_Eng.indd 11 2009-08-06 2:31:49
2.2.2 Connecting a TV (Component jack) Connect the receiver to a TV with Component jack, if your TV is equipped for it. HD PVR receiver Component cable Audio cable TV 2.2.3 Connecting a TV (HDMI jack) Connect the receiver to a TV with HDMI jack, if your TV is equipped for it. HD PVR receiver HDMI cable TV B HDMI, or high-definition multimedia interface, is a next-generation interface that enables the transmission of digital audio and video signals using a single cable without compression. “Multimedia interface” is a more accurate name for it especially because it allows multiple channels of digital audio (5.1 channels). When connecting via HDMI, you do not need to connect Audio Cables. You only need to connect Audio cables when connecting via HDMI/DVI. 12 - ENG STB_WESTSTARTV_Cab_110963_KCF-B3001HCOC_Eng.indd 12 2009-08-06 2:31:52
2.2.4 Connecting a VCR Connect the receiver to a VCR with AV jack, if your VCR is equipped for it. Audio/Video cable VCR HD PVR receiver 2.2.5 Connecting a audio system Select the most appropriate procedure for your convenience. ? Connect the receiver to a Hi-Fi system using an Audio (stereo) cable. ? Connect the receiver to a digital amplifi er for higher quality sound using an S/PDIF optical cable. Audio cable Hi-Fi system HD PVR receiver Optical cable Digital amplifi er ENG - 13 STB_WESTSTARTV_Cab_110963_KCF-B3001HCOC_Eng.indd 13 2009-08-06 2:31:55
2.4 Turning On and Off Your Receiver Power On 1. Connect the power cord of the receiver to a wall outlet. 2. Turn on the power switch located at the back of the receiver. 3. Press the STANDBY button on the front of the receiver or on the remote control. 3 2 1 3 . Power Off Press the STANDBY button again. The receiver will display “Off”. 14 - ENG STB_WESTSTARTV_Cab_110963_KCF-B3001HCOC_Eng.indd 14 2009-08-06 2:31:56
3. Easy installation Before you watch the television or radio program, you must perform the installation procedure first. Therefore you will see only “Easy Installation” menu at first when you plug into your system. The Easy Installation gives you the convenience of selecting various languages, adjusting the time and channel search. 3.1 Language The first option in “Easy Installation” is to select the required language of the Menu, Audio, or Subtitle. Press the ?/? button to select the required language and press the OK button to change the language. ? The Language of the Menu, Audio, or Subtitle will be changed to the selected language. 3.2 TV You can set the aspect ratio of your TV. Press the ?/? button to select the required option and press the OK button. ? If you have a TV set with 4:3 picture format, select 4:3 TV and if you have a TV set with 16:9 picture format, select 16:9 TV. 3.3 Screen Type You can select the display format according to the TV screen ratio. Press the ?/? button to select the required option and press the OK button. 4:3 TV Auto, Letterbox, Center cut 16:9 TV Auto, Pillarbox, Pan and scan ENG - 15 STB_WESTSTARTV_Cab_110963_KCF-B3001HCOC_Eng.indd 15 2009-08-06 2:31:57
3.4 Resolution The receiver supports various video resolutions (480p, 720p, and 1080i). Press the ?/? button to select the required option and press the OK button. 3.5 Time You can set your local time according to your location. 1. Press the ?/? button to select the current time zone from standard time and then press the OK button. When you press the ?/? button, the time zone will move by 30 minutes. 2. If you want to turn the Day Light Saving on, press the?/? button to select “On” and press the OK button. 3.6 Search You can search the channels according to the automatic or manual mode. Please wait until the channel search is complete. Press the ?/?button to select the required option and then press the ?/?/Numeric button to set it as you want. B For more information, refer to 5.4 Installation. 16 - ENG STB_WESTSTARTV_Cab_110963_KCF-B3001HCOC_Eng.indd 16 2009-08-06 2:31:58
4. Basic Functions 4.1 Changing the Channel After the television channels have been programd, you will see program information for a few seconds each time you change the channels. You can change the current channel using one of the following methods. ? You can change the channel using the CH +/- button and change to required channel by entering its channel number with the Numeric (0-9) buttons. ? Press the PRE-CH button to return to the previous channel. ? Press the TV/RADIO button to switch between TV channels and radio channels. ? You can change channel by using the channel banner, simple channel list, or program guide. 4.2 Volume Control ? Press the VOL +/- buttons to adjust the volume level. Volume level bar is displayed. ? Press the Mute button to temporarily stop the volume. To cancel mute, press the Mute button again or press the VOL +/- buttons. 4.3 Audio If the current program is available in multiple audio languages, you can select the language that you wish to listen to. 1. Press the AUDIO button to display the audio menu. 2. Press the ?/? button to select the required audio language and press the OK button. 3. Press the ?/? button to select audio output (Left, Right, or Stereo). B You can change a default audio language in the system setting menu mode. ENG - 17 STB_WESTSTARTV_Cab_110963_KCF-B3001HCOC_Eng.indd 17 2009-08-06 2:31:58
4.4 Subtitle If the current program provides subtitle information, you can select the language for the subtitle. 1. Press the SUB-T button to display the subtitle menu. 2. Press the ?/? button to move to the corresponding subtitle and press the ?/? button to select the required subtitle language. ? The subtitles will be displayed on the screen. 4.5 Teletext If the current program provides teletext, you can watch teletext. Press the TELETEXT button. The teletext is displayed on the screen. 4.6 Sleep Time You can select a time period of between 10 and 90 minutes after which the receiver automatically switches to standby mode. Press the SLEEP button to select the preset time interval (Off~90) for staying on. 4.7 Channel List 1. When you press the OK button during receiving service stream, you can view simple channel list. 2. Press the ?/? button to select the required channel and then press the OK button. 3. Press the TV/RADIO button to switch between TV channels and radio channels. To get the channel sort list 1. Press the Green button to display the channel sort list. 2. Press the ?/? button to select the sort list you want and then press the OK button to get it. 18 - ENG STB_WESTSTARTV_Cab_110963_KCF-B3001HCOC_Eng.indd 18 2009-08-06 2:32:00
4.8 Channel Banner When you press the Blue button during receiving service stream, you can view channel banner. ? Press the ?/? button to select the channel and then press the OK button. ? Press the ?/? button to view to previous or next program information. ? Press the Blue button to view to the program information. 2 3 4 1 7 8 9 0 5 6 1 2 3 4 Program name Program broadcasting time Detailed program infromation Icons Displayed when the program is recording. Displayed when the channel provides HD programs. Displays the resolution of the current programs. Displayed when the program is broadcast in Dolby Digital. Displayed when the program is broadcast in AAC Audio. Displayed when the program is broadcast in subtitle language. Displayed when the program is broadcast in teletext. Displayed when the channel is a locked channel. Displayed when the channel is a scrambled channel. Indicates the minimum level of age for viewing the program. 5 6 7 8 9 10 Current channel number Current program broadcasting time Next program information Current channel name Current time Current program progress bar ENG - 19 STB_WESTSTARTV_Cab_110963_KCF-B3001HCOC_Eng.indd 19 2009-08-06 2:32:00
5. Menu Guide 5.1 PVR 5.1.1 File List File List manages the files and directories in the built-in HDD. 1. Press the ?/? button to select “File List” on the PVR menu and press the OK button. 2. Press the ?/? button to select “AV”, “MP3”, or “Photo” and press the OK button. The files and directories saved in the HDD will appear. 3. Press the ?/? button to select “AV”, “MP3”, or “Photo” and press the OK button. AV Directory that saves recorded files. MP3 Directory that saves MP3 files. Photo Directory that saves photo image files. Editing the File/Folder Lists 1. Press the Yellow button to display the edit menu on the File List menu. 2. Press the ?/? button to select the required option and press the OK button. 3. Use the ?/?/?/?/OK button to edit the selected file/folder list. New Directory To create a new directory in the current directory. Rename To change file or directory names. Characters such as 0~9, a~z, and A~Z can be used. Delete To delete a file or directory. Move To change the position of the files. Using the ?/? button, select the files you want to move and press the OK button. Copy To copy the file to built-in HDD or USB memory. Using the ?/? button, select the files you want to move and press the OK button. B The names of the basic directories cannot be changed. 20 - ENG STB_WESTSTARTV_Cab_110963_KCF-B3001HCOC_Eng.indd 20 2009-08-06 2:32:01
Sorting the File/Folder Lists 1. Press the Green button on the File List screen. The file sort menu will appear. 2. Press the ?/? button to select the arrangement method and press the OK button. Title To arrange files in file name order. Date To arrange files in date order. 5.1.2 Reservation You can set reserved recording functions including adding, changing and deleting reserved recordings. 1. Press the ?/? button to select “PVR” in the main menu and press the OK button. 2. Press the ?/? button to select “Reservation” and press the OK button. Timer screen is displayed. Adding 1. Press the Red button to display the add screen. 2. Press the ?/? button on the add screen to select the items for setting. Channel To select the channel you want to record. Mode To select the interval for the reserved recording. You can choose to record once, daily or weekly. Date To set the date for the reserved recording. Start To set the time the reserved recording starts. End To set the time the reserved recording ends. If end time is passed, the reserved recording will stop. 3. Press the Red button to save. Changing 1. Press the ?/? button to select a reserved recording to be change and press the Yellow button. 2. When the edit screen appears, change the reserved recording in the same way as you did with adding. Deleting ? Pressing the Green button on the edit screen deletes the selected recording list only. ? To delete all reserved recording lists, press the Green button on the Timer screen and then press the OK button.. B If you skip a reserved channel, or delete it, the reserved settings are canceled. ENG - 21 STB_WESTSTARTV_Cab_110963_KCF-B3001HCOC_Eng.indd 21 2009-08-06 2:32:02
5.1.3 Format HDD You can format (erase) the disk drive if necessary. 1. Press the ?/? button to select “PVR” in the main menu and press the OK button. 2. Press the ?/? button to select “Format HDD” and press the OK button. 3. Enter the PIN code using the Numeric (0~9) button and press the OK button. ? The PIN code preset to 0000 from the factory. ? The code can be changed from the “Change PIN Code” menu. 5.1.4 PVR Setting You can use the PVR functions effectively by setting the following PVR options. 1. Press the ?/? button to select “PVR” in the main menu and press the OK button. 2. Press the ?/? button to select “PVR Setting” and press the OK button. The PVR Setting option is displayed. 3. Select the required option and set it as you want. Guard Time Start To set the guard time start of the reserved recording. Guard Time End To set the guard time end of the reserved recording. Default Record Duration To set the default record duration. Instant Replay To set the interval of instant replay time. Commercial Skip To set the interval of skip time. 22 - ENG STB_WESTSTARTV_Cab_110963_KCF-B3001HCOC_Eng.indd 22 2009-08-06 2:32:03
5.2 Program Guide The program guide displays program information about each channel, based on the date and time. You can also reserve a recording by pressing the ● (Record) button. 5.2.1 Viewing the Program Guide Information 1. Press the ?/? button to select “Program Guide” on the main menu and press the OK button. ? You can access program guide simply by pressing the GUIDE button on the remote control. 2. Press the EXIT or GUIDE button to exit the program guide screen. ?/?/?/? To move the cursor to the up, down, left, or right. OK To switch the selected channel. (among the currently serviced programs) Red To check the program guide on the required date. Green To sort the channel lists. Blue In case detailed info content is too long to check, you can check its information as a long lists form, and resize its lists by pressing Blue button. Record To reserve recording of the channel. B The Program Guide information might not be supported by the service providers. 5.2.2 Recording Reservation by Program guide You can set a program to be record at a specific time by program guide. 1. Press the ?/?/?/? button to select to the program to be record and press the OK button. 2. Select the required option and set it as you want. 3. Press the Red button to save. ? The reservation icon is displayed. ? You can check the reserved recording list by using the "PVR" > “Reservation” menu. ? You can also delete or edit the reserved recording list. B For more information about recording reservation, refer to 5.1.2 Reservation. ENG - 23 STB_WESTSTARTV_Cab_110963_KCF-B3001HCOC_Eng.indd 23 2009-08-06 2:32:04
5.3 Edit Channel List You can create favorite lists, lock, delete, or skip channel. 1. Press the ?/? button to select “Edit Channel List” in the main menu and press the OK button. 2. Press the ?/? button to select the required option and press the OK button. 3. Among the all channel lists, the selected channel can be moved to the right folder of “Lock, Delete, or Skip, Favorite (1~16)”. ? To add from edit list at right folder, press the OK button. ? To remove the channel list from edit list at right folder, press the OK button. ? To sort the channels, press the Green button. Select the required arrangement and press the OK button. ? If you want to include all the channels in the channel list, press the Red button. ? To rename the channel, press the Yellow button. ? To rename the favorite, press the Blue button. 4. To confirm the channel list, press the MENU button or EXIT button and press the OK button to save. Lock You can lock channels in any of the list in order to prevent e.g. your children from watching. 1. Press the ?/? button to select the channel you want to lock and press the OK button. 2. Repeat the procedure for each channel you want to lock. When you lock a channel in any list, the channel will be locked automatically in all other lists. Delete You can delete the TV or Radio channel from the current list. Press the ?/? button to select the channel you want to delete and press the OK button. 24 - ENG STB_WESTSTARTV_Cab_110963_KCF-B3001HCOC_Eng.indd 24 2009-08-06 2:32:05
Skip You can skip the TV or Radio channel from the current list. Press the ?/? button to select the channel you want to skip and press the OK button. ? To recover the skipped channel, press the OK button from edit list. Favorite (Favorite 1~16) You can edit favorite TV and Radio list. This enables you to create the 16 favorite TV and Radio lists. Press the ?/? button to select the channel you want to edit on the favorite list and press the OK button. 5.4 Installation You can search the channels according to the automatic or manual mode. Please wait until the channel search is complete. Search 1. Press the Numeric buttons to set the Start Frequency and Symbol Rate of the cable signal. 2. Press the ?/? button to select the constellation (“Auto, 16, 32, 64, 128, or 256QAM”). 3. Press the ?/? button to select the spectral invert (“Auto, Off, or On”). 4. Press the Numeric buttons to set the Network ID. 5. Press the OK button and searching will start. 6. When searching is finished, press the OK button to save the channel list. 7. Press the ?/? button to select "Antenna Power"and press the ?/? button to select "On" or "Off". ENG - 25 STB_WESTSTARTV_Cab_110963_KCF-B3001HCOC_Eng.indd 25 2009-08-06 2:32:06
5.5 System Setting If you want to customize the system to suit you better, you can specify some settings from the submenus in the “System Setting” menu. 1. Select “System Setting” in the main menu with the ?/? buttons and press the OK button. 2. Enter the PIN code using the Numeric (0~9) button. 3. Press the ?/? button to select the sub menu and press the OK button. B The PIN code preset to 0000 from the factory. 5.5.1 Language You can select the required language of the Menu, Audio, or Subtitle. Menu Language You can select in which language the menus will be shown. Press the ?/? button to move to the language you want and press the OK button. First audio language/Second audio language You can change default language for audio when changing services. Press the ?/? button to move to the language you want and press the OK button. B ? Select the audio language between the first and second audio language. ? If the first audio language is not selected, then the second audio language is selected by default. (If both the first and second audio language are not available, the audio language is set to the first audio language the selected channel supports for.) First subtitle language/Second subtitle language You can change default language for subtitle when changing services. Press the ?/? button to move to the language you want and press the OK button. B ? If you cancel the subtitle function, select the off. ? Select the subtitle language between the first and second subtitle language. ? If the first subtitle language is not selected, then the second subtitle language is selected by default. (If both the first and second subtitle language are not available, the subtitle language is set to the first subtitle language the selected channel sup- ports for.) 26 - ENG STB_WESTSTARTV_Cab_110963_KCF-B3001HCOC_Eng.indd 26 2009-08-06 2:32:07
5.5.2 Time You can set the Local time, Wakeup time, and Sleep time. Time Offset/Daylight Saving You can set your local time according to your location. 1. Press the ?/? button to select the current time zone from standard time, then and press the OK button. When you press the ?/? button, the time zone will move by 30 minutes. 2. If you want to turn the Day Light Saving on, press the ?/? button to select “On” and press the OK button. Wakeup Time/Sleep Time You can set the On/Off timers so that the receiver will switch on or off automatically at the time you select. 1. Press the ?/? button to select the required option (“Off”, “Once”, “Daily”, or “Weekly”). 2. Use the Color/?/?/?/? button to select the year, month, and day and then press the OK button. 3. Press the ?/? button to move the cursor and then use the Numeric (0~9) button enter the hour and minute. ENG - 27 STB_WESTSTARTV_Cab_110963_KCF-B3001HCOC_Eng.indd 27 2009-08-06 2:32:07
5.5.3 Lock Control Channel Lock When you change “Channel Lock” to “On” or “Off”, service channel can get or not from that set values. ? If you select “On”, you need PIN code every time you select the lock channel program as you set in the channel control. ? If you select “Off”, you can see all channels without PIN code. Parental Rating Lock Parental Rating Lock enables you to place certain restrictions on the viewers by setting age limits. The password is required to view the blocked programs. Press the ?/? button to select to the required option and press the OK button. Menu Lock If the Menu Lock is set to “On”, the PIN code is needed to set the Edit Channel List and System Setting. Change PIN Code You can change the PIN code from the standard 0000. DO NOT FORGET IT! Without it, you are not able to access to any of the functions where the code is required. You can change password for Channel Lock and Menu Lock simultaneously. 1. Enter the current PIN code using Numeric (0~9) button on the remote control. 2. In the selected New PIN code, enter a new PIN code. 3. To verify the new PIN code, re-enter a new PIN code in the selected confirm PIN code. ? If the PIN code is correct, the message “Success” will be displayed on the screen. B If you forget the PIN code, press the Color button in sequence: Red?Green?Yellow?Blue. The PIN code will be changed to “0000”. 28 - ENG STB_WESTSTARTV_Cab_110963_KCF-B3001HCOC_Eng.indd 28 2009-08-06 2:32:08
5.5.4 AV Setting You can set various options related to input/output signals. TV You can set the aspect ratio of your TV. Press the ?/? button to select the required option and press the OK button. ? If you have a TV set with 4:3 picture format, select 4:3 TV and if you have a TV set with 16:9 picture format, select 16:9 TV. Display Format You can select the display format according to the TV screen ratio. Press the ?/? button to select the required option and press the OK button. 4:3 TV Auto, Letterbox, Center cut 16:9 TV Auto, Pillarbox, Pan and scan Resolution The receiver supports various video resolutions (480p, 720p, and 1080i). Press the ?/? button to select the required option and press the OK button. 5.5.5 RF Channel You can change the RF channel by VHF 3 or VHF4. Press the ?/? button to select the required channel and press the OK button. ENG - 29 STB_WESTSTARTV_Cab_110963_KCF-B3001HCOC_Eng.indd 29 2009-08-06 2:32:09
5.5.6 OSD Setting You can adjust the on-screen transparency and set the banner time. Menu/Teletext/Subtitle Transparency From 20% to 100% will give the variable transparency on Video and OSD screen. Press the ?/? button to select the required transparency and then press the OK button. ? The transparency will be applied on the screen. Banner Time When you switch channels, an information banner will be shown for a few seconds. You can select for how long the banner will be shown. Press the ?/? button to select the banner time (1~10sec) you want and then press the OK button. ? Each selectable time items has meaning of the interval time during a channel banner stays on changed channel screens. 5.5.7 Software Upgrade Software can be downloaded through OTA (Over The Air) or USB connection. OTA Upgrade It is possible to set up OTA upgrade manually. Please check if there is new software as pressing the OK button after entering Frequency, SymbolRate, Const.. Updated software will be downloaded. USB Upgrade You can upgrade the software using the USB jack at the back of the receiver. 1. Press the ?/? button to select “USB Upgrade” and press the OK button. 2. Press the ?/? button to select the upgrade file and press the OK button. The software upgrade will begin. 30 - ENG STB_WESTSTARTV_Cab_110963_KCF-B3001HCOC_Eng.indd 30 2009-08-06 2:32:10
5.5.8 Factory Reset Use this option only if you have to start the complete installation procedure from scratch. If you perform the Factory Reset, all your previous settings and all channels will be cleared! The default data will be loaded. 1. Press the ?/? button to select “Factory Reset” and then press the OK button. 2. If you want to reset, press the OK button, or press the EXIT button to exit this menu. 5.5.9 System Information Displays the system information: Model name, S/W, H/W, Loader version, Kernal, MAC address, Chip ID. Press the ?/? button on the Setup list to select “System Information” and then press the OK button. 5.6 CA System The menus are provided by the CA module and its smart card. Your receiver is equipped with 1 slot of smart card. Plug in the appropriate a valid smart card. You will then have access to the respective scrambled and Pay-Per-View services provided. Insert the smart card into the slot. The smart card determines the programs that can be de-scrambled. The smart card contains your subscription details so that you can view your entitlement. ? If you do not insert the smart card, you will see the message “Insert the valid smart card”. ? If you insert the smart card into the slot then you can watch your selected channel. ENG - 31 STB_WESTSTARTV_Cab_110963_KCF-B3001HCOC_Eng.indd 31 2009-08-06 2:32:11
6. PVR Guide 6.1 Recorded List You can check the recorded program on “File List”. 6.1.1 Recorded List screen Press the Recorded List button on the remote control to display the recorded list. The recorded list displays as the following. Also you can view the recorded list in the "PVR" > "File List" menu. 1 2 7 3 8 4 9 5 6 0 1 Path of present folder Recorded program list 2 3 MP3 file list 4 Photo file list 5 Thumbnail of recording 6 Used size of HDD 7 Folder icon 8 File Icon 9 File name, time, date, duration Button help 10 B When a USB memory or external HDD is connected to the USB jack or SATA jack, the USB or external HDD icon is displayed on left of File List screen. 32 - ENG STB_WESTSTARTV_Cab_110963_KCF-B3001HCOC_Eng.indd 32 2009-08-06 2:32:12
6.1.2 Play Option 1. Press the Recorded List button on the remote control. ? The recorded list will appear. 2. Press the ?/? button to select the required program and press the press the OK button. Begin To play the program from the beginning. Continue To continue to play from the previous stop point. Descramble To descramble file and store it again. Cancel To cancel playback. 3. Press the ?/? button to select “Begin” or “Continue” and press the press the OK button. ? The selected program is played back. ? When press the Progress bar button on the remote control, progress bar is displayed on the screen. ? To display the help box, press the Blue button while the progress bar appears on the screen. 6.2 Progress Bar Press the Progress bar button while watching a recorded program to display the progress bar. Progress bar displays the current play status, the recorded time, and elapsed time. 6.3 Playback The program can be played in various ways. 6.3.1 Fast-Forward/Rewind The Fast-Forward and Rewind functions enable the user to view the forward, backward or any required part of the program. ? To view forward parts press the ? (Fast Forward) button and to view previous parts press the ? (Fast Rewind) button on the remote control. ? Each time you press the button, the speed increases. (x2, x4, x8, x16, x32) ? Press the ? (Play) button at the required place to play at the recorded speed. ENG - 33 STB_WESTSTARTV_Cab_110963_KCF-B3001HCOC_Eng.indd 33 2009-08-06 2:32:13
6.3.2 Slow motion ? Press the ? (Pause) button during playback, and press the ? (Fast rewind) /? (Fast forward) button to play backward/forward as slow motion. ? Each time you press the button, the prograqmme plays at 2x, 4x, 8x, 16x, and 32x speed. ? Press the ? (Play) button to play at the recorded speed. 6.3.3 Instant Replay (Replay) button to jump back and play from that location. ? Press the When the replay is completed the program will play from the current point. ? You can set the replay time interval by using the PVR setting menu. 6.3.4 Commercial Skip ? Press the When the skip is completed the program will play from the current point. ? You can set the skip time interval by using the PVR setting menu. (Skip) button to jump forward and play from that location. 6.3.5 Direct jump 1. Press the Progress bar button on the currently playing screen. The progress bar will appear. 2. Press and hold the ?/? button to move the location icon to a time point and release the ?/? button to play the program from the specified time point. 34 - ENG STB_WESTSTARTV_Cab_110963_KCF-B3001HCOC_Eng.indd 34 2009-08-06 2:32:14
6.3.6 Repeat A-B You can set a specific block within a recorded program and play it back repeatedly. Press the Yellow button once at the start position and press the Yellow button again at the end position. The program is played back the selected block repeatedly. To stop repeat mode 1. Press the OK button. 2. Press the ?/? button to select “Offrepetition” and press the OK button. Alternatively you can use the Yellow button. 6.3.7 Bookmark Use bookmarks to search positions quickly and conveniently. 1. Press the Progress bar button on the currently playing screen. The progress bar will appear. 2. Press the Red button at a certain position to set a bookmark. 3. Press the Green button to display bookmark list and press the ?/? button to select the location you want to view. 4. To delete a bookmark, select the location you want to delete and press the Red button. ENG - 35 STB_WESTSTARTV_Cab_110963_KCF-B3001HCOC_Eng.indd 35 2009-08-06 2:32:15
6.4 Time Shift Recording The receiver automatically saves the program in the built-in hard disk drive temporarily, so that users can pause, play, fast rewind, fast forward, replay, etc. even while watching the currently broadcasting TV program. When you press the ? (Fast Rewind) or ? (Pause) button, the time shift will be start. 6.5 Instant Recording You can record a program using the built-in hard disk drive without an external media device. Press the ● (Record) button to record the current program instantly. The record icon and default record time is displayed. 6.6 Multi Channel Recording You can record two channels simultaneously. 6.7 Stop Recording 1. Press the ? (Stop) button. The stop list is displayed. 2. Press the ?/? button to select the recording list to be stop and press the ? (Stop) button. 36 - ENG STB_WESTSTARTV_Cab_110963_KCF-B3001HCOC_Eng.indd 36 2009-08-06 2:32:16
6.8 MP3/Photo You can play MP3 or photo files stored on built-in hard disk drive, USB memory, external HDD (SATA). Use a USB cable to connect the USB memory or external HDD (SATA) to the receiver. 6.8.1 Connecting the USB Memory/External HDD (SATA) 1. Save MP3 and image files into USB memory or external HDD from your PC. 2. Connect the USB memory or external HDD to USB or SATA jack on the receiver. 6.8.2 Playing back the Files 1. Press the ?/? button to select “PVR” in the main menu and press the OK button. 2. Press the ?/? button to select “File List” and press the OK button. 3. Press the ?/? button to select “MP3” or “Photo” and press the OK button. The MP3 or Photo files are displayed. 4. Press the ?/? button to select the required file and press the press the OK button. The selected file is played back. ENG - 37 STB_WESTSTARTV_Cab_110963_KCF-B3001HCOC_Eng.indd 37 2009-08-06 2:32:16
7. Supplement 7.1 Troubleshooting Problem Solution No display LED on the front panel. No power supply. ? Power cord plug in correctly. ? Ensure that the receiver is switched on. ? Check connection and correct. ? Check channel and video output and correct. No picture. ? Check the signal level, if it is low. ? Check that the RF cable is properly connected. Poor picture quality. ? Check the volume level of the TV and receiver. ? Check the mute status of the TV and receiver. ? Check the connection of audio cable. No sound. ? Point remote control directly towards the receiver. ? Check and replace batteries. ? Check that nothing blocks the front panel. Remote control does not operate. Service is not running or scrambled. ? Check that the smart card is appropriate for the selected service. You have forgotten your secret PIN code. ? Refer to change PIN code of this user’s manual. 38 - ENG STB_WESTSTARTV_Cab_110963_KCF-B3001HCOC_Eng.indd 38 2009-08-06 2:32:17
7.2 Technical Specification System Resources Flash Memory Program DRAM EEPROM 32Mbytes 256Mbytes 32KBytes MPEG TS A/V DECODING Transport stream MPEG Profile/level Input bit rate Video aspect ratio Video formats Video outputs MPEG-4/H.264 HP@L4.0 1920x1080 interface@60Hz MPEG-2 MP@HL, MPEG-4/AVC MP@L4 Max. 81,0 Mbit/Sec. 4:3, 16:9, Letter Box 480p, 720p, 1080i SD output: NTSC HD Resolution: 1080i, 720P, 480P Dolby AAC, AC-3, MPEG-1 layers 1,2 and 3 (MP3) Single Mono, Dual mono, Stereo, Joint stereo 32,0, 44,1 and 48,0 kHz Audio decoding Audio modes Sampling rate A/V & DATA INPUT/OUTPUT Y/Pb/Pr (COMPONENT) RCA (COMPOSITE), SPDIF (OPTIC), HDMI, RJ45, USB2.0 (Back Panel: 1EA, Front Panel: 1EA) Output connectors Tuner (Dual) & Channel RF input connector IEC 169-9 Female (preferable), IEC 169-9 Male (acceptable), 75 Ohm 50.5MHz ~ 858MHz 16/32/64/128/256 -15 dBmV ~ +15 dBmV 1.9M baud ~ 6.0M baud PLL Synthesize(I2C) Frequency range QAM Input dynamic range Symbol rate Channel selection system Descrambling & Access control Standard Number of smart card slots DVB common Scrambling algorithm (ETR 289) ONE slot (One smartcard slot is included in the front panel.) Front panel Connector on bottom side of smartcard ISO 7816 Part 3 Location Standard Power Supply(Internal) Input Voltage Power Consumption Protection Type AC 90-250V, 50/60Hz 45W Separate Internal Fuse SMPS Hard disk Interface Capacity SATA 250~500 Gbytes Physical Specification Operation Temperature Storage Temperature Size (W*H*D) Net weight 0˚ ~ 50˚C -20˚ ~ 60˚C 370*60*280 mm 3.0Kg ENG - 39 STB_WESTSTARTV_Cab_110963_KCF-B3001HCOC_Eng.indd 39 2009-08-06 2:32:17
7.3 Menu Map PVR File List AV MP3 Photo Reservation Format HDD PVR Setting Guard Time Start Guard Time End Default Record Duration Instant Replay Commercial Skip Program Guide Edit Channel List Installation Search Start Frequency Symbol Rate Const. Invert Network ID Antenna Power Menu Language First audio language Second audio language First subtitle language Second subtitle language Time Offset Daylight Saving Wakeup Time Sleep Time Channel Lcok Parental Rating Lock Menu Lock Change PIN Code TV Display Format Resolution VHF3, VHF4 Menu Transparency Teletext Transparency Subtitle Transparency Banner Time OTA Upgrade USB Upgrade System Setting Language Time Lock Control AV Setting RF Channel OSD Setting Software Upgrade Factory Reset System Information CA SYSTEM 40 - ENG STB_WESTSTARTV_Cab_110963_KCF-B3001HCOC_Eng.indd 40 2009-08-06 2:32:17
7.4 Remote Control TV Setting 7.4.1 Checking the Set-Up Code 1. Press the TV STANDBY button with OK button on the remote control for 2 seconds to covert to Setting Mode. ? It will convert to the Setting Mode after the LED is on. 2. Press the INFO button. ? Set-up code will blink in oder as number of 100 digits, 10 digits, 1 digits. (Only 0 is blink 10 times.) 7.4.2 Using the Three Digit Code 1. Press the TV STANDBY with OK button on the remote control for 2 seconds to convert to Setting Mode. ? It will convert to the Setting Mode after the LED is on. B Setting mode will be exited if no input is made for more than 20 seconds. 2. Point the remote control toward the TV. 3. Find the 3-digit code for your manufacturer on the list below, and enter the code by using the number buttons. ? The LED will blink once each time you enter the number. 4. Press the OK button to finish. ? The LED will blink 2 times and becomes "Off" status. B Some buttons may not work. 7.4.3 Using the Auto Search (TV CH+/-) 1. Press the TV STANDBY with OK button on the remote control for 2 seconds to convert to Setting Mode. ? It will convert to the Setting Mode after the LED is on. B Setting mode will be exited if no input is made for more than 20 seconds. 2. Point the remote control toward the TV. 3. Press the TV CH + or - button. ? The LED will blink once each time you press the button. 4. Press the OK button to finish. ? The LED will blink 2 times and becomes "Off" status. B Some buttons may not work. 7.4.4 Resetting the TV to the Factory Defaults Press the TV STANDBY with ? (Record) button on the remote control for 5 seconds. ? After the LED blinks 5 times, resets all settings to the default values. ENG - 41 STB_WESTSTARTV_Cab_110963_KCF-B3001HCOC_Eng.indd 41 2009-08-06 2:32:17
7.4.5 TV Code Lists Manufacturer/Brand Set-Up Code Number Manufacturer/Brand Set-Up Code Number ADMIRAL ADVENT AIKO AKAI ALARON AMARK AMERICA ACTION AMPRO ANAM AOC APEX DIGITAL AUDIOVOX BAYSONIC BELL&HOWELL BRADFORD BROKSONIC CANDLE CAPEHART CARVER CELEBRITY CETRONIC CINERAL CITIZEN CLASSIC CONCERTO CONTEC CORONADO CRAIG CROSLEY CROWN CURTIS MATHES CXC DAEWOO DAYTRON DENON DUMONT DWIN DYNASTY DYNATECH ELECTROBAND ELECTROHOME EMERSON FISHER FUJITSU FUNAI FUTURETECH GATEWAY GE GIBRALTER GOLDSTAR GRUNPY HALL MARK 072 081 160 161 096 247 103 006 146 248 028 112 143 043 073 043 054 055 056 080 112 058 006 004 112 015 226 076 103 043 043 072 043 096 006 002 003 004 058 164 001 043 103 120 006 002 003 004 101 103 143 043 004 043 051 143 043 054 028 164 043 143 006 004 101 143 011 072 081 120 164 043 076 103 055 004 127 143 016 043 044 125 120 004 143 011 004 073 161 043 062 001 024 076 143 005 028 043 048 076 096 155 004 051 143 151 153 154 007 057 164 028 198 246 028 043 052 249 043 242 006 073 144 160 161 004 008 009 034 056 074 091 155 081 120 004 073 004 106 119 110 112 113 127 143 028 043 004 HARLEY DAVIDSON HARMAN KARDON HARVARD HITACHI INFINITY INKEL INTEQ JBL JCB JCPENNEY JENSEN JVC KENWOOD KLOSS KTV LG LODGENET LOEWE LOGIK LUXMAN LXI MAGNAVOX MAJESTIC MARANTZ MATSUI MATSUSHITA MEGATRON MEMOREX METZ MGA MIDLAND MINERVA MINUTZ MITSUBISHI MOTOROLA MTC MULTITECH NAD NEC NIKEI NIKKO NTC ONKING ONWA OPTIMUS OPTONICA ORION PANASONIC PHILCO PHILIPS 028 164 043 163 004 007 009 011 072 010 012 023 075 143 158 164 129 073 164 001 004 006 008 024 030 065 101 143 156 160 013 038 001 034 083 206 217 068 069 006 001 002 059 006 043 143 154 004 106 119 110 112 113 127 143 072 207 164 072 004 007 015 052 081 160 164 006 003 004 022 059 060 061 063 064 127 164 094 160 028 250 072 164 006 164 080 004 004 007 072 028 096 088 024 006 004 042 073 088 008 109 024 042 004 040 146 028 081 225 081 006 004 062 101 043 015 025 006 134 040 056 007 019 024 237 043 103 103 043 043 080 019 081 096 201 202 203 204 205 028 034 056 080 164 208 222 006 003 004 024 056 059 060 063 064 127 143 164 164 005 038 093 127 006 003 004 059 210 ? The bigger numbering value of input code for each manufacturer indicates the newest model of production. 42 - ENG STB_WESTSTARTV_Cab_110963_KCF-B3001HCOC_Eng.indd 42 2009-08-06 2:32:17
Manufacturer/Brand Set-Up Code Number Manufacturer/Brand Set-Up Code Number PIONEER PORTLAND PRISM PROSCAN PROTON QUASAR RADIO SHACK RCA REALISTIC RUNCO SAMPO SAMSUNG SANSEI SANSUI SANYO SCOTCH SCOTT SEARS SEMIVOX SEMP SHARP SIGNATURE SONY SOUNDESIGN SPECTRICON SQUAREVIEW SSS STARLITE SUPRE MACY SUPREME SYLVANIA SYMPHONIC TANDY TATUNG TECHNICS TECHNOL TECHWOOD TEKNIKA TELERENT TERA TMK TNCI TOSHIBA TOTEVISION UNIVERSAL VIDEO CONCEPTS VIDIKRON VIDTECH WARDS WESTING HOUSE YAMAHA 023 025 135 176 004 018 006 209 234 004 143 103 034 144 160 161 004 058 143 171 173 112 034 056 004 019 127 143 043 160 161 144 156 065 006 004 023 024 056 074 152 081 007 019 072 073 006 004 058 242 004 101 127 133 143 160 089 105 211 228 229 120 096 007 053 057 082 020 004 004 005 028 043 048 143 004 007 015 028 030 057 082 094 143 160 052 164 043 015 081 014 019 028 004 022 143 175 072 001 126 139 003 004 028 043 112 052 004 043 043 002 001 006 003 059 060 063 064 127 160 164 044 249 052 249 081 056 062 034 080 ACE 028 004 002 003 004 024 028 043 072 101 143 103 164 072 172 004 073 015 030 007 040 062 101 143 008 009 146 174 188 164 004 004 064 164 008 009 019 028 060 061 063 072 074 143 076 004 006 YORK YUPITERU ZENITH ZONDA 004 043 072 073 095 103 011 096 112 ENG - 43 STB_WESTSTARTV_Cab_110963_KCF-B3001HCOC_Eng.indd 43 2009-08-06 2:32:17
ENG_110963 STB_WESTSTARTV_Cab_110963_KCF-B3001HCOC_Eng.indd 44 2009-08-06 2:32:17