Download
1 / 18
200 likes | 1.21k Vues
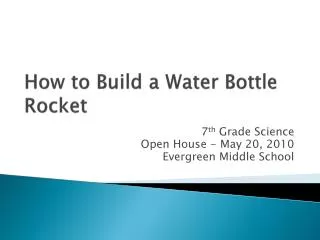
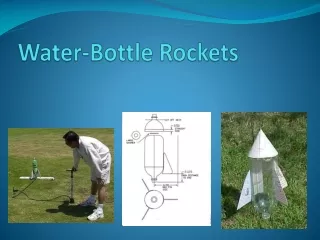
How to Build a Water Bottle Rocket. Science Fall 2006. 2 Two-Liter Bottles Newspaper (Ballast) Foam Tray (Fins) Paper (Nose Cone) Tape Scissors Marker. Materials. Nose Cone- For aerodynamic effect Ballast adds mass to rocket to increase stability. Fins- For aerodynamic effect

E N D
How to Build a Water Bottle Rocket Science Fall 2006
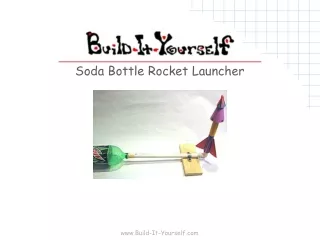
2 Two-Liter Bottles Newspaper (Ballast) Foam Tray (Fins) Paper (Nose Cone) Tape Scissors Marker Materials
Nose Cone- For aerodynamic effect Ballast adds mass to rocket to increase stability. Fins- For aerodynamic effect Pressure vessel- source of rocket propulsion Parts of Rocket
Step 1) Cut the bottom portion of one of the two liter bottles off. Rocket Body
It is against the rules to use a green bottle for the pressure vessel. However you can use a green bottle for the top half. Therefore if using a green bottle cut the bottom portion off. Green Bottles
Step 2) Roll up newspaper in balls and place in top half of two liter bottle. - You can use other items as ballast such as: Sand, Foam peanuts, etc. Rocket Body: Ballast
Step 3) Push bottom half of two liter bottle upside down into top half – to keep ballast in place. Use small pieces of tape to secure bottom piece inside bottle. Rocket Body (cont.)
Step 4) Place two liter bottle (pressure vessel) into top half. Try to make bottles straight. Use little pieces of tape to secure bottles. Rocket Body (cont.)
Milk or Juice bottle Foam trays Unused election signs (Only after election is over) Do not use card board Corrugated Plastic Materials for Fins
Step 5) Use marker and draw fin patterns on foam trays. Fins
Step 6) Cut fins out. Note: (a) If leave sides of tray attached to fins – will allow rocket to spin in flight. Fins (cont.)
Step 7) Attach fins to rocket using small pieces of tape. Fins (cont.)
You can use many materials to make a nose cone. It is against the rules to have a point on your nose cone. The tip most be rounded. To create a rounded tip you can use an egg carton or a plastic egg shell. Nose Cone: Materials
Step 8) Roll paper into a cone. Use tape to hold paper in place. Place plastic egg shell on the cone as tip. Use tape to fasten tip to cone. Nose Cone
Step 9) Fasten nose cone to body with tape. Nose Cone (cont.)
Step 10) Measure parts of your rocket to make sure they fit rules and guidelines for SECME Water Bottle Rocket Competition. Measure
You may decorate with stickers, your patch design, etc. The bottom half of your rocket must remain clear of any paint or decoration. Fins cannot extend pass bottom half. Decorating
Tips • Lengthening the rocket adds stability • Experiment with different fin shapes • Try different body shapes • Try to make body smooth (no kinks with tape). • Do not use hot glue gun to fasten parts of your rocket together. • Use small pieces of tape (incase you mess up you can easily remove it). • Do not leave two liter bottles in hot car.