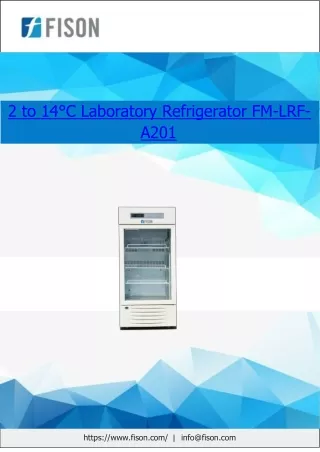
Laboratory Refrigerator
Laboratory Refrigerator. Prof. Asma Shaukat. I am sure you all think that you know what a refrigerator is? Do you? Really?. A refrigerator is An apparatus An equipment An Instrument A Machine A tool e) an equipment. Introduction.


Laboratory Refrigerator
E N D
Presentation Transcript
Laboratory Refrigerator Prof. AsmaShaukat
I am sure you all think that you know what a refrigerator is? Do you? Really?
A refrigerator is An apparatus An equipment An Instrument A Machine A tool e) an equipment
Introduction The most important piece of equipment in laboratories
Principle of operation It is an insulated cabinet with a door and a refrigeration unit that generates and maintains the required low temperatures.
Conservation refrigerators in the range of 2 to 8 °C. Low temperature freezers in the range of –15 to –35 °C. Ultralow temperature freezers in the range of –60 to –86 °C
PURPOSE OF REFRIGERATED STORAGE UNITS • These units are used for storage of: • Reagents • Stock cultures • Media • Patient specimens • Blood and its derivatives • Biological fluids
In general, the higher the temperature the more chemical and biological activity is present. By reducing temperature, one can control the effects on the composition and structure of substances to be preserved. In the laboratory, systems of refrigeration are used for conserving substances such as reagents and biological elements which would otherwise decompose or lose their properties.
What Physical concerns should be addressed while installing refrigerators?
Physical concerns Located in a well ventilated area allowing 2-4 inches at the top, back, and sides for proper air circulation. Avoid placing these units in areas with hot drafts and direct sunlight. Proper leveling of the units will ensure the most efficient operation.
Place a carpenter’s level on top of the unit and adjust the leveling screws until the bubble is centered in the level. If a carpenter’s level is not available, adequate leveling can be obtained using the door as a guide. When the unit is level, an open door will not swing further open or closed until it is moved manually.
Biohazard signs When patient samples or cultures are stored in these units, a biohazard sign should be in plain sight. Never store food or drink for human consumption in a laboratory refrigerator.
Performed routinely • Daily, weekly, monthly, annually • After adjustment or repair
Daily Ensure internal blower fans are operating. Check unit temperatures when they are first opened each morning and record results on the temperature chart. The internal temperature of a laboratory refrigerator should be 2 to 8°C ± 1°C.
Annually Ensure the unit is still level. Check power cords for signs of wear. Frayed or cracked cords must be repaired by cutting them down or replacing them. Never use electrical tape to cover cracks or frays. Check door gaskets for obvious deterioration and replace them if they are cracked, torn or warped.
Equipment maintenance Quarterly Six monthly Annually
Quarterly • Clean the interior: • Remove refrigerator contents, unplug the unit and leave the door open allowing it to reach room temperature. • Clean the internal walls, removable parts and the exterior with an approved disinfectant and thoroughly rinse with water to remove residual disinfectant. • Plug the unit in, close the door and wait one hour before checking the internal temperature. • Once within range, return contents to the unit.
Warning: Avoid using steel wool or other abrasive materials for cleaning the shelves and drawers. Avoid using gasoline, naphtha or thinners, as these damage the plastic, the packing or the paint on the surfaces.
Door gasket can be verified by using Level bubbles paper Plastic special tools suction cups b) paper
Door gasket verification: • Open the door. • Insert a strip of paper of about 5 cm in width between the door gasket and the edge of the refrigerator’s body where the gasket is housed. • Close the door. • Pull the paper gently from the exterior. The paper must put up resistance when being moved outwards. If the paper can be moved without resistance, the gasket must be substituted.
Warning: A door gasket in bad condition produces various problems in the functioning of cooling units: 1. It allows humidity to enter which condenses and freezes inside the evaporator. 2. It increases the time needed by the compressor for maintaining the selected temperature. 3. It affects the storage temperature. 4. It increases the operational costs.
How often should we defrost a laboratory refrigerator and what is the proper procedure to defrost it?
Six monthly • Defrosting: • Verify that the thickness of the frost is more than 8 mm. • Remove the contents of the compartments. • Disconnect the freezer. • Leave the door open allowing the unit to reach room temperature • Remove the water while it is accumulating in the compartments. Use a sponge or a piece of absorbent cloth. • Place a towel to avoid the melting ice from wetting the front and interior part of the refrigerator.
Once defrosted and warm, clean the interior and exterior with an approved disinfectant and thoroughly rinse with water to remove residual disinfectant. Plug the unit in, close the door and wait one hour before checking the internal temperature. Once within range, return contents to the unit.
Warning: Never use sharp elements to remove ice or frost from the evaporator. Such an action can perforate the wall of the evaporator and allow the refrigerant gas to escape causing a serious defect which can only be repaired by a specialist.
Do you need an engineer to clean the condensor? What would be the next best option? YOU
Cleaning of condenser: • Disconnect the electrical feed cable. • Verify the position of the condenser. Remove the condenser’s protective grids and the protective filter • Remove the dust and grime deposited on the surface of the condenser. Use an aspirator equipped with a suction brush. Run it over the entire surface of the condenser to remove grime or accumulated dust. Verify that the tubes’ surfaces as well as those of the heat conducting wings are clean. Vacuum the filter as well • Replace the cover. • Connect the refrigerator to the electrical connection.
Warning: If the condenser is not clean, this will interfere with the heat transference process and the refrigerator could “heat” or function at temperatures different than selected.
vaseline and bleach are well known beauty products. But these beauty products have other uses too. Can you use these products for the maintenance of your refrigerator? yes
Annually Inspect door gasket for mould. When present, clean the gasket with a 10% bleach solution. Rinse thoroughly to remove all residual bleach and dry completely. Apply a thin layer of Vaseline or ArmorAll to maintain flexibility.
Temperatures of laboratory refrigerators must be monitored with National Institute of Standards and Technology (NIST) traceable thermometers. Thermometers for refrigerator are in range of (-5 to 15ºC)
What is the proper method of using an electronic thermometer?
Principle Thethermometer uses a separate probe attached to the device by a 3 meter long cable. It is advisory to fix this probe in a glycerol tube. Because when you buy the thermometers made for monitoring the fridge temperature it comes in glycerol. It is a liquid that doesn't evaporate and stays stable when the temp fluxes when the door is opened and shut. Also its nontoxic and innocuous.
Digital thermometers Drop counter Plastic tube Stopper Glycerol
Procedure: • Installation of thermometer • Pull down the battery cover. • Install the battery with correct polarity positioning • Check if thermometer works • Thermometer will have a full segment display for about 3 seconds • After 3 seconds normal fridge sensor temperature will be displayed • Peel off the adhesive tape cover sheet on the sensor holder. • Put the sensor inside a glycerol tube to limit temperature fluctuations when opening the fridge door
Firmly attach the tube with the sensor inside the fridge. The best place to attach the tube is in the middle of the fridge. Use strong tape to attach the tube in an upwards position. Pull the cable and the thermometer through the opening of the rubber sealing of the fridge door. Attach thermometer outside the fridge by using the magnets on the back of the device.
Press [°C/°F] button to select temperature unit [Celsius or Fahrenheit]. Print the registration form. Fill in the correct information in the header of the registration form. Paste the registration form on the fridge. Make sure the form is clearly visible.
Glycerol tube: • Use the knife to make an incision in the stopper. The incision has to be big enough so the cable of the thermometer can go through it.
Pull the sensor and the cable through this incision in the stopper.
Take the needle and make a small hole in the reservoir of the drop counter so air bubbles can escape
Pull the sensor and the cable through the drop counter. Tweezers can be used to facilitate this job.
Fill the plastic tube with glycerol. Fill it so the stopper can be put on without spilling too much glycerol. Place the tube in a rack in upwards position.
Fill up the stopper with silicones. This is necessary to prevent leakage of the glycerol when the tube is not in the upwards position in the fridge. Push the sensor with the drop counter and the stopper in the plastic tube until it fits.
While pushing the stopper, make sure air bubbles disappear through the hole in the reservoir of the drop counter
Place this construction in an upwards position and let it dry for 24 hours.