Download

1 / 15
160 likes | 333 Vues
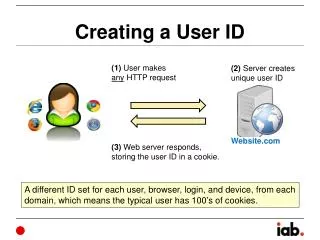
Manually Creating a New User Account. Presented by Carl South. When creating new user accounts, several steps must be followed. Assign username, uid and primary group etc. Enter this information into /etc/passwd file Assign password to the account Create home directory for the user

E N D
Manually Creating a New User Account Presented by Carl South
When creating new user accounts, several steps must be followed • Assign username, uid and primary group etc. • Enter this information into /etc/passwd file • Assign password to the account • Create home directory for the user • Place initialization files into user’s home dir • Give the user ownership and access • Testing the new account
The /etc/passwd file • System’s master list of information about users • Format for each user contains seven fields • Simply use any text editor to open file and add another user • Example: • name:coded-passwd:UID:GID:user information:home-dir:shell • Note: It is always a good idea to save a copy of the unedited version so that you can recover from any errors
The /etc/passwd file • Name - The user name assigned to the user. Most user names follow a certain pattern. My user name at work is csout0. • Coded passwd - (Discussed later) • UID - User ID: Each distinct user should have a unique user ID • GID - Group ID: Determines the user’s primary group membership • User Info - Usually contains the user’s full name. Also a comment field. • Home Directory - User’s initial working directory • Shell - The command interpreter used for the new user such as korn, bash, bourne etc.
The /etc/passwd file (password field) • There should be an asterisk ( * ) placed in this field when editing the /etc/passwd file. • Why? This prevents anyone from using this name to log in. Asterisks are not located in the target character field for passwords, so it can never be matched. Maintains system security if you are interrupted while creating the account. • Passwords should never be assigned while editing the /etc/passwd file. The passwd command can be used later in the creation of the account.
The /etc/passwd file • Example of an entry in the /etc/passwd file • csout0:*:30604:222:CarlSouth:/home/ahvap04/csout0:/bin/ksh
Assigning user passwords • The next step is to assign an initial password for the new account. • Command: passwd username • You will be prompted for the password twice. It will not appear on screen.
Assigning the home directory • The next step is to create a home directory for the new account. • Command: mkdir /home/username • Note: The directory created must match the directory name located in the sixth field of the new entry in the /etc/passwd file.
Login initialization files • Initialization files vary with different shells that are used. The bash shell uses .bash, .login and .bashrc • These files are typically located in the /etc/skel directory.These files must all be placed in the user’s home directory as part of the creation process.
Changing ownership of home directory • After creating the user’s home directory, it is important to remember to change the ownership of the directory from root to the new user. • Command: chown -R username /home/username • This command will change the ownership on the directory and all the files it contains.
Testing the account • After changing ownership, you should log completely out and then log back in under the new account name using the password that was previously assigned. • Check to see that everything is in working order, then switch user (su - root) back to root.
Testing the account • Once you are back as root, create a pre-expired password for the new account. • Command: passwd -f username • This will pre-expire the password, forcing the user to change it at the next login.
Automating the process • A script can be created to automate this process. Lets say the script is called make_users. This script will make use of a command called useradd, which comes with many options. • Make_users will take one argument on the command line that will be the username to be used in creating the account.
Automating the process Make_users useradd [ -u 100] -g student [ -G tty, other] -d /home/$1 -s /bin/ksh [ -c “comment field” ] [-k /etc/skel] -m $1 Option meanings: u: User ID g: Primary group G: Comma-separated list of secondary groups d: home directory path name s: shell c: Full name k: skeleton directory containing initialization files m: Defines the username
References • Essential System Administration, 2nd. Ed.. O’Reilly & Associates, Inc. September 1995. Pg. 144 - 177. • Unix System Administration. The Seale Group, Inc. 1996. Training Module Three, Pg. 1 - 17.