Mastering the Touch Screen Lectern: A Comprehensive User Guide
This guide provides a step-by-step overview on how to effectively use the Classroom Touch Screen Lectern and associated technology, including VCRs, DVDs, document cameras, and the desktop computer. Learn how to wake the system from sleep mode, select sources, and control projector settings. The guide covers essential functions such as projecting text, connecting auxiliary devices, and troubleshooting common issues. It also offers tips for ensuring optimal visibility and usability in your presentations.

Mastering the Touch Screen Lectern: A Comprehensive User Guide
E N D
Presentation Transcript
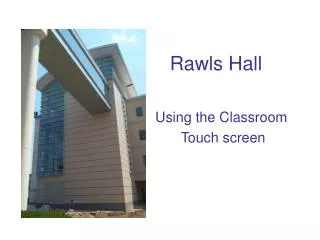
Rawls Hall Using the Classroom Touch screen
Lectern and Touch Panel 4. VCR 5. DVD 2. Document Camera 1. Touch Panel 3. Desktop Computer 5 main parts of the system
Lectern and Touch Panel 5 main parts of the system 4. VCR 5. DVD
Starting Out If you are the first person to use the screen, it may be in sleep mode (it never fully turns off). Simply tap the screen firmly to wake it up. The tap should be done quickly with some force, using the pad of the finger - not the nail. Quick but light taps will not register. Neither will slow forceful presses.
Starting Out The picture below shows the 1st screen you will see when the system “wakes up” To begin using the system, follow the written advice, and “Touch Here to Begin”
Three Main Parts of the Screen Screen#1 Screen#2 Controls
Source Selection Send Source to Projector Screen #1 Controls for the left projector (from student’s perspective) Image of content to be displayed Controls for that input
Source Selection Send Source to Projector Screen #2 Controls for the right projector (from student’s perspective) Exactly the same as for Screen #1 Image of content to be displayed Controls for that input
Extra Controls The right panel contains some additional basic controls such as: • Main Volume (audience) • Individual projector power on/off • Lighting controls • (same options as on the wall panel) • Panel Volume • (controls the previewed volume on the lectern only) • Shades Lower/Raise • Help • Gives text message on how to get help and report problems • Turn System OFF
Selecting a Source Notice that the computer image is not sent up to the projector until you press “Send to Screen” It will take about 30seconds for the projector to warm up if it was not already showing an image. (Works the same on both sides) To select your first source, press the “Source Select” button Once you select your source (we’ll say you pressed “Lectern Computer”) that source occupies the upper frame.
Controlling a Source Same for Screen_1 and Screen_2 Once you have selected a source, the controls for that source will be displayed below it’s preview. • In this example, the controls for the DVD player are listed below the preview of the video, with “more controls” available if needed. • - The Laptop cannot be controlled from the touch panel.
Viewing a Source on the Panel If you would like to see a larger version of a source, simply tap the image of that source. For example, to have the computer screen enlarge to fill the entire screen, tap the small image of the computer display (upper right).
Viewing a Source on the Panel Once you tap the small view, it will instantly fill the entire screen. To return to your controls, simply tap the screen anywhere. A good tip: Whenever you are “stuck” on a screen that isn’t showing what you need, reach out and touch the screen, and it will change to what you were looking for.
Projecting Text Make sure it’s big enough!!! • Any Computer Source: • Word, Excell, PowerPoint, Web, etc • Any Printed Material: • Handout that will be projected, textbook copies, charts, graphs, spreadsheets Absolute smallest font you should use is 16 pt. (18pt is preferable).
Projecting Text (44pt) This is text written in 12pt font – fine for reading on paper, absolutely lousy for projecting on screen This is text written in 16pt font – looks large on paper, barely passable on screen This is text written in 18pt font – preferable for your smallest bullet points This is text written in 28pt font - a good general-purpose size for projection, titles should be larger, while bullet points can be smaller
Two Ways to Add Wireless Mice PS/2 plug available near mouse on keyboard tray
Two Ways to Add Wireless Mice USB port available on front of computer
Connecting an Auxilary Source RCA inputs for user provided A/V are located behind the touch panel, along with a power outlet.
Connecting a Laptop A VGA computer cable with minijack sound is also available behind the touch panel, as is a network connection and power outlet (on the Aux panel). To use the network connection, plug in your CAT5 network cable, and be sure your internet TCP/IP settings are configured for DHCP.
Misc. Reminders: • Keep a set of Vis-à-vis markers and notepad on you in case they have been removed from the room. • ONLY use DRY ERASE markers on the whiteboard • If you will be using the laptop, bring your own network cable, and make sure your laptop is set for DHCP • If a projector won’t respond, individually power it off (controls on right of touch screen), wait 2-3 minutes, then power it back on. • Never clean the touch panel with anything but a slightly damp, clean cloth (NEVER “Windex,” alcohol, or soap)
Things for you to try: • Blank the screen. • Cue a video tape without letting the audience see what you’re doing until you’re ready. • Add a laptop • Zoom in/out and AutoFocus the Document Camera
When you’re finished using the system: If you used the computer, be sure to log off in order to prevent the next user from accessing your account. If nobody will be using the system after you use it, power it off by pressing the “Turn System Off” button in the lower right-hand corner. Please turn the lights out as you leave the room.
Documentation about these touch panels and how to best project information will be available at: http://intra.krannert.purdue.edu/kcc/documentation/rawls -------------------------------------------------------------------------- How do I get help? For immediate assistance, call the appropriate number below: AV Assistance: ------------------ 42769 (IT@P Audio Visual) In-Room Assistance:-------------- 68238 (IT@P Instructional Computing) Other Classroom Assistance: -- 43900 (Space Mgmt & Acad. Sched.) These numbers are also listed on the “Help” button on the touch panel, and on the wall plaque mounted above the room telephones. Problems that do not require immediate attention can be reported through the trouble report system (http://trouble.cc.purdue.edu/bin/trouble?pcmac) or via e-mail to classroom-mgr@purdue.edu. To find out more about the TIC program, you can contact the IT@P Instructional Computing Coordinator Jody Reigel at mgmt-mgr@purdue.edu. -------------------------------------------------------------------------- Other questions about the touch screens can be directed to Scott Albritton via e-mail, or you can walk into RAWL_3068 to see if he’s in the office. salbritt@krannert.purdue.edu (765)743-6052
For More Information, please go to: http://intra.krannert.purdue.edu/kcc/documentation/rawls