### Creating Effective Posters Using PowerPoint: Tips for Quality and Clarity ###
This guide provides essential tips for designing presentation posters using PowerPoint, offering insights on line spacing, font selection, and image resolution. It emphasizes the importance of proper layout, readability from a distance, and maintaining high-quality images for print. Learn how to format text efficiently, limit font usage, and ensure consistent styling in bullet points. The guide also warns about PowerPoint's limitations and the necessity of thorough proofreading before printing. Follow these suggestions to create visually appealing and impactful posters for your presentations. ###

### Creating Effective Posters Using PowerPoint: Tips for Quality and Clarity ###
E N D
Presentation Transcript
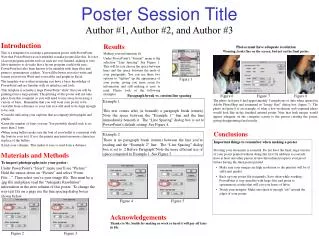
Results Making your information fit Under PowerPoint’s “Format” menu is the selection “Line Spacing” See Figure 1. This will let you choose the space between lines and the space between the ends of your paragraphs. You can use these two options to “tighten” up the appearance of your poster, giving you more room for information and still making it easy to read. Please look at the following examples. Figure 1 Photos must have adequate resolution Warning; looks fine on the screen, but not on the final poster Figure 6 Figure 7 Figure 8 The photo in figure 6 had approximately 5 megabytes of data when opened in Adobe PhotoShop and examined in “Image Size” dialog box (figure 7). The photo in figure 8 is an example of what a low-resolution web-captured photo would look like in the finished, printed poster. Note that both images would appear adequate on the computer screen to the person creating the poster, giving disappointing final results. Poster Session Title Author #1, Author #2, and Author #3 • Introduction • This is a template for creating a presentation poster with PowerPoint. Note that PowerPoint was not intended to make posters like this. It is not a layout program and the tools as such are very limited, making it very labor-intensive to do tasks that a layout program could with ease. PowerPoint has also been known to be unstable with large files and prone to spontaneous crashes. You will be better served to write and format your text in Word and your tables and graphs in Excel. • The template was written assuming you have a basic knowledge of PowerPoint and are familiar with its interface and tools. • This template is actually a large PowerPoint “slide” that you will be printing from a large printer. The printing of this poster will not take place from this computer so you will need to stay away from using a variety of fonts. Remember that you will want your poster to be viewable from a distance so your font size will need to be large enough to be seen. • Consider italicizing your captions that accompany photographs and graphs. • Limit the number of fonts you use. You probably should stick to no more than 2 fonts. • When using bullets make sure the font of your bullet is consistent with the fonts in your text. If not, the printer may print erroneous characters in place of the bullets. • Limit your columns. This makes it easy to read from a distance. Paragraph break vs. custom line spacing Example 1 This text comes after (is beneath) a paragraph break (return). Note the space between the “Example 1” line and the line immediately beneath it . The “Line Spacing” dialog box is set to PowerPoint’s default setting. See Figure 4. Conclusions Example 2 There is no paragraph break (return) between the line you’re reading and the “Example 2” line. The “Line Spacing” dialog box is set to .2 Before Paragraph”Note the more efficient use of space compared to Example 1. See Figure 5. • Important things to remember when making a poster • Proofing your document is essential. Do not have the final, large version of your poster printed without doing this first! In addition to yourself, have at least one other person review the technical aspects your proof before having the final poster printed. • Make sure your images are high resolution so the printout will be of sufficient quality. • Back up your poster file frequently. Save often while working. PowerPoint is very unstable with large files and prone to spontaneous crashes that will cost you hours of labor. • Watch your margins. Make sure there is enough “air” around the edges of your poster. Materials and Methods To import photographs into your poster: Under PowerPoint’s “Insert” menu you’ll see “Picture” Hold the mouse down on “Picture” and select “From File…”. Then select you’re your image file. This must be a .jpg file and please read the “Adequate Resolution” information in the next column of this poster. To change the way text fits on a page use the line spacing dialog boxes shown below. Figure 4 Figure 5 Acknowledgements Thanks to Mr. Smith for making us work so hard it will pay off later in life. Figure 2 Figure 3


![[Poster Title]](https://cdn3.slideserve.com/5382651/poster-title-dt.jpg)