Student Overview
MMS Wireless Mobile Lab. Student Overview. Removing the laptops from the cart. Each laptop is numbered. Each slot in the cabinet is numbered. Pick up your laptop with both hands and carry it carefully to your desk. DO’S and DON’TS. Laptop Dos.

Student Overview
E N D
Presentation Transcript
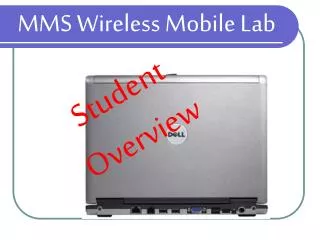
MMS Wireless Mobile Lab Student Overview
Removing the laptops from the cart • Each laptop is numbered. • Each slot in the cabinet is numbered. • Pick up your laptop with both hands and carry it carefully to your desk.
Laptop Dos • Be sure that you have the laptop assigned to you by your teacher! • Make sure that your hands are clean and dry before using the laptop. • Make sure that your laptop is placed securely in the middle of your desk. Keep it off of books or the side of the desk. • Touch the touch pad gently.
Laptop Do’s • Tell your teacher immediately if there is a problem with the laptop. • Only one person should use the keyboard at a time. If you are working with a partner, take turns. Remember, the laptop is school property! • Correctly shut down the computer when you are finished. • Close the laptop gently before carrying it. • Return the laptop to the appropriate shelf in the cart.
Laptop Don’ts • Do not touch the screen with your hand or any object. • Do not lift and/or carry the laptop by the monitor. Hold it with two hands by the base. • Do not place pencils/other objects on the keyboard.
Laptop Don’ts • Do not place the laptop near liquids. • Do not use the laptop with dirty or wet hands. • Do not clean the screen with anything. Notify your teacher if the screen is dirty. • Do not change the settings on a laptop. • NEVER eat or drink near the laptop.
Picking up a Laptop • You will be assigned a number by your teacher, use only the number assigned to you. (Your number may not be the same in each class.) • Follow the room policy for getting the laptops out of the cart. • Remember the Dos and Don’ts for handling the laptops.
Push gently and open the lid. Laptop Latch (front of laptop) • Check laptop condition. • Inspect your laptop to make sure there is no damage before you begin. Inform your teacher if you see any damage.
Getting Started • Turn on your computer by pressing the power button once.
Left button: mouse left click Right button mouse right click The Touchpad The touch pad on your laptop performs the same job for the computer as the mouse. To move the cursor on the laptop screen, simply roll your finger tip on the surface of the touch pad. Touchpad Move cursor
Checking the Battery • Go to the desktop of the computer. • Roll the curser over the battery icon in the lower right corner of the screen but don’t click. • The estimated amount of time left on the battery will appear.
Low Battery If you get this warning… • Your battery power is 10% or less… • Immediately save everything you have created. • Recharge the computer by connecting it to the power source in the appropriate place in the cart.
Saving Your Work • You must have a CD-RW or jump drive in order to save anything you have created. Each laptop is equipped with Deepfreeze software that will delete anything added to the computer and return settings to normal upon shutdown of the computer.
Saving Your Work • If you do not save your work on a CD-RW or jump/flash drive, it will be lost forever. • Work done in A+ or SkillsTutor is saved for you on the program’s server.
How to Save Your Work • To save a file, click File>Save As. • IF you are saving to a CDRW, save first to the desktop by using the pull-down menu in the “Save As” box and choosing “desktop” from the list. Click save.
How to Save Your Work • Once the file is saved, open up the CDRW window. • Click and hold on your file and drag it to the CDRW window. • Click “write file(s) to CD”. • Allow the computer to complete the writing process. The CD will eject. • Click finish. • IF you are saving to a jump or flash drive inserted into the USB port, use the pull-down menu in the “Save As” box and choose the appropriate drive from the list. • Click save.
If the laptop freezes • Your laptop may occasionally become frozen or stuck in one place. If that happens, follow these steps: • Wait for a minute. The hard drive may be processing. Or…
Alt Control • If nothing changes, press the Control, Alt, and Delete keys at the same time. • Click on the Task Manager button. • Look to see which program is causing the laptop to freeze up. • If your laptop is still frozen, raise your hand to let your teacher know.
Shutting Down Correctly • Click Start > Shut Down • Choose Shut Down from the drop down menu • Click > Okay • Make sure your screen is completely black before you close the lid.