Digital Cameras in Education: Promoting Visual Literacy
Learn how digital cameras can encourage students to use technology, from types of cameras to editing software. Discover camera lessons and digital projects to enhance learning.

Digital Cameras in Education: Promoting Visual Literacy
E N D
Presentation Transcript
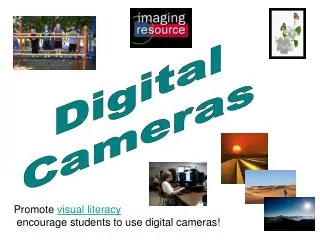
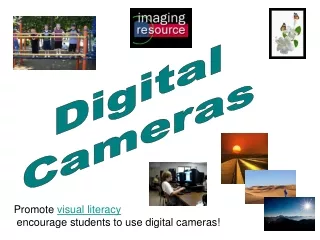
Digital Cameras Promote visual literacy encourage students to use digital cameras!
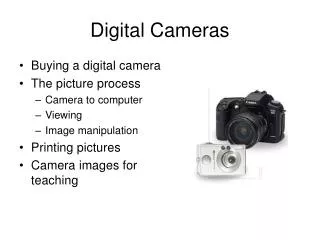
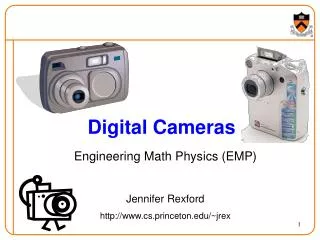
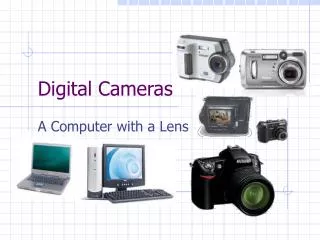
Digital Cameras • Types of digital cameras from each school • Memory sticks/cards and Multi USB Card Readers • Printers (PictBridge) • How do I get, save, resize, crop, insert and e-mail my photos/movies? • Publisher, Power Point, Movie Maker, Schoolwires, & Groupwise • Camera lessons and Digital Projects
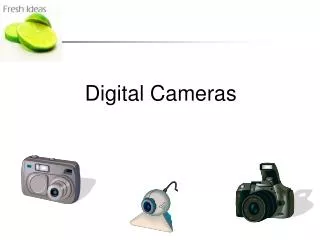
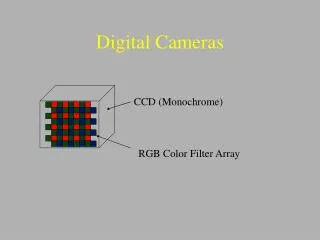
Types of Digital Camers
Sony Cyber-shot DSC-W55 Hamilton
Canon PowerShot S410 Hamilton Resource Sony Cyber-shot S410
Fujifilm FinePix F40fd Kresson
CanonPowerShotA85 Signal Hill CF Card
SonyCyber-shotDSC-W70 Osage
Memory sticks/cards and Multi USB Card Readers
Internal External Does it support your type . . . CompactFlash Type I CompactFlash Type II Microdrive CF Card SmartMedia Card (SM) Secure Digital (SD) Card MultiMediaCard (MMC) Memory Stick, Memory Stick PRO Memory Stick Duo xD-Picture Car Kingston USB flash memory card reader Multi USB Card Reader
Printers (PictBridge)
PictBridge • allows images to be printed directly from digital cameras to a printer, without having to connect the camera to a computer. • What is PictBridge? Card Reader PictBridge
How can I get and work my photos?
Software that comes with the cameraIe: Picture Motion Browser for Sony Cyber-shot DSC-W55
Memory port(where you put the memory card)Memory Card Manager
How do I save my photos? • Folders • Creating under H: • Naming (ie: Images 07-08) • Convert images to and save as thumbnails (not full size images
How do I resize a photo? • Left click on photo • Resize from corners
How do I crop a photo? • Left click on photo • Picture toolbar should appear • If not • View > toolbar > picture • Crop from center/middle of photo
How do I insert/import my photos into Microsoft Publisher (object based) • Microsoft Publisher From a file • On the Objects toolbar, click Picture Frame , and then click Picture from File. • Drag the mouse diagonally until you have the size picture frame you want. • In the Insert Picture dialog box, locate the folder that contains the picture you want to insert, and then click the picture file. • Do one of the following: • To embed the picture, click Insert. • To link the picture to the picture file on your hard disk, click the arrow next to Insert, and then click Link to File.
How do I insert/import my photos into Microsoft Publisher (object based) • Directly from a scanner or digital camera • Before you begin, make sure that your device is TWAIN or WIA-compatible and is connected to your computer. You should also make sure that you have installed the device software that supports TWAIN or WIA. • Some devices come with more than one software program. If you are not sure what software is TWAIN or WIA-compatible, check the device documentation or contact the manufacturer of the device. • Set up the picture in the scanning device. • On the Insert menu, point to Picture, and then click From Scanner or Camera. • If you have more than one device attached to your computer, select the device you want to use. • Do one of the following: • If the selected device is a scanner and you want to use default settings for scanning the image, click Web Quality if you are going to display the picture on a screen, or Print Quality if you are going to print it, and then click Insert to scan your picture. • If the selected device is not a scanner (for example, if it is a digital camera), or if you want to customize any settings before you scan the picture, click Custom Insert, then follow the instructions that come with the device you're using. • Note The Insert button might be unavailable with some scanners because the scanner software doesn't support an automatic scan. Use the Custom Insert button instead.
How do I insert/import my photos into Power Point? Add a picture • Click where you want to insert the picture. • Insert one of the following: • A picture from a file • On the Drawing toolbar, click Insert Picture From File . • Locate the folder that contains the picture that you want to insert, then click the picture file. • Do one of the following: • To embed the picture, click Insert. • To link the picture to the picture file on your hard disk, click the arrow next to Insert, and then click Link to File.
How do I insert/import my photos into Power Point? A picture directly from a scanner or digital camera • For this procedure, make sure your device is TWAIN- or WIA-compatible and is connected to your computer. You should also make sure that you have installed the device software that supports TWAIN or WIA. • Set up the picture in the scanning device. • On the Insert menu, point to Picture, and then click From Scanner or Camera. • If you have more than one device attached to your computer, under Device select the device you want to use. • Do one of the following: • If the selected device is a scanner, and you want to use default settings for scanning the image, click Web Quality (if you are going to show your picture on the screen) or Print Quality (if you are going to print your picture), and then click Insert to scan your picture. • If the selected device is not a scanner (for example, if it's a digital camera) or you want to customize any settings before you scan the picture, click Custom Insert. Follow the instructions that come with the device you're using. • Note The Insert button might be unavailable with some scanners because the scanner software doesn't support an automatic scan. Use the Custom Insert button instead.
How do I insert/import my photos into Movie Maker? • You can import existing digital media files that are supported by Windows Movie Maker to use for your project. • The files you can import might be stored on and imported from your hard disk on your computer, a shared network location, a CD, or on removable media. When importing files in Windows Movie Maker, you can import one file or multiple files at one time. • A source file you import remains in the same location from which it was imported. Windows Movie Maker does not store an actual copy of the source file; instead, a clip that refers to the original source file is created and appears in the Contents pane. • After you import files into your project, don’t move, rename, or delete the original source files. If you add a clip to a project after the corresponding source file has been moved or renamed, Windows Movie Maker attempts to automatically locate the original source file. If the source file is deleted, it must be placed on your computer, or on a location your computer can access, again. • After you upgrade to this release of Windows Movie Maker, your collections file, which stores information about your collections and the clips contained within your collections in Windows Movie Maker, from a previous release of Windows Movie Maker is imported and upgraded automatically when you first start this version of Windows Movie Maker.
How do I insert/import my photos into Movie Maker? To import existing digital media files • On the File menu, click Import into Collections. –or- • Do one of the following, depending on what type of digital media file you want to import: • In the Movie Tasks pane, under Capture Video, click Import video. • In the Movie Tasks pane, under Capture Video, click Import pictures. • In the Movie Tasks pane, under Capture Video, click Import audio or music. • In File name, enter the path and file name of the file you want to import, and then click Import. • If you want selected video files to be separated into smaller clips, select the Create clips for video files check box. • Note You can import several files at one time. For consecutive files, click the first file in the list, press and hold down the SHIFT key, and then click the last file in the list. For files that are not consecutive, press and hold down the CTRL key, and then click each file that you want to import.
How do I import my photos into Schoolwires? 3. Click in the radio button to the left of “Select new image from my computer or network.” • Navigate to the page on which you want to insert the image. • 2. Click on the Insert Image icon . Step 1 of the Insert Image Wizard will display.
How do I import my photos into Schoolwires? • 5. Browse your computer or network until you locate the file. 4. Click on the Browse button to browse your computer or network for the image file. A Browsing window like the one shown in Exhibit 7 will display. • Highlight the file. • Click the Open button. Step 2 of the Insert Image Wizard will return as the active window, populated with the file path for the file you selected.
How do I import my photos into Schoolwires? • Click in the radio button to the left of the file size you desire. • 9. Click the Next button. A message that the image is uploading will display momentarily. • 11. Enter the alternate text. • 12. Set the alignment on the page or add a border to the image as desired. • 13. Click on the Insert Image button. The Schoolwires Editor will return as the active window. The image you inserted will be visible. • 14. Continue working in the Editor as desired. • 15. Click Savewhen your work is completed.
How can I get my movies into Power Point? • Connect camera to USB or insert memory stick into PC • On the menu bar • Click Insert > Movies and sound > Movie from File • Drop down arrow and locate camera • Ie: Sony Memory Stick (F:) • Open folder where photos are located • Ie: DCIM • Note: • File of types – Movie Files
How can I get my movies into Movie Maker? • Connect camera to USB or insert memory stick into PC • On movie task bar • Click Import Video • Drop down arrow and locate camera • Ie: Sony Memory Stick (F:) • Open folder where photos are located • Ie: DCIM • Note: • File of types – Movie Files
How do I send e-mail my photos? 1. Sending an attachment (Paper clip) 2. Select folder Click OK 3. Select images/photos Click OK
How do I open a photo via e-mail? • Right click on attachment and left click save as • Save in folder you’ve name for images • Open by one of the following:
Attachments? Sending as an attachment About Attachments • Use Attach File to send one or more files to other users. You can attach a file that exists on your hard disk, diskette, or network drive. The recipients can open the attached file, save it, view it, or print it. If you change the attached file after you have sent it, the recipients do not see the changes. Opening Attachments • When you open an attached file by double-clicking it, GroupWise� determines the correct application to open the file in. Viewing Attachments • You can view the attachment by right-clicking it > clicking View Attachment.
Camera lessons and Digital Projects
Camera lessons and projects • How to take great photos? • Top Ten Tips from Kodak • An Outdoor Halloween Portrait • Exploring Lighting Options With Indoor Portraits • Digital Projects • Promote visual literacy encourage students to use digital cameras!
Digital Storytelling • Short, personal multimedia tales told from the heart • Combining the longstanding art of telling stories with any of a variety of available multimedia tools, including graphics, audio, video animation, and Web publishing. • Story Collections || Resources || Storytellers || LMC || Clow ... • Lesson Plans for Digital Storytelling • Storyboard (pdf) • Adobe Digital Kids
Digital Cameras and Camcorders in the Classroom • Using a Digital Camera* (Acrobat PDF) • Ideas for Using a Digital Camera in the Classroom • Digital Camera in Education...all types of practical information about using digital cameras in support of the curriculum • Digital Camera Ideas for kids...a nice set of ideas for the use of digital cameras • DIGITAL PHOTOGRAPHY
Digital Camera Participants • Baker Maureen PE/Health E.T. Hamilton School • Calabree Joan SE RC E.T. Hamilton School • Champion Lana IA E.T. Hamilton School • Romaniello Diane SLP E.T. Hamilton School • Fekete Margaret SLP Voorhees Middle School • Jeffries Laurie Art Voorhees Middle School • Lambert Mary R. IA Kresson School • Redfearn Michael PE/Health Kresson School • Clark Danielle IA Kresson School • Viloria Linda IA Signal Hill School • Bansch Elaine IA Signal Hill School • Christopher Gail IA Signal Hill School • Deeley Janette SE RC Signal Hill School • Ehly Laura IA Signal Hill School • Holliday Maribeth SE SC Signal Hill School • Taylor Bruce Dir of Ed Tech Administration Building