Falcon BMS
Falcon BMS. Building Tactical Engagements. By Garold “Gman” Stewart January 7, 2012. How to Build The Template.

Falcon BMS
E N D
Presentation Transcript
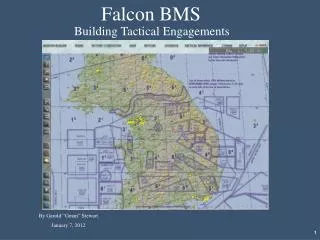
Falcon BMS Building Tactical Engagements By Garold “Gman” Stewart January 7, 2012
How to Build The Template To start, open Falcon (DUH). Go to Tactical Engagements and click on TE Builder. You will now see a blank map of Korea. Next click on “ADD A SQUADRON”. Next place your cursor over an airbase and left click your mouse. A window “ADD SQUADRON” will pop up asking which aircraft that you want to assign that airbase. From the dropdown menu, select an aircraft type. Do this for as many airbases that you wish. You may want to have several aircraft at some bases or only use just a few. Don’t be skimpy, use lots of bases, you may need them later. Do this for both Red and Blue sides. Make a list of these and keep it on your desk. Add Squadron TE Builder
You will select which side by clicking on the flag in the upper left corner of the map. Next, do the same with your ground forces. Make sure that you use all types of battalions, including Air Defenses, tanks, armor and just ground troops. Again, don’t be skimpy. You should also remember that you can add naval assets as well. (There is, and always has been, a bug in the sim that will only show naval assets in the Planning window. They are not visible on the map when you actually go to fly the missions). When you are finished getting everything set up, save the map with the name “Template”. Now you can use this same template for any flight that you create. If you want a night flight, just advance the clock in the upper right corner to the time that you want. To make things easier, I just did this once and saved it as “Night Template”. One thing to remember when building a template, or a TE is to SAVE, SAVE, SAVE often. I will save after making additions. That way, if something is wrong, you only need to go back one step. SAVE
Part 1 Planning • Before you begin to build a TE, you must first have an idea what the mission will be. In other words, what do you want to accomplish in the mission? Is this going to be an all air-air, air-ground, SEAD strike, or maybe a search and rescue, etc. Also, don’t rule out FOF and just training missions. • The second thing to consider is the number and type of aircraft that will be involved. Keep in mind the number of pilots that you can count on to fly on any given day. Also consider the configuration of the pilots. In other words, if you are planning on 6 pilots, should you use 3 and 3, 4 and 2 or 2, 2 and 2. • Will it be necessary for air to air refueling, and if so, where will this take place. • Next you want to decide if there will be an AWACS, and where it will be stationed. • Now remember, if it is going to be a combat flight, you will need aircraft on the other side as well. So, what type of aircraft and what numbers do you want? Do you want a fair fight or do you want your side to just walk away with it? These are the things to think about long before you even open the sim and start constructing a mission. Another thing to do is start with a template. In our example build, we will create a mission in which we attack a heavily defended manufacturing facility. Please note that in this mission, in order to limit the complexity, we will not have any ground war going on. Now we must pick a manufacturing facility to bomb. Let me warn you right now, that if you attempt to display too many objects in the mission builder at once, it becomes a visual cluster duck (quack quack), and nothing is readable. So, your first trick is to set the mission builder map up such that you can see ONLY those things we need to see.
To get started, click on Tactical Engagements and then Saved. Scroll down to your template, highlight it, and click Edit. Now you are in the mission builder and you have a template on which to build. At this time, save this map to the name that you want the mission to be named. Thus, the template will not be changed. Now, the first thing that you will need to do is to set the time of the mission in the upper right hand corner. If you use the default time of 0900, you will not need to change anything. However, if you do change the time, then you will also have to adjust the times in Victory Conditions, which default to a start of 0900 and end of 1400. If you do change the time, set the start time to 1 hour before takeoff and the end time to well after the mission should end. Phase II The Mission Building Time Saved SAVE New Name
Now let’s start building a mission. The first step is to determine what the target is, if it is a strike mission. This is a rather simple process and is just a matter of preference. In your mind, you have already decided about where you want to go. This is where the "Don't display too much lest we have a visual cluster-duck" rule applies. All you need to see at this point are the airfields, the air defenses (which include fixed SA-2 sites and radar stations), and War Production. To do this, right click anywhere on the map and select Installations/Airbases/War Productions. Then, select Ground Units/Battalions/Air Defenses Phase II The Mission Building cont.
Phase II The Mission Building cont. The next step is to set the tanker’s track. This is done at this time so you will know where it will be when setting the route of the other aircraft. To do this, you choose to Add a Flight. You place your cursor on the map where you want the refueling to be and left click. You will get a window that states Add a Flight. You should use the dropdown menu to select the type of aircraft, KC10 or KC135. Next, make sure that you select “Tanker” for the Role. You only want 1 tanker so select 1 in the size dropdown. In the Skill dropdown, select Ace and in the Start At dropdown, select Target. You should adjust the steerpoints for the refueling track about 100 miles apart. Use Lines from the drop-down menu to set the refueling track. (these lines will not be saved when you save the mission) SAVE
Phase II The Mission Building cont. Now we get into the meat of the mission. It is always best to create a package rather than a single flight. That way, the use of data link is possible. To do this, place the cursor on the target and right click. A menu will pop up as before but this time click Add Package. When you do this, another window will pop up called Add Package. Here you will click on New and another window will come up. Here you are given the same options as with the tanker. Select the aircraft type, role, size, squadron, airbase, target, skill and start. This time you want to select Takeoff in the start window. Click OK. Takeoff OK New
Phase II The Mission Building cont. Next, you will click new again and add the second flight and the third flight, and so forth. Remember to change the roles for each additional flight. There is one unique feature in BMS that none of the previous versions of Falcon had. You now can add or delete flights without creating any problems. To add a flight after closing the ADD FLIGHT, go the ATO and expand the mission that you want to add to. Find the correct Package and right click. From that menu select Show Flights. This will reopen the ADD FLIGHT window allowing you to add your flight. Similarly, to delete a flight, use the same menu that allowed you to add a flight and click delete. SAVE
Phase II The Mission Building cont. You will notice at the bottom of the ADD FLIGHT window are two times, Takeoff and Time on Target (TOT) To the right of these windows is a padlock. One is blue and appears unlocked and the other is green and seems to be in a locked state. The one that should be locked is the TOT. If you lock the "Time on Target" and leave the "Takeoff Time" unlocked, then as you add individual flights to the package, the computer will determine all speeds between steerpoints and takeoff times to insure that your planes arrive at target on time. If you attempt to lock the "Time on Target" time AND the "Takeoff" time, you may create a situation where the plane cannot physically make it to steerpoint on time (or it may have to fly too slow!!) and your flight path on the map will be drawn in red. RED PATH LINES are impossible (or very difficult) for the aircraft. If you simply ALWAYS lock down the "Time on Target" only and leave all other steerpoint times as unlocked, the computer will very smartly assign times for each steerpoint, including the take off time, to ensure that planes can easily arrive at target ON TIME. This "locking of the target steerpoint only" rule has another VERY USEFUL side effect. Once this is properly done, you can click and drag flight steerpoints around on the map without even looking at the steerpoint editor window. All the "TOS" (Time on Station) and "airspeed" fields will be properly updated within the limits of physical possibility ( because they are unlocked and therefore allowed to be adjusted by the unseen mission planners...people who work behind the scenes for you getting all the math right). When you have finished adding all of the flights, click OK and that window will go away. You will notice now that all of the flights follow the same flight plan. This is where the fun begins.
Phase II The Mission Building cont. And so we introduce yet another level of military planning known as the "Air Tasking Order" or the ATO (as it will be called from here on). The ATO is a complete listing of all air operations, their individual packages, and the flights as they are arranged in each package. This is your organized filing cabinet for every package and flight in the mission you are building. Once you are actually playing the mission however (remember, you are in the editor right now), the ATO will only show you the packages and flights on your side of the fence..... as it should be. On the lower left corner of the screen, find the button called Air Tasking Order and click it. ATO
Phase II The Mission Building cont. On the bottom of the window that pops up is a box called Show All Packages, click it. You will see a box that says USA with a (+) sign before it. Click on it and all other boxes and expand them. Now you can see each flight. We now see the 3 flights we created in this package plus the Tanker and AWACS flights, with some very important information. Show All Packages
Phase II The Mission Building cont. Let’s assume that you have selected the strike flight. There will be one steerpoint, the one with the large blue triangle, at the target and all of the others will be in a straight line to home plate. Target This window tells you the role (which you can actually change with the drop down right next to it...but you shouldn't need to if you got it right when you were adding flights initially) and it tells you the airbase, and the squadron name etc. To adjust each flight click on one and close ATO window and you will see the flight path. You can now move the steerpoints to where you want them.
Phase II The Mission Building cont. Another useful tool is the Flight Plan. This shows each flight and all of the information about what takes place during the flight. Note also that you can scroll through all the other steerpoints by clicking the arrows next to the steerpoint number. Do that now and make sure that all other "TOS" times are in the "unlocked and blue" state except for the target steerpoint. Now go back to the target steerpoint for the strike flight. You want detail...good! This thing has detail. Look at the bottom of the steerpoint window. See the button that says "ASSIGN"? Click it. The target list window appears. This is where you actually pick the target you are going to kill. Click on the "+" plus sign next to the "Munch’on Smelter" entry to see all the subtargets of that plant. Scroll through the list. Notice that the "first two Factory buildings" have a medium priority rating, and all the other buildings are rated as essentially unimportant. Highlight the first Factory and press the “ASSIGN” button. You just assigned this building as the primary target of your flight. If you look at the bottom of the Flight Planer you will see that the target, the Factory is now assigned.
Phase II The Mission Building cont. Target Recon Window Once you have selected your target, advance the Designate As Target Steerpoint to the correct steerpoint, and click ACCEPT. This information will now show up in the briefing window.
Phase II The Mission Building cont. Now that you have assigned your target, you can adjust your steerpoints to wherever you want. So, start with steerpoint #2 and place it where you want it. A good rule of thumb is to set it at 90 degrees from the runway, as it will make joining up easier for the rest of your flight. Caution: do not lock the time on steerpoints (TOS). If it does lock after your adjustments, UNLOCK it if it is not the target steerpoint. Then progress up the flight path moving the steerpoints to where you want them. Obviously you don’t want to move the one at the target. Now if refueling is going to be needed, set a steerpoint near the line where the tanker will be. You will continue the same procedure with the other flights in the package. Realize that their flight plans may differ from each other. For example, the SEAD flight will fly near any SAM sites. Now, let’s talk a little about timing. This can be the hardest part of building missions. You may see red lines in your flight path. This is usually caused by timing/speed or fuel problems. Let’s take these one at a time. The very first thing to check is the TOT. Click on the Flight Plan icon or left click on the Target steerpoint. Check to make sure that the TOS is locked. Then go through each steerpoint and make sure that all of them are not locked. If your timing is wrong, then the speed may be the problem. If you see a red box around the Airspeed, then you need to adjust the speed by clicking on the arrows to the right. If your timing is wrong, you will notice that one or more of the legs of the flight path will be red. You can increase or decrease the timing by clicking on the arrows to the right of TOS. If you are building a very long flight, and you do not see any problem with the timing, yet there are red lines throughout your flight path, then you should check your fuel. Even though you plan to refuel, the mission builder does not know that. So, click on loadout and add some fuel tanks and that should eliminate the lines being red. SAVE
Phase II The Mission Building cont. OK, so you have your mission and flight plan the way we want it, what about the “OTHER” side. First, unless you want to fly unmolested you need some bad guys. Well, you handle them basically the same way, with a few exceptions. Before you start adding flights to the Red side, as before, you will need to decide when and where they will interact with your flights. So, lets assume that your TO time is 0900 and your TOT is 0930. You want the bad guys to attack say, the strike flight before it arrives at the target. Advance the clock in the upper right corner to 0920. If you have not already done so, right click anywhere on the map and when the menu comes up, select Air Units then fighters, support and maybe unknown. Now you can see where your strike flight is at that time. Make sure that you have selected the DPRK flag in the upper left corner and click the “ADD FLIGHT” button. Now, place your cursor over the strike flight and left click. You will see the ADD FLIGHT window pop up. As before, select the aircraft, number of ACs, their role (Intercept, Barcap, or whatever), their home base and skill. This time make sure that the start time is TARGET. Amazingly, the flight path is shown. You can adjust this flight path just as before, just make sure the TOT is locked and all other steerpoints are not. You may want to add another flight of bad guys to get involved later, maybe on the way home (RTB). If so, advance the clock once more to a later time. Notice as you advance the clock, you will see movement in all of the AC in the theater. When you have decided at what time, or position of your AC, that you want the bad guys to show up, just place your cursor where you want them to appear and left click. Again, you will see the “ADD FLIGHT” window and again you go through setting up this flight the same as before. Make sure that Target is selected
Phase II The Mission Building cont. Guys, that’s all that is involved in a simple mission. It’s just that easy. If you want to make things more interesting, i.e. harder, just add more flights, adjust your steerpoints on both sides, add weather or add more ground operations. Literally, the sky’s (no pun intended) the limit. Now go and actually fly the mission, turn labels on, and see how the war goes. Once you like the way the "TOS"s and flights work out, then save your mission and share it with others. Remember, just because you know when the enemy will jump you doesn't mean the guy you give your mission to will know. He can always cheat and go into the editor and look, but if he wants a challenge, he will simply play the mission, recon the target, fly and see if he can win. And oddly enough, even though you know what will happen and when it will happen, flying your own missions can still be fun and challenging. I hope that you will get something of interest out of this presentation. I would also like to acknowledge Glenn “Sleepdoc” Klesky, MD for his information. Garold Stewart aka Gman