Comprehensive Guide to FTP File Transfers Using FileZilla on Windows
This guide introduces File Transfer Protocol (FTP), a method to transfer files between your local site and remote servers using FTP software like FileZilla. It covers the installation of FileZilla on Windows, establishing connections to remote sites, and file manipulation techniques. Users are cautioned about potential risks when working with live websites, emphasizing the importance of backing up files before making any changes. This tutorial includes step-by-step instructions to ensure safe and efficient file transfers for users managing websites.

Comprehensive Guide to FTP File Transfers Using FileZilla on Windows
E N D
Presentation Transcript
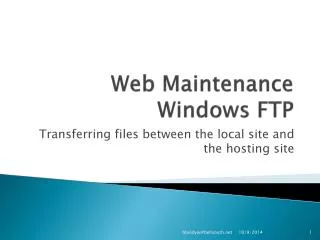
Web Maintenance Windows FTP Transferring files between the local site and the hosting site blandyw@bellsouth.net
Getting Started File Transfer Protocol (FTP) is a network protocol used to transfer files over a Transmission Control Protocol (TCP) computer network, like the Internet. An FTP client may connect to an FTP server to manipulate files on that server. This is accomplished using FTP software. blandyw@bellsouth.net
WARNING • You are about to learn how to move files between your local site and the Remote site. • If the Remote site you are working with is a live website, such as, your Flotilla’s website, be very careful about moving files to the Remote site. • The file structure of the Remote site may be a little different than you are used to within your own computer • If your Flotilla website is hosted by the Auxiliary and most are then your web address will look something like this, http://a0700502.uscgaux.info/ • If this is your situation then first move all files to your local site from the Remote site • This will give you a backup of the entire site prior to moving any files to the Remote site • How to create your local site and move all files from the Remote site to your local site will be the first slide after you finish familiarizing yourself with the FileZilla software blandyw@bellsouth.net
FTP Software If you don’t have FTP software, you can download a free copy from numerous sources. Two are listed below: • http://filezilla-project.org/download.php?type=client • http://winscp.net/eng/index.php The following slides describe how to download Filezilla FTP software for windows. To start you can click on the Filezilla link above, then come back, and go to the next slide. blandyw@bellsouth.net
When you click on the link from the previous page, this page should appear Click the Windows “.exe” version of the product blandyw@bellsouth.net
If the following message appears, click “Yes” Download File… What’s the Risk? Information Bar Help If this message appears, click where it says, “Click here for options” Then click on “Download file” in the dropdown box that appears Finally, if the following message appears again, click “Yes” blandyw@bellsouth.net
The pop up below will be displayed, click on “Save”, when the pop up below appears, click on “Save” Note: Make sure you write down the folder and saved file name blandyw@bellsouth.net
After the download completes this will pop up, click “Run” Depending on the Operating System that you are running (XP, Vista, etc.), you may get an additional pop up that asks whether you want to allow or cancel this operation, click on “Allow”, then when the pop up below appears click on “Run” blandyw@bellsouth.net
When the License Agreement pops up, read it, then click on “I Agree” blandyw@bellsouth.net
Choose your Installation option (either one will work depends on your situation) then click “Next” blandyw@bellsouth.net
Check all components, then click “Next” blandyw@bellsouth.net
The default destination folder will work for most users, Change it if you need to and then click “Next” blandyw@bellsouth.net
Choose Start Menu Folder, your choice, then click “Install” blandyw@bellsouth.net
Click on “Finish” The product is now installed and ready for use, click “OK” blandyw@bellsouth.net
Working with FileZilla • Your FTP software is now installed • The following slides will give you a flavor of what it is like to do a “put” of files to the remote site and a “get” of files from the remote site • We will start by setting up the software • The next page shows the FileZilla screen and is intended to help familiarize you with some of the buttons on the menu bar blandyw@bellsouth.net
This is the native FileZilla screen with no site opened blandyw@bellsouth.net
Before you start transferring files, you might want to familiarize yourself with some of the buttons on the menu bar. Feel free to try each of the buttons before we get started, but get the screen back to the way it looked before going forward. The button next to the 4 toggles refreshes the file listings. You will note that when you click on this button there is activity in the message log. First try the buttons on the menu bar. The 4 that are circled change the way items are display. Try toggling (clicking) each one to see what happens, then click again to return the display to the way it was originally. blandyw@bellsouth.net
FileZilla - Setting Up a New Site • If you are using a “Firewall” you may have to give permission to FileZilla to access the internet • Next we will set up a new site. • NOTE: If you are setting up a current “live” Flotilla site, then you must download all contents of the Remote site to your local site right after setting up the New Site • There are two ways to initiate this process • Start by clicking on “File” in the upper left corner – see screen on next page, or • Use the shortcut button on the left side of the menu bar (will show later) blandyw@bellsouth.net
First click on “File” then click on “Site Manager” This is the Site Manager screen Click on “New Site” blandyw@bellsouth.net
This is the New Site Screen, you will notice that FileZilla has already filled in some of the fields for you, such as, Servertype, Logontype, User, and Password blandyw@bellsouth.net
First click on “New Site” in the upper left corner of the screen and enter the Site name. Use a name that will be meaningful to you. Now click on the box next to Host and fill in the Host name that was given to you. It will generally look like a typical internet address Unless you were told otherwise, leave the servertype as FTP Enter your User and Password Change the Logontype to “Normal” Enter any comments that might be helpful to you (Optional) Finally press “OK” blandyw@bellsouth.net
Once again, click on “File” then click on “Site Manager” You have now created a new site, if you have additional sites to create simply click on “New Site” and add another. Once you have added your site(s) select one from the list in the “Select Entry” navigation pane and click “Connect” blandyw@bellsouth.net
Review • You have downloaded the FTP software • Installed the FTP software • Created a new Site to manage, and • If this is a “live” site, then the first thing you are going to do is copy all files from the Remote site to your local site. • If you have not yet done so, then create a directory (folder) for your new site. • Place it somewhere that is convenient for you. • If the site is a Flotilla site, then name the folder something like Flotilla 23 where 23 is your Flotilla number. blandyw@bellsouth.net
Created a New Site and labeled it Flotilla 52 We are now connected to the New Site: Flotilla 52 By typing the path to the directory on the Local site, you bring up the directory in the directory listing Then when you click on the actual Flotilla52 directory, you see that the directory is empty Now you are ready to transfer the entire site from the Remote Site to the Local Site And just clicked on the “Connect” button blandyw@bellsouth.net
NOTE: Be careful here. Click on “+” on the Remote Site. Files will start to be copied over to the Local site (your computer), when done, all directories (except empty ones) will be copied to the Local site from the Remote site giving you an exact copy of the web site on your computer Click on “Download” The following screen will appear blandyw@bellsouth.net
You now have a backup of your Remote site • Your local site and the remote site are now in sync • It is now safe to start copying files from one site to the other • Since both sites have all of the files nothing will be changed during your practice session • Let’s proceed, first if the connection has been lost, reconnect to the Remote site blandyw@bellsouth.net
You are now connected to the Remote Site and are ready to transfer files List of FTP commands generated by the software when you clicked on “Connect” Click on the “+” File listing of the files on your local site (i.e.: your hard disk) File listing of the files on your Host AKA Remote site blandyw@bellsouth.net
Note that the file list has been expanded, but there is a “?” to the left of the folder names, the software has discovered the directory but does not yet know what is in the directory, when you clicking on one of the “?” , the directory contents will be discovered blandyw@bellsouth.net
Continue to open all directories and the “?” will disappear blandyw@bellsouth.net
Now the focus will be on the Local Site. If you do not have a local directory set up, create one. In this case the local directory is c:/Operations. To find it, C: (OS) will be expanded by clicking the “+”, then using the right hand scroller, scroll down to Operations blandyw@bellsouth.net
You are now ready to transfer files Simply double click on the folder name to open it blandyw@bellsouth.net
Now might be a good time to note that there is a time-out feature built-in to the software for your protection. If this happens to you, simply click on the “Open the Site Manager” Down Arrow” and up pops your sites. Click on the site you want to open and it will reconnect you. To transfer a file from the local site to the remote site, click on the file name to highlight it, then click and hold the left mouse button, drag the file to the corresponding directory on the Remote site, and release the mouse button. blandyw@bellsouth.net
Immediately prior to transfer the file 2005AUXco.. is highlighted , the _documents folder is also highlighted, and the cursor with a plus sign is positioned over the _documents folder. All you have to do now is release the mouse button. blandyw@bellsouth.net
This shows the results of the transfer of 2005AUXwsCOMDTNOTE.PDF, which was successful and that is all there is to it. To move or “Put” a file to the Remote server, you reverse the process. Open a directory on the Remote site, “grab” a file, drag it to the Local site, and drop in the directory where you want it. blandyw@bellsouth.net