Download
1 / 72
730 likes | 752 Vues
CAP Ground Team - Task O- 0001 Prepare Individual Equipment Revision December 2011. Ground Team Individual Equipment (Task O- 0001 ). Reference: Ground & Urban Direction Finding Team Tasks (24 May 2004) Ground Team Member & Leader Reference Text (Revised April 2003). Introduction.

E N D
CAP Ground Team-Task O-0001Prepare Individual EquipmentRevision December 2011
Ground TeamIndividual Equipment(Task O-0001) Reference: Ground & Urban Direction Finding Team Tasks (24 May 2004) Ground Team Member & Leader Reference Text (Revised April 2003)
Introduction Administrative Items
NOTES ON THIS TRAINING Completing the online training alone for Task O-0001 will NOT in itself qualify you for completion of the Task To qualify you for completion of Task O-0001 you must: • Print certificate for successful completion of the online training for this Task. • Print the 24 & 72 Hour Pack checklist • Take both the Certificate and Checklist to your ES Officer and have them inspect to ensure you have required gear. • Your ES Officer will then be able to certify final completion of Task O-0001.
BENEFITS OF GROUND TEAM EQUIPMENT • Your individual equipment is designed to keep you functional in the field and to help you do your job • Everywhere that you go, you will have gear with you, and we mean everywhere. To do that you are going to need know how to wear that equipment properly and safely. • The equipment that you take with you could not only save the life of a missing person or crash survivor, but will save yours, if you use it properly and take care of it.
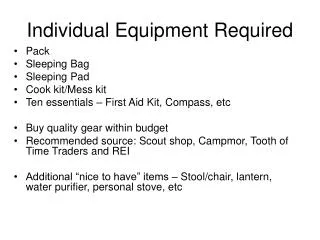
Equipment is divided into two parts; • 24-hour pack for short activities (typical field gear) • 72 hour pack for longer duration activities (typically called base gear). • Please click below to download the 24-hour & 72-hour pack list required for Trainees and Ground Team Members http://www.trainingsupportgroup.com/www/ReferenceMaterials/24_and_72_HOUR_PACK_CHECKLISTS.doc
For your equipment to be effective, you must insure it is clean and serviceable. Occasionally you will have to replace items such as medicine, batteries or food because it has passed its expiration date. • You must be able to carry all your equipment at once, in case you must “hike in” to a mission base. Normally, this means leaving room in your base gear pack to stow all of your field gear. • Ensure your gear is properly secured -- nothing should be flapping loose where it could snag in the brush or bang against your body when moving.
How to Carry Your Gear • Most people use either the military LBE (Load Bearing Equipment), Aircrew Survival Vests, small backpacks or civilian rescue vest options. • You will need to carry many things, as you can see from the list you downloaded, and you need to keep in mind that the system you use to carry your gear needs to fit comfortably on you. • You will need to arrange and your gear so that you can wear it for long periods of time, and not have any major complaints. • Your Ground Team Leader should check all of your gear to make sure that you are wearing it properly and will also make suggestions for changes. • This kind of equipment has been in use for years, and if worn properly, you should not have any problems.
24 Hour Pack • The 24 hour pack is what you carry while searching. • As its name infers, in case of an emergency, this equipment will help you survive in the wilderness for 24 hours. • In addition, your 24 hour pack is part of your uniform -- when the public sees you on a mission, they will probably see you wearing your field gear. • Because of this, your 24 hour pack must present a professional uniform appearance. Though packs do not need to be identical, it is advantageous for unit members to have similar 24-hour packs. • Every ground team member will have this equipment.
The 24-hour pack is intended for the short haul or quick duty. These are the necessities for the job at hand. • This load is set up for one day, including the possibility of an overnight stay, but this does not mean to over pack. • The 24-hour pack should be replenished from the 72-hour pack at the end of each day if in the field for an extended period. • It is recommended that you establish a checklist of equipment carried on your search load so that you know what needs to be replenished or if you have lost anything
24-Hour Pack contents • Storage System • 1 day of Food • Minimum of 2 Quarts of Water • Personal Survival Equipment • Waterproof matches and other fire starting materials • A few square feet of heavy duty aluminum foil • Assorted Fish hooks, line, and split shot • Assorted types and sizes of flexible adhesive bandages • Small sewing kit • Signal Mirror • 50 to 100 feet of paracord • 2 large Lawn & Leaf Trash Bags • Water Purfication Tablets • Personal first aid and hygiene kit • Pancho and/or rain gear • Compass • Flashlight with red lens, extra batteries and an extra bulb • Orange reflective vest • Pocket knife • Work Gloves • 12 to 15 feet of 5/8” rope and a carabiner • Whistle on a lanyard • Notepad, pen and pencil
1 Day of Food(24-Hour Pack) • This should be food packaged for the long term so that it will last such as smaller canned goods or broken up MREs. • MREs are ideal since they are high calorie and now have alternate and quicker means of heating. MREs or freeze dried foods are also much lighter than the typical canned foods, and leave less to be packed out of the wilderness. By carrying these lighter foods, you can also carry more, that way if you have that extended stay or rescue a starving survivor, you have the food to survive. • In addition to MRE's, snack foods like "GORP" (Raisins, peanuts and M&MÔ candies), athletic food bars (Cliff Bars, Power Bars, etc.) or granola bars, dried fruits and meats from your local grocery store, and other foods are excellent. • You can pack some instant oatmeal for breakfast, beef jerky or salami for lunches, and perhaps an MRE for dinner.
Drink a Minimum of2 Quarts of Water • The average person should drink much more than this per day in summer or winter, but 2 quarts normally sustains a person long enough to get replenished or find another source. • If you know that you are heading into an area that there is no place to replenish your water supply, you may want to consider bringing more.
Personal Survival Equipment • Your survival should be your top priority. • If you get stuck overnight because storm rolls in at the last minute, or you have to stay with a survivor overnight, then you will need to be prepared. • Hopefully you will never get separated from the team and need to use this equipment, but if you do, you will have the equipment to survive • The following is what most people carry to guarantee their own survival: • Waterproof matches and other fire starting materials • A few square feet of heavy duty alumin foil • Assorted Fish hooks, line and split shot
Waterproof matches & fire starting materials • Magnesium striker bars, dryer lint in a Ziploc bag, paper, or any of your typical dry materials can easily be carried to start a fire when you must. • Remember though, that a fire is not necessary for your survival, but it does make it much more comfortable, so plan for it. Nobody likes to be uncomfortable. • Also, dryer lint needs to be from natural fabrics to be effective. Synthetic lint doesn't really burn well; it melts (and smells bad).
Uses for heavy duty aluminum foil • Packaging left over food • Helping to heat food over a fire • Made into a cup • Made into a bowl to boil water for sanitization. • As an antenna array for better radio reception
Fish hooks, Line & Split Shot • Fish are often easy to catch, and considering the weight of these items for the benefits derived, it is a wise idea to bring them. • Also, consider trying to make a fish hook in the field. It may keep you busy, but it will normally keep you hungry rather than nourished.
Flexible Adhesive Bandages • It is very easy to cut yourself on briars or tree limbs or other things that you might find out in the wilderness. • Bring the bandages along so that you can clean the wound and protect yourself from getting an infection. • It is also recommended that personnel carry povidone-iodine pads to use as an antiseptic to clean out wounds.
Sewing Kit • Strong thread, assorted needles, and safety pins, and replacement buttons for uniform items can help you stay neat and protect yourself. • If your clothes begin to fall apart then they are doing nothing to protect you. • You can wrap a few sewing needles with thread and keep them in your match case. • Also, safety pins can be removed from your first aid kit, and buttons can be salvaged from less critical areas if necessary.
Signal Mirror • A signal mirror can often help you get an aircrew's attention. • A mirror can help you take care of cuts that you may have to your face or in starting a fire. • Glass mirrors are easily broken though. If you own a glass signal mirror make sure that it is packed so that it does not get damaged before you get a chance to use it. • Glass signal mirrors are more effective than metal ones - they stay shiny since hey don't scratch. This is the reason that military signal mirrors are glass. • Remember though, any shiny object will do in an emergency, including CD’s.
Paracord • Paracord also has many uses. It can be used to tie branches together to make a shelter or hang food out of the reach of small woodland creatures for example. • Paracord tends to be like gold to ground teams, so keep track of it so that it does not disappear. If you don’t have it when you need it you will not be very happy. • You need not have one long piece of paracord - you will probably end up cutting it anyway, so several pieces are perfectly OK.
Trash Bags • Trash bags have great uses in survival situations. • They can be used to help protect you from the weather, on your pack, or as part of your shelter. • Can be used for storing whatever you might want to keep dry
Water Purification Tablets • Water is essential to your survival, but there is no reason why you should get sick from drinking it. • Bacteria and algae often carry sickness, and both are often found in free standing water and even in running water. • Tablets should be iodine based (military surplus or Potable Aqua brand), or Iodine crystals (Polarpure). Filters certified by the National Sanitary Foundation (NSF) are also acceptable. • Chlorine tablets (halazone) should not be used. • Iodine tablets should be gunmetal gray in color, if they turn rusty brown they have lost their effectiveness. Keep tablets sealed in their bottles until use, and keep dry.
Personal First Aid & Hygiene Kit • In addition to what is in your personal survival kit it would be a wise idea to carry extra items to make you more comfortable and healthy in the field. • The following items are recommended: • Sterile gauze pads (4" x 4") & roller bandages (3" wide) • Two triangular bandages • Aspirin, Acetaminophen (Tylenol Ô) or other analgesic • Antibiotic Ointment • Medical Tape, 1" wide, partial roll. Recommend waterproof tape or athletic tape
Personal First Aid & Hygiene Kit(continued) • Povidone-Iodine (Betadine) Prep Pads • Travel Razor (Not Electric) • Soap - small hotel sized bar, in a plastic bag. Liquid soap in a small squeeze bottle is also good, but pick one that is not irritating if not rinsed well. • Travel Toothbrush and Tooth Paste • Tweezers, for splinters - fine sharp points • Nail Clippers & File Combination • Special or Personal Medication • Spare undergarments
Poncho and/or Rain Gear • Make sure any holes are patched before returning to the field if they occur. • Military rip-stop ponchos are recommended for summer use and Goretex rain gear for use in all other seasons. • Ponchos are easily repaired with Duct Tape and can be used for other things like quick shelters in the summer or helping winter shelters. • Remember that while, a poncho is not the ideal year round solution to weather problems, it is a good supplement.
Compass • Get one that you are comfortable using in both day and night. Some members prefer using a military lensatic compass or an orienteering compass, there are many compasses oriented towards what we do. • Make sure to check with your Emergency Services Officer before investing money in a compass • Don’t forget that this compass will need to be used for not only simple orienteering exercises, but also map work and should come with a straight edge and easily convert for declination. (you will learn more about this during a compass course). • Store this compass in a location that it will not be affected by magnetic objects like a knife and where it will not get easily lost. Evaluators often see people carrying a compass in a compass pouch on their suspenders upside down so that the pocket can easily be opened and drop the compass out. This is great, but if you don’t have you compass on a lanyard then that same compass could fall out on the trail and you must purchase a new one. • Stow your equipment so that you have it when you need it.
Flashlight with red lens • We recommend using a mini-mag flashlight or equivalent with the red lens attachment. These tend to be more durable than the standard military anglehead flashlight, but both work. • Whatever flashlight you use, we recommend that you use Krypton bulbs in your flashlight since they tend to be much brighter than the bulbs that come with the flashlight from the factory. • Finally, remember that the red lens is not an option, but a requirement. Humans are not like other animals that have permanent night vision. When exposed to white light, the typical person loses their night vision for about 30 minutes. Using a red lens allows you to keep your vision, and even if coming from white light it assists your eyes to recovery from your night blindness. The only exception to this rule should be medical personnel evaluating or treating patients. White light may be necessary to accomplish an accurate patient assessment. • Non-essential team members should protect their night vision in case they are needed to lead the team out.
Where to keep your Flashlight • Most personnel keep their anglehead flashlight on their suspenders. This is a good place for it, but you need to make sure that it is secured so you don’t smack yourself in the jaw or lose it. Use a blousing band or tape to keep an anglehead flashlight from moving around if you want to keep it on your suspenders. • Another question to consider is how often do we enter into situations where darkness just occurs? You can keep your flashlight and batteries stowed in your butt pack or a cargo pouch out of the way. You will still know where they are, and you don’t run as much risk of getting hurt or losing your flashlight. • Always have a spare bulb and spare batteries for your flashlights.
What about Headlamps? • Many people find that using headlamps is superior to using flashlights. Headlamps leave both hands free, and are always pointing in the right direction. You can even find headlamps with a red lens • Think when wearing a head lamp. Either turn it off, shade the light, or don't look directly at a person you're talking to so that they are not blinded. • Like any flashlight, you should have spare bulbs and batteries for your headlamp. Some models can take two different types of batteries. Lithium batteries are excellent for cold temperatures and have a long shelf life. Headlamps that have a battery compartment worn on your belt are not as useful for most rescuers because the wire is either too short or gets snagged.
Orange Reflective Vest • We are not doing a job where we need to be camouflaged or covert about our tasks. • Being visible helps team members see each other from greater distances, as well as making sure that hunters do not shoot at you. • Your vest can be substituted by an equivalent rescue vest that is already blaze orange and reflective. • By the way, regulations require the wear of orange vests when performing field operations in BDUs.
Pocket Knife • We recommend Swiss army type knives or Leatherman tools because of the multiple functions and obvious advantages. • A brighter colored knife will not be as easily lost in the field. • A large survival or Rambo knife is not necessary or recommended. We are not going into combat, so your knife can be packed away when not in use • It should not be hung on your suspenders upside down in a combat approach. This is not only unsafe, but scares the public, and we don’t need any thing that hurts CAP’s image. • Your knife should always be kept clean and sharp, and should never be played with like a toy. It is a tool that should only be taken out when the tool needs to be used.
Restrictions on Knives • You may only wear a sheath knife if authorized by your team leader. • Sheath knives cannot have a blade longer than 6” or a total length of greater than 11”. • The sheath must adequately secure the knife and protect the wearer from the blade. • If authorized, sheath knives will be worn only on the pistol belt or carried inside the pack. • The following knife types are NOT authorized: • Boot knives • Butterfly knives • Switch blades • Double edged knives • “Rambo” style survival knives • Knives with retracting sheaths. • Machetes or hatchets can only be carried by senior members when needed for that specific sortie. • No knives may be visible when the member is performing crash sight surveillance duty.
Work Gloves • Work Gloves are a required piece of equipment for teams in the field. • For those heavy-duty jobs, it is just smart to wear heavy work gloves (such as leather) • Winter gloves and mittens are normally designed to do one thing, keep your hands warm. That is great, but if you must move wreckage parts to get to a survivor, you will most likely rip or tear your winter gloves or mittens. Your hands can easily be damaged, and there is no reason to expose yourself to these problems.
12-15 feet of 5/8” Rope & a Carabiner • This has many uses such as a rappelling seat or other towing functions, hoisting parts out of the way at a crash site, or helping to make a shelter for your own survival. • Remember that just because you carry it does not mean that you are qualified or allowed to use it. CAP members do not rappel or perform climbing or high angle rescues without the assistance and guidance of professional instructors. If you do it and something happens to you without instructors and guidance, then you will not be covered by CAP insurance and will henceforth be on your own. • Twenty feet of 1" tubular climbing quality webbing can be used to make a more secure and comfortable harness for most applications. • Carabiners should be locking-D shaped.
Whistle on a lanyard • This whistle is used during practical search exercises to give voiceless commands, as well as to bring attention to yourself when necessary (you will learn whistle commands later) • This whistle should preferably be made of durable plastic so that it lasts, and does not cause you your lips to freeze to it in the winter
Notepad, Pen & Pencil • Every member should be carrying a writing implement of some sort and paper when in uniform. • It is always a good idea to make sure that you have spares with your gear. • You may need to record the information off of an ELT or draw diagrams at a crash site. It is important that you are able to document what you did.
Additional Items • Local regulations, field conditions, or higher qualifications may require you or your team to carry specialized equipment. Ropes and climbing gear, shovels, and extrication equipment are just the beginning. • Think about what you may need in the next few hours of a search. Some personnel may carry a small air band radio like the Radio Shack Jet Stream Mini to use to find an ELT. • Mission radio operators may carry a VHF/FM radio to maintain communications with the ground team vehicle, aircrews or mission base. • The ground team leader may carry an Air/Ground signal kit to establish better communications with an aircrew or to establish a helicopter landing site. • Medics may carry a trauma kit appropriate for their level of certification and competence.
A Note about carrying Additional Items • Remember to take what additional items you may need to complete the task, but don’t over burden yourself so that you never reach the target. • If you don’t rescue the survivor because you were to slow from all of the gear you carried that could have been improvised on the site, then someone just dies because you didn’t think. • Carrying food for a week for the entire team to a site one mile off the road that the aircrew is leading you to is not a smart move. • Think before you add additional equipment.
72-Hour Pack(Extended Duration Pack) • The extended duration pack is designed to help you live in the field for more than one day, typically 48 to 72 hours. • It includes your sleeping bag, tent, and other long term comfort items. • The extended duration is not subject to uniformity -- color and size does not matter. The major constraint is how much you can carry. • Even if the mission is only expected to last one day, you should always bring your base gear. You never know how long a mission will last, or whether you will go straight to another mission from the current one.
72-Hour Pack • Your pack should be designed to fit you comfortably for the long haul of approximately six or more miles. • You will have to consider if you want to get an internal frame backpack or an external frame backpack (backpack types covered in the next slides) • Your pack will vary in size and description depending upon the user and the type of frame most suitable and comfortable for the task. For example: In the summer you may only need a small external frame pack to store all of your items, but in the winter you may need a large internal frame pack to store the same items plus all of the items to keep you alive in the colder temperatures. • Remember to not over pack. Look at your required gear and only add additional items that you will truly need. With proper training and foresight many problems can be avoided and you can still be comfortable both at the site and while hiking your way there.
Backpacks Internal Frame External Frame
Internal Frame Backpacks • Internal frame backpacks have a streamlined shape because the frame, a flexible one, is inside the backpack. • Because the pack is flexible and carries close to the body, it offers a comfortable fit, a low center of gravity, flexibility, and a relative freedom of movement to the user. • Those features make internal frame packs good for rock scrambling, off-trail work, winter ski touring, and mountaineering. • The drawback with internal frames is that they do not carry unwieldy loads easily and can become quite unstable and uncomfortable if you end up lashing large amounts of gear to the outside of the pack.
External Frame Backpacks • External frame backpacks feature rigid, rectangular frames that are usually made of aluminum. • The weight carries higher than a pack with an internal frame, so correct loading is essential. • The frame carries the pack away from your back, improving ventilation and making the pack a cooler choice. • Because the pack frame is somewhat rigid, however, it tends to restrict moment. • External frame packs also typically have a higher center of gravity, making them feel a bit top-heavy unless you load them properly. • External frame backpacks are ideal for very large and bulky loads and for long backpacking trips.
Loading Gear for Internal-Frames • Whether you are hiking or traveling on- or off-trail, keep your heaviest items close to your back, centered between your shoulder blades. • For on-trail travel, keep heavy items higher inside your pack. This helps focus more of the weight over your hips, the area of your body best equipped to carry a heavy load. • For off-trail exploration, reverse the strategy. Arrange heavier items lower in the main compartment, starting again from the spot between your shoulder blades. This lowers your center of gravity and increases your stability on uneven terrain. • Stuff your sleeping bag into its lower compartment first. Squeeze in any additional lightweight items you will not need until bedtime (pillowcase, sleeping shirt, but nothing aromatic). This will serve as the base of the main compartment, which you'll fill next. Tighten all compression straps to limit any load-shifting.