DIY Bike Frame Manufacturing Project
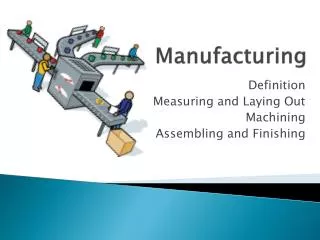
Learn how I fabricated a custom bike frame at home using welding, turning, and shaping techniques. From suspension mounts to exhaust, join me in creating a unique ride.

DIY Bike Frame Manufacturing Project
E N D
Presentation Transcript
Frame • I manufactured large portions of the frame at home as I felt this was easier done at home an I felt the lab times could be better used on the lathes an other equipment which I didn’t have. Most of the frame I welded at home, which I have videos up of and I use the gas welding on the crossbar.
Turning • There was a lot of turning required in the manufacturing of this bike, the suspension, handlebars, exhaust and a variety of bushings were all manufactured using simple lathe processes within the lab.
Suspension mount/steering • I used the standard laser cut suspension mounts and bent them into shape using the jig that was available. • For the steering bracket I shaped most of it with the guillotine and finished with the file. When I bent it into place I then drilled it with timber wedged between the top and bottom pieces, this was done to insure the holes lined up perfectly.
Handle bars • For joining the handle bars I used TIG welding as it would be the most suitable and neat, when welding it I had to insure I welded the bottom bar to the suspension mount first. When this was done I dropped a threaded bad with a lock nut on the end down through the bar letting it drop out under the suspension mount, this was done to insure my suspension will be connected to my steering, once this was done I welded on the handlebar. The ends were then slotted in, they were quite a tight fit but I used a small drop of glue just to make sure they were secure.
Exhaust • The bracket to connect to the engine was just simple cut and filled to size and then drilled. The tubing was bent to the required shape on the pipe benders and then the excess was then cut off. I then welded the bracket to the pipe, the end of the exhaust was manufactured on the lathe and was just fitted into the end of the pipe, there was a tight fit so there was no need for glue.
Tank/Seat/Mud guard • This was shaped using tan cast. I used a variety of methods such as saws, rasps, files, knifes and sandpaper to create the required shape, when I had got the required shape I used filler to cover the whole surface and sanded it down an repeated this process five times until I was happy with the surface finish. I then applied three coats of primer and two coats of the finish colour, I also added an leather seat to give a more realistic view.
Finishing • All the steel was cleaned with a wire brush and emery paper and al dirt and dust washed of and then I applied a spray finish to all my pieces, as required for a black or blue finish I used a grey primer, I applied three coats of primer to each piece and two coats of the finish paint, this was all done at home in my own shed and I hadn’t the time or facilities on the labs to do so. For the exhaust I got a chrome paint to put a chrome finish on it. I used a variety of methods to keep painted parts touching other surfaces throughout the spraying, some were hung up and others were supported with splinters on timber to minimise contact.
Finishing – Final touches • When assembling the suspension a small bit of the paint scrapped off so I had cover all the black parts in cling film and re-sprayed them in position. In the tank I got a cork of a 5 litre water bottle an primed it and sprayed it chrome to get a fine finish. I also added in a cushioned seat by getting some hardboard and 10mm cushion and fixing to size, I then got black leather materials and brought it around this and the seat.