Download

1 / 38
380 likes | 616 Vues
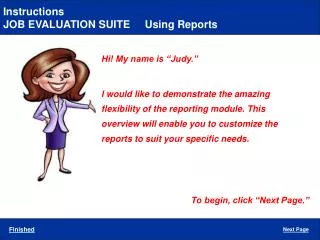
Instructions. JOB EVALUATION SUITE. Hi! My name is “Judy.” . I would like to introduce an amazingly simple, web-based application designed to provide ergonomics training, identify risk factors within a task, and create all necessary documents. . To take a brief tour, click on “Next Page.”.

E N D
Instructions JOB EVALUATION SUITE Hi! My name is “Judy.” I would like to introduce an amazingly simple, web-based application designed to provide ergonomics training, identify risk factors within a task, and create all necessary documents. To take a brief tour, click on “Next Page.” Next Page
Instructions JOB EVALUATION SUITE “Judy,” our tour guide, will ask the user to login by entering company name and password. For this demonstration the company name is “Wa Ergo” and the password is 81040. (When in doubt, read “Judy’s” instructions.) Next Page
Instructions Enter Your Last Name Enter at least the first two characters of your last name and click “Find Name.” Back Next Page
Instructions Enter Your Last Name You will be shown a list of names. If your name is not on the list, you may add your name by clicking on the “Add New” link. Click on the yellow text below to see what happens if the name is not found. What Happens if Name Not Found Back Next Page
Instructions Name Not Found If your name is not on the list you must add your name by clicking on the “Add New” link. Back Next Page
Instructions Completing the Add New Function You must complete your name entry by adding a comma, a space, and your first name. Entering a “Password” is optional and not recommended. (The password slows the process and people forget passwords. Note: The only data our application associates with a person’s name is a series of numbers 0 through 8.)Click “Save” when you are finished. At this time the "Reminder Email" box should be left blank. It will be used in a later revision. Back Next Page
Instructions Completing the Add New Function Your name should now appear as an option. Select it from the list. Back Next Page
Instructions Selecting a Location After the correct name has been selected, Judy will ask the user to select from a list. At this point the user is simply specifying where they are located within the organization. In this example, it is a list of clients, however, this list could contain the names of operating divisions, plant locations, departments, or whatever terminology your organization uses. In order to increase ease of use, this list will be customized for each customer. You may add additional entries and sub-entries as needed. Click on the yellow text below to see how the “New,” “Edit,” “Expand,” and “Links” buttons function. Back Next Page New Edit Expand Links
Instructions Adding “New” Information Clicking the “New” link will display this screen. Type the name of the “Client” that is to be added to the list. In this example, “Olympia” is to be added. The password is optional and not recommended. The “Sub-Group” box allows “Olympia” to be further defined. In this example, the title “Branch Office” will be entered as a sub-group. Back Next Page
Instructions Selecting a Location Notice the word “Branch Office,” previously entered in the “Sub-Group” box, now appears in Judy’s instructions and at the top of the “List” box. Notice “Olympia” has been added as a client. Because you entered “Branch Office” in the “Sub-Group” box, Judy now asks the user to “Please select a Branch Office from the list.” However, the list is empty so a new branch office location must be added. Click on the “New” button to add a branch office location. Back Next Page
Instructions Entering Information in the “Sub-Group” box After clicking “New” you will be able to add a branch office location to the list. In this example, Fifth Avenue was added as a branch office location. This time the “Sub-Group” box is left blank because the user will make no further selection after Fifth Avenue. You may repeat this process until a complete representation of your organization has been created. Back Return
Instructions Editing the Field Names Clicking on the “Edit” link will allow you to edit the text “Customer Name” and/or the sub-group title, “Client.” This is how you can specify sub-group headings as Department, Cost Center, etc. If you enter a password you will need this password to edit or add information later. Return
Instructions Expanding the List Clicking the “Expand” button will expand the list of locations to show sub-groups. This will allow you to quickly view the categories, and also to navigate directly to your choice. Clicking the “List” button will return to a simple list of Clients. Return
Instructions Selecting a Department After selecting a “Client” (Seattle Ergo Company) and a “Plant Location” (Seattle City) the user will be asked to select a “Department” from the list. Back Next Page
Instructions Selecting an Evaluation Level After completing all the “Customer Name” selections, the user is asked to select one of three “Evaluation Levels.” The “Baseline” is used to evaluate current conditions. The “Predictor” allows teams to evaluate various ideas for improvement, and the “Final” is used to evaluate a job after the changes have been completed. Back Next Page
Instructions Selecting an Evaluation Tool The user may now select one of the 3 evaluation tools. “Hands and Arms” is used for tasks involving the upper extremities. “Lifting” is limited to lifting tasks and “Office” is used for evaluating computer tasks. Back Next Page
Instructions Selecting a Job Name After selecting an evaluation tool the user will be asked to select the name of the job being evaluated. Click on the yellow text “Adding a Job Name” below to see how to add a job name to the list. Clicking on any of the “All” buttons will cause all the items in that list to be displayed. For example, clicking on the “All” button in front of the text “Client” will show a list of all the clients. Back Next Page Adding a Job Name
Instructions Adding a Job Name In this example the job name, “Machine Repair,” is added. Most jobs will be broken down into tasks. For example, the job of Machine Repair may have tasks of removing an old bearing and then a separate task of installing a new bearing. Because the job of Machine Repair will contain a list of tasks, enter the title “Task Name” in the “Sub-Group” box. (The password is optional and not recommended) Back Next Page
Instructions Training and Evaluation - Hands & Arms After selecting the job, “Machine Repair,” and the task, “Bearing Removal,” the user will begin the evaluation process. Judy asks the user to select “Arm” as the first factor. This is a sample of the “Hands & Arms” evaluation tool. Click “Next Page” to continue this sample. To view samples from the other tools click on the yellow text below. Click “Finished” after viewing the samples that interest you. Back Next Page Sample of Lifting Sample of Office
Instructions Evaluation Page - Hands & Arms The user will be asked to use this “Evaluation” page to assign a rating of “0” to “8” to “Arm” factor. Additional training is provided by clicking the “Training” tab, located at the top of the page. Clicking the “Body Basics” tab will provide information about biomechanics. Back Next Page
Instructions Training Page - Hands & Arms Clicking the “Training” page provides clarification on how to complete the evaluation and provides additional understanding of the risk factor. Next Page Back
Instructions Sample of Body Basics Tab Clicking the “Body Basics” tab will display the “Table of Contents.” You may select the chapter that interests you. Next Page Back
Instructions Sample of Body Basics Chapter This is a sample page from the “Shoulder” chapter. Next Page Back
Instructions Score Sheet - Hands & Arms After each factor has been evaluated the “Scoreboard” will display the results. Judy will ask the user to click on the “Save” button to record the results. The evaluation and training are now documented and completed. Back
Instructions Training and Evaluation - Lifting Judy will ask the user to to begin the evaluation by clicking on the “Weight” risk factor. Back Next Page
Instructions Evaluation Page - Lifting This “Evaluation” page provides the ability to rate the risk factor. There is a brief “reminder” training section on this page. Clicking on the “Training” tab will provide additional training. Back Next Page
Instructions Training Page - Lifting The “Training” page provides clarification on how to complete the evaluation and provides additional understanding of the risk factor. Back Next Page
Instructions Sample of Body Basics Tab Clicking the “Body Basics” tab will display the “Table of Contents.” You may select the chapter that interests you. Next Page Back
Instructions Sample of Body Basics Chapter This is a sample page from the “Shoulder” chapter. Next Page Back
Instructions Scoreboard - Lifting After each factor has been evaluated the “Scoreboard” will display the results. Judy will ask the user to click on the “Save” button to record the results. The evaluation and training are now documented and completed. Back
Instructions Training and Evaluation - Office Computer After selecting the “Office” evaluation tool the user will be asked to select the task to be evaluated. Judy will then ask the user to select “Chair” as the first factor to be evaluated. Back Next Page
Instructions Training Page - Office Computer There is a “Training” page associated with each factor to be evaluated. The training does not promote or endorse any type of product. If the user is having problems with the factor being evaluated he/she can receive additional training presented on the “Tips” pages. Back Next Page
Instructions Evaluation Page - Office Computer The user is given five possible ratings. The last rating, red in color, indicates that the user is experiencing symptoms associated with the risk factor being evaluated. If the user does have concerns, he or she is encouraged to visit the “Tips” section for advanced training. Back Next Page View Tips Page
Instructions Sample of Tips Page - Office Computer The “Tips” provide practical, additional information which encourages greater understanding of simple solutions to problems. Back Next Page
Instructions Scoreboard - Office Computer After each factor has been evaluated the “Scoreboard” will display the results. Judy will ask the user to click on the “Save” button to record the results. The evaluation and training are now documented and completed. Back
Instructions JOB EVALUATION SUITE Thank you for your valuable time. If you have questions please contact William (Bill) Brough Phone: 253-839-4624 E-Mail: billbergo@aol.com Exit Back
Instructions Using Links By clicking on “Links ON,” you will be able to display any comments, links or other data that you would like to associate with each level. If “Link” is displayed that means that there is content available to view. If Note is displayed that means that nothing is currently associated. In order to add content, all you need to do is click on “Note” and input the data. Back Next Page
Instructions Using Links You may also link in video clips, animations, graphic illustrations and other media that can be used for training, etc. All a user needs to do is click the appropriate link in order to access the material. Back Return