Download

1 / 11
120 likes | 229 Vues
Development of CD album booklet. Front cover.

E N D
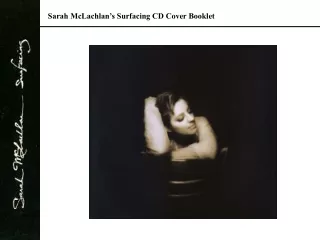
Front cover To the left is the original image that I used for my Album cover front page. Whilst at a party I saw the opportunity of a friend standing in this pose as decided to capture it as it gave of the correct vibe that I want my front cover to show. The contrast of light in the top left corner to dark in the bottom right corner is captured to show the liminal space that teenagers are in where they are not children and not yet adults. The freeness of the girl is showed by her variety of colours and patterns that she styles herself in. As I was creating a CD cover I wanted it to be square, however when I cropped my image I would either cut off her legs, or the the lamp. I wanted both parts in my image So I drew round and copied the image that I wanted and moved it into place.
Front cover I then selected a area of bricks with the lasso tool which will be used to cover up the unwanted lamp. Them move it into place with the layer being in front of the original picture, but behind the new lamp. However the bricks do not all match up, so I copied one brick and moved it into place to make the wall look realistic.
Front cover Add my selected font and wording and my front cover is complete. Happy with the image in front of me, I cropped my picture to the desired size
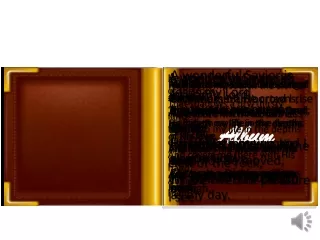
Inside double page 1 I pasted my original image onto Photoshop, on a background of my chosen size. I then erased all aspects of the image that are not required. Then I resized my image and dragged it into the required place. My next step was to change the background colour to grey. I added my lyrics in white and my double page inside was complete.
Inside double page 2 I added the original image onto the background of the Photoshop document. I resized the image and moved it into the desired place. Finally I added my lyrics in white and my inside double page is complete. I then changed the background to my chosen shade of green. I added a white border around my image.
Inside double page 3 Finally I added my chosen lyrics in white and this double page is complete. I added two black circles to the background of my white document. Next I resized my image and made it blend into the background. I then added my selected original image.
Inside double page 4 I placed the original image onto a Photoshop document I then rotated the image and moved it into the desired place. I then removed all parts that were not required with an eraser. I then added the lyrics in black, and the inside double page is complete. Next I made the background yellow.
Inside double page 5 Finally I added the lyrics and red and this inside double page is complete. I added the original image to my Photoshop document. I then erased all aspects of the image that I didn’t not want. Next I chose the background pattern that I wanted.
Final inside double page (accreditations) Next I added all the accreditations in blue, and my final double age is complete. I then resized them and cut out bits that I don’t need. I added the four original images to the Photoshop document. I then changed the background colour to black.
That was my step by step demonstration on how I created my CD album booklet.