Download
1 / 48
480 likes | 717 Vues
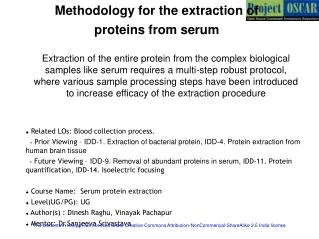
Methodology for the extraction of proteins from serum. Extraction of the entire protein from the complex biological samples like serum requires a multi-step robust protocol, where various sample processing steps have been introduced to increase efficacy of the extraction procedure .

E N D
Methodology for the extraction of proteins from serum Extraction of the entire protein from the complex biological samples like serum requires a multi-step robust protocol, where various sample processing steps have been introduced to increase efficacy of the extraction procedure • Related LOs: Blood collection process. > Prior Viewing – IDD-1. Extraction of bacterial protein, IDD-4. Protein extraction from human brain tissue > Future Viewing – IDD-9. Removal of abundant proteins in serum, IDD-11. Protein quantification, IDD-14. Isoelectric focusing • Course Name: Serum protein extraction • Level(UG/PG): UG • Author(s) :Dinesh Raghu, Vinayak Pachapur • Mentor: Dr.Sanjeeva Srivastava *The contents in this ppt are licensed under Creative Commons Attribution-NonCommercial-ShareAlike 2.5 India license
Learning objectives 1 After interacting with this learning object, the learner will be able to: • Define the protein precipitation using TCA-Acetone treatment. • Infer the protein solubilisation using rehydration buffer. • Separate out high abundance proteins • Operate steps involved in handling the instrument and the materials used. • Assess the troubleshooting steps involved in the experiments. 2 3 4 5
Master Layout 1 Reagents preparation (Slide: 6-8) Blood processing (Slide: 9-12) 2 Sample processing (Slide: 13-16) Sample depletion (Slide: 17-26) 3 Depletion Mechanism (Slide: 27-28) TCA-Acetone precipitation (Slide: 29-37) 4 Rehydration buffer treatment (Slide: 38-40) 5 Sample storage (Slide: 41) Animate for user click to show images or instruments used for each step from the respective slides.
Definitions and Keywords 1 • Protein: Proteins are the biomolecules, composed of amino acid, forms the building block of the system and performs most of the biological function of the system. 2. Protein extraction: The process of extracting the proteins from the serum for analysis purpose is called protein extraction. The chemicals involved in the extraction are 3. Serum: Serum is the yellowish part of the blood, devoid of cells and clotting factors. Serum contains all blood proteins and secreted proteins which can be used for the study. 4. Depletion column: The affinity column that are used to trap the high abundance proteins like IgG, albumin etc in serum are called depletion column. 5. Depleted serum: Serum devoid of high abundance proteins. 6. Lysis Buffer: A cocktail of reagents used for cell lyses. • Trichloro acetic acid: The acid used in the lyses buffer for lyses of the cell and helps to precipitate the protein. b) Acetone: One of the constituent of lyses buffer used to denature the protein. c) Dithiothreitol: Constituent of lyses buffer used to reduce the disulfide bonds in the protein. 2 3 4 5
Definitions and Keywords 1 7. Rehydration buffer: A cocktail of reagents used for sample solubalization and used for sample storage. a) CHAPS: is a zwitter-ionic detergent, constituent of rehydration buffer that is used to solubilize the proteins including membrane proteins. b) Urea: It is a organic compound in rehydration buffer that is used to denature protein. 8. Bromophenol blue: Used in rehydration as color marker and acid-base indicator 2 3 4 5
Step 1: T1: Reagents preparation 1 2 3 Audio Narration (if any) Description of the action Show a measuring balance the user should click ON the Instrument, pick paper from rack, fold it across and on the edge, place it on the balance so that balance reads 0.03g and the user should press ”0” on the balance to make the reading to “0.00”. Animate the action, whenever user starts to weigh any reagents. Clean the surface of the balance, tare the weight of the paper before weighing for each reagent. 4 5
Step 1: T1: Reagents preparation 1 Lysis buffer TCA 2 DTT Acetone 3 Audio Narration Description of the action Instruct user to prepare lysis buffer. Animator redraw above figure as shown. Let user takes out the bottles from the racks. Instruct user to weigh TCA and DTT, tare the balance like in previous slide, the user should pick the spatula open the lid of the TCA to weigh 1g and DTT bottle to weigh 0.007g separately and put in the tube labeled as lyses buffer. In case if the gram exceeds user should remove some quantity or if it is low add to get required amount and instruct user to click on acetone bottle, to take out 10ml in 25ml cylinder to transfer to lysis buffer bottle, now let user take the bottle for a brief vortex to mix the solution. Weigh 1% trichloroacetic acid, 0.07% of Dithiothreitol and add it to 10 ml of acetone to prepare lysis buffer and keep at 4’C. The reagents prepared are used for the protein extraction. 4 5
Step 3: T1: Reagents preparation 1 Rehydration buffer CHAPS 2 water urea 3 Audio Narration Description of the action Instruct user to prepare rehydration buffer (RF). Animator redraw above figure as shown. Let user takes out the bottles from the racks. Instruct user to weigh CHAPS and Urea, tare the balance like in slide:5, the user should pick the spatula open the lid of the CHAPS to weigh 0.02g and Urea bottle to weigh 0.6g separately and put in the tube labeled as RF. Instruct user to click on water bottle, take out 1ml pipette, set it for 1000ul and pipette in water into RF bottle. let user take the bottle for a brief vortex to mix the solution. Weigh 0.6g of urea, 0.02g of CHAPS to prepare rehydration buffer to store it at 4’C. 4 5
Description of the action/ interactivity Audio Narration (if any) Animate the blood collection step, show patients hand, instruct user to tie a band, make blood vessel visible, instruct user to apply antiseptic solution with cotton, instruct user to collect syringe and puncture the vessel for blood collection. Animate syringe action to collect blood with user interaction (clicking on the hand). After collection, apply antiseptic solution with cotton on punctured spot. Show like transferring the blood to the bottle labeled as serum separation tube and show some white powder at the bottom Step 2: T2:Blood processing 1 2 3 Collect the blood in the serum separation tube be careful and take necessary precautions to avoid any accidents. 4 5
Description of the action/ interactivity Audio Narration (if any) Instruct user to place the vacutainer tube into the bucket ice before centrifugation. Instruct user to open the lid of centrifuge and rotor. Zoom in the rotor, balance equal number of tubes inside the rotor. Close the lid of rotor and of centrifuge with hand action. Instruct user to set 2500 rpm, 4C temperature and 10mins, along with display. User can increase and decrease the values of set parameters. Animate the clock for 30min. Kindly redraw the figures Step 2: T2:Blood processing 1 2 3 Place the tube on ice for coagulation for an hour and centrifuge for 10mins at 2500 rpm at 4’C to separate the coagulants and blood cells serum. 4 5
Step 2: T2:Blood processing 1 and cells Serum 2 Coagulants Blood cells Audio Narration (if any) Description of the action/ interactivity 3 After 10min, instruct user to open the lid of centrifuge, rotor and animate the hand action to left the tube from drum. Now zoom the tube having three different solutions, as shown in figure. Now pipette out top portion (supernatant) completely and pipette into empty tube, the action should take place only when the user clicks on the pipette and tube. Kindly redraw the figures The centrifuged sample contains the serum as the supernatant and the cells as the pellet. Collect the serum and transfer to clean eppendorf tubes for further processing. 4 5
Step 2: T2:Blood processing 1 2 Description of the action/ interactivity Audio Narration 3 Instruct user to aliquots the collected serum samples into different tubes for storage. now show the tubes as in figure and the animator should instruct the user to take pipette and set the value to 1000ul and animate like pipetting out the yellow solution from the above step and pouring it in the each tubes (1000ul each). Animate to close the lid of tubes and the hand picking the eppendorf tubes and placing them at -80 C incubator by opening it. Once all the tubes are placed, close the door of freezer. Kindly redraw the figures Store the samples in eppendorf tube at -80 C in aliquots until further use, as an when required sample from the aliquots can be taken for processing. 4 5
Description of the action/ interactivity Audio Narration (if any) Animate removal of sample from -80 C by opening the door and placing it on the bucket of ice for 15min, animate the effect with user interaction. During 15min zoom the tubes and animate the frozen solution changing to liquid phase. Show the animation of taking the pipette and setting the value to 125ul and the removal of serum by pipette out, as the user clicks on it and transfer it to the new tube “sample tube”. Kindly redraw the figures Step 3: T3:Sample processing 1 2 3 Remove the serum from -80 C and allow it to thaw by keeping it on ice for 15 min. Transfer the required amount of the serum to the fresh , clean eppendorf tube for further sample processing. 4 5
Description of the action/ interactivity Audio Narration (if any) Show phosphate buffer bottle, let user pick 1ml pipette, set it to 500ul to pipette out the buffer as the user clicks on it and adding it to the tube labeled as sample tube. The user should click on the pipette for the action to be done. Kindly redraw the figures Step 3: T3:Sample processing 1 2 3 Dilute the serum 5 times using phosphate buffer of pH 7.4. take the sample tube for vortex. 4 5
Description of the action/ interactivity Audio Narration (if any) Instruct user to vortex the tube, hand animate by picking the tubes and placing on top of rubber pad for vortex and clicking “ON” button. During vortex, animate mix of solution. The user should click on start button for vortex. kindly redraw the figures Step 3: T3:Sample processing 1 2 3 Vortex the sample to achieve uniform mixing Vortex the sample to achieve uniform mixing. Now carry out sonication for cell lyses to extract more proteins from the cells. 4 5
Step 3: T3:Sample processing 1 2 Description of the action/ interactivity Audio Narration (if any) 3 Instruct user to place the tube on ice, with cap open. Show the sonicator instrument, place the tube such that the tip of sonicator rod touches the solution in the tube animate like the user adjusting the rod and dipping it into the tube in ice. Now display the screen of sonicator, let user make the necessary setup like pulses, time and amplitude with help of user interaction and use the required values from the right hand side to set user should click on the sonicator to proceed with sonication. Animate with little sound for 1sec and followed by solution movement in the tube. Keep the sample on ice and start sonication by providing 6 cycles of pulses for 5 sec ,20% amplitude with 59 sec gap. Sonication help protein extraction by cell lysis. 4 5
Step 4: T4: Sample depletion 1 2 3 4 5
Audio Narration Description of the action Step 4: T4: Sample depletion 1 2 After sonication, show the tube to display the contents like from the previous slide. The animator should show a tube containing brownish liquid labeled as serum. Animate in such a way that the user should click on the liquid to get the composition of it. Draw a red ring and label as IgG, Orange circle as alpha-1 antitrypsin, green as IgA, blue as Transferrin, Yellow-Albumin and brown -haptoglobin . Animate similarly as shown in the previous slide. The serum consists of high abundance proteins such as IgG,alpha-1 antitrypsin, IgA, transferrin, haptoglobin which will interfere during 2D separation. For this reason the sample need to be depleted to remove out high abundance proteins. 3 4 5
Step 5: T4: Sample depletion 1 2 3 4 5
Description of the action Audio Narration Step 5: T4: Sample depletion 1 2 Remove the depletion column from the freezer, the column is used to remove the high abundance protein. 3 The animator should draw a freezer and a hand opening the freezer and take a box labeled as depletion column. Animate in such a way so that the user should click on the box to open and take a depletion column wrapped. The animator should design like removing the wrapper so that the column which is shown in the previous slide is taken out. 4 5
Step 6: T4: Sample depletion 1 2 3 4 rotor Centrifuge 5
Description of the action Audio Narration Step 6: T4: Sample depletion 1 The animator should draw a centrifuge as shown in the figure. Animate in such a way that user clicks on open to open it and keep the column inside the rotor (with lots of holes) as shown. The animator should animate like the user should click on setting and set 800 rpm , 5minutes and click “enter” and animate like closing the lid and click “start”. Show a clock running for 5 minutes. Once the 5 minutes is done the user should open the lid by clicking “open” and remove the column out. Please include the buttons like enter, set, start, open in the centrifuge. Centrifuge the column for 5 minutes at 800 rpm, this steps to place the resin in the required orientation. 2 3 4 5
Step 7: T4: Sample depletion 1 2 3 4 pipette 5
Step 7: T4: Sample depletion 1 2 3 4 5
Description of the action Audio Narration Step 7: T4: Sample depletion 1 Add binding buffer to the column, which helps to prepare the resin for the depletion step. Now carry out centrifugation step like explained earlier. The animator should draw a freezer and a hand opening the freezer and take a box labeled as Binding buffer. Animate in such a way so that the user should click on the box to open and take a binding buffer wrapped. The animator should design like removing the wrapper so that binding buffer is taken out. The animator should draw a pipette as shown in the figure and set 400ul in the pipette. And put it in the binding buffer tube as shown in slide 23, 24 and take it in pipette and add it to the column. and the user should close the column and keep it in centrifugation and setting as shown in slide 10. 2 3 4 5
Description of the action/ interactivity Audio Narration (if any) Instruct user to take out column from centrifuge, zoom the column to show some liquid level at the bottom of the tube, animate to discard the liquid into waste labeled bottle. Later, Instruct user to add 50ul of serum to the column when the user clicks on the pipette, animate the pipette action and later place the tube on ice for 5min. Please redraw the figure Step 4: T4: Sample depletion 1 2 3 Discard the liquid collected in the tube below, now the column is ready for depletion. Add the serum to the binding column and keep in ice for 5mins followed by centrifugation. 4 5
Step 9: T5: Depletion Mechanism 1 2 3 4 5
Step 4: T5: Depletion Mechanism 1 2 Description of the action/ interactivity Audio Narration (if any) 3 Animate flow of serum into the column, show protein like IgG, albumin binding to the column with no further movement and the small abundance protein having a free flow and getting eluted at faster rate. The animator should animate like the crescent shaped proteins binding to the pink rings in the column and blue square shaped and yellow triangle shaped coming out of the column . Draw as given in the previous slide. High abundance protein get attracted and bind to the affinity column while the other proteins does not bind and get eluted at faster rate. This step helps in depleting the sample. 4 5
Step 10: T6: TCA-Acetone precipitation 1 2 3 4 5
Audio Narration Description of the action Step 10: T6: TCA-Acetone precipitation 1 The animator should draw a centrifuge as shown in the figure. Animate in such a way that user clicks on open to open it and keep the column inside the rotor (with lots of holes) as shown. The animator should animate like the user should click on setting and set 800 rpm , 30 sec 4 degree Celsius temperature and click “enter” and animate like closing the lid and click “start”. Show a clock running for 30 sec. Once the 30 sec is done the user should open the lid by clicking “open” and remove the column out. Please include the buttons like enter, set, start, open in the centrifuge. Centrifuge the column for 30 sec at 800 rpm for the separation of the phases. 2 3 4 5
Description of the action Audio Narration Step 11: T6: TCA-Acetone precipitation 1 Depleted serum solution 2 3 Animate in such a way that the user should remove the column from the centrifuge and take the depleted serum containing solution (bottom level). The animation should be like the user draw the serum from the pipette and transfer that to the new tube. And keeping it at -20’C freezer in a box. Transfer the depleted serum to the new tube and store it at -20’C till further usage. 4 5
Description of the action/ interactivity Audio Narration (if any) Later, Instruct user to set the pipette to 500ul and open the TCA-acetone solution bottle and pipette out 500ul into depleted serum liquid tube. Animate the solution from clear to cloudy appearance. please redraw the figure. Later show placing the tube at -20’C freezer. animate like the user opening the freezer and placing the tube and closing the door and animate clock running for 4hour. please redraw the figure Step 12: T6: TCA-Acetone precipitation 1 2 3 Centrifuge the column so that the depleted serum will be collected in the tube. Add TCA-Acetone to the depleted serum which helps protein precipitates in the solution. Place the tube at -20’C for at-least 4hrs. 4 5
Description of the action/ interactivity Audio Narration (if any) Step 13: T6: TCA-Acetone precipitation 1 2 3 After 4hr, instruct user to open door, take out the tubes, transfer into centrifuge. Zoom in the rotor, balance equal number of tubes inside the rotor of centrifuge. Close the lid of drum and of centrifuge with hand action. Instruct user to set the 14000 rpm, 4’C temperature and 30minutes time along with display. User can increase and decrease the values of set parameters. Animate the clock for 30min. Kindly redraw the figures Place the sample in the centrifuge, balance with equal number of tubes and centrifugation should be carried out at 4’C at 14000 rpm for 30 minutes. 4 5
Description of the action/ interactivity Audio Narration (if any) After 30min, instruct user to open the lid of centrifuge, drum and animate the hand action to left the tube from drum. Now zoom the tube having two different solutions, bottom one opaque and top one transparent phase. Now pipette out top portion (supernatant) completely and discard into empty tube, the action should take place only when the user clicks on the pipette and tube. Kindly redraw the figures Step 14: T6: TCA-Acetone precipitation 1 2 3 After centrifuge, protein being heavier in nature settles down as pellet leaving out unwanted particles as supernatant. Remove as much as supernatant from the tube, without disturbing the pellet and discard it . 4 5
Description of the action/ interactivity Audio Narration (if any) Show tube with pellet, let user take wash buffer tube from the freezer. Instruct user to take the pipette and set it to 1000ul and pipette out from tube labeled as wash buffer and add it to the pellet (opaque phase) . action should be done only when the user clicks on the pipette. Kindly redraw the figures Step 15: T6: TCA-Acetone precipitation 1 2 3 Add 1ml of ice cold wash buffer for the pellet wash. 4 5
Step 16: T6: TCA-Acetone precipitation 1 2 Description of the action/ interactivity Audio Narration (if any) 3 Zoom in tube with pellet and liquid over it. Instruct user to vortex the tube, hand animate by picking the tubes and placing on top of rubber pad for vortex. During vortex, animate the pellet disappearing into the solution. The user should click on the hand and start the vortex so that the solution get mixed in the tube and animate like switching off the vortex, show the tube and inside greenish solution and kindly redraw the figures. Vortex the pellet until it goes completely into the acetone. 4 5
Description of the action/ interactivity Audio Narration (if any) Step 17: T6: TCA-Acetone precipitation 1 2 3 Place the sample in the centrifuge , balance with equal number of tubes and centrifugation should be carried out at 4’C at 14000 rpm for 10 minutes Animate like placing the tube in centrifuge. Zoom in the drum, balance equal number of tubes inside the drum of centrifuge . Close the lid of drum and of centrifuge with hand action. Instruct user to set the 14000 rpm , 4 C temperature and 10 minutes time along with display. User can increase and decrease the values of set parameters. Animate the clock for 10min. Kindly redraw the figures. Repeat the steps in slide 34, 35, 36, 37 for 3 times. 4 5
Urea CHAPS Description of the action/ interactivity Audio Narration (if any) Zoom-in tube showing the colorless pellet and show like keeping in the stand for 10 minutes. Instruct user to set the pipette to 400ul and pipette out rehydration buffer and add rehydration buffer to the tube. And vortex as shown in slide 36 . Display the contents of rehydration buffer when user clicks on the tube. Kindly redraw the image Step 18: T7: Rehydration buffer treatment 1 2 3 Air dry the colorless pellet to remove excess acetone trace and add 400ul of rehydration buffer. 4 5
Description of the action/ interactivity Audio Narration (if any) Zoom-in tube with blue solution, and instruct user to open the fridge and keep the tube and close it .Animate a clock running for 12 hours store the tubes at -20’C into the freezer. Step 19: T7: Rehydration buffer treatment 1 2 3 Incubate the sample at 4’C overnight for the protein to solubilize in the rehydration buffer 4 5
Description of the action/ interactivity Audio Narration (if any) Carry out the centrifugation process like in slide:33 ,just for 30min at 15000rpm at 4’c. Zoom in tube with dried pellet. Instruct user to set the pipette to 300ul and take, add rehydration buffer, animate it with user click on pipette. Instruct user to vortex the tube, animate by user picking the tube and placing on top of rubber pad. During vortex, animate the pellet disappearing into the solution. The user should click on start button to ON the vortex so that the tube will be vortex. kindly redraw the figures Step 20: T7: Rehydration buffer treatment 1 2 3 Vortex the pellet until it goes completely into the rehydration buffer. 4 5
Step 21: T8:Storage of sample 1 2 Description of the action/ interactivity Audio Narration (if any) 3 Zoom-in tube with clear solution, instruct user to store the tubes at -20’C into the freezer. Animate opening the door of freezer, placing the tube and closing the door. kindly redraw the images. The sample in rehydration buffer can be stored at -20’C and can be thawed and used during the experiment. Now the sample can be taken for protein estimation, to carry out 1D, 2D run. For more information and continuity follow the future viewing IDD like mentioned in slide:1. 4 5
Button 01 Button 02 Button 03 Slide 9 -12 Slide 27-28 Slide 13-16 Slide 17 -26 Slide 29-37 6-8 Tab 01 Tab 02 Tab 03 Tab 04 Tab 05 Tab 06 Name of the section/stage Animation area Interaction 1: slide-14: if user is unable to dissolve the sample in PBS and proceeds further. Instructions: Instruct user to make sure the sample is dissolved into the PBS, if not the sample get blocked into the column and depletion wont happen. Interaction 2: slide-35: if user is unable to precipitate the protein during first wash and proceeds further. Instructions: Instruct user to make sure the protein is precipitated and user carry out the acetone wash two or three times to do the same. Interactivity area Instructions/ Working area Credits
Button 01 Button 02 Button 03 Slide 41 Slide 38-40 Tab 07 Tab 08 Tab 09 Tab 10 Tab 11 Tab 12 Tab 13 Name of the section/stage Animation area Interactivity area Instructions/ Working area Credits
Questionnaire: APPENDIX 1 Question 1 Serum can be defined as a)Blood devoid of cells and clotting factor b)Blood containing cells and without clotting factors c) Blood with RBC and devoid of WBC d)Blood containing clotting factors Answer:a)Blood devoid of cells and clotting factor Question 2 Abundant proteins in the serum includes • Albumin • Haptogloblin • IgG • All the above Answer: All the above
Questionnaire: APPENDIX 1 Question 3 Depletion column removes • Serum • Plasma • Clotting factors • High Abundance proteins Answer: high abundance proteins Question 4 Amplitude used for the sonication is • 20% • 30% • 40% • 50% Answer: 20%
Questionnaire: APPENDIX 1 Question 5 The reagent that gives color to rehydration buffer is • CHAPS • Commassie blue • Bromophenol blue • Urea Answer: Bromophenol blue
APPENDIX 2 Links for further reading Chen JH , ChangYW, Yao CW et al. Plasma proteome of severe acute respiratory syndrome analyzed by two-dimensional gel electrophoresis and mass spectrometry.Proc Natl Acad Sci U S A2004, 7;101(49):17039-44. Eymann C, Dreisbach A, Albrecht D. A comprehensive proteome map of growing Bacillus subtilis cells. Proteomics. 2004 :2849-76. Maldonado AM, Echevarría-Zomeño S, Jean-Baptiste S. et al. Evaluation of three different protocols of protein extraction for Arabidopsis thaliana leaf proteome analysis by two-dimensional electrophoresis. Proteomics 2008, 71(4):461-72. 2DE Tutorials by Angelika Görg : http://www.wzw.tum.de/blm/deg/ BOOKS Biochemistry by Stryer et al., 5th edition Biochemistry by A.L.Lehninger et al., 3rd edition Biochemistry by Voet & Voet, 3rd edition
APPENDIX 3 Summary Blood collection has to be done by trained personal or under the supervision of them. Centrifuged serum should not have any debris. Exact pH has to be maintained in phosphate buffer (pH 7.4). Do all the vortexing properly whenever required and ensure complete mixing of the pellet in the solution. Sonication has to be done as per the optimized protocol. Follow exact timing as mentioned in the protocol and store the samples properly. Following the above mentioned precaution and steps involved in the extraction highly efficient extraction can be done