Download

1 / 53
530 likes | 588 Vues
Understand HTML basics, create your first webpage with tags and format efficiently. Easy steps to begin developing websites using HTML language.

E N D
Creating a Web Page with HTML By huda Alsuwailem • References: • HTML4ARAB عن موقع HTML المرجع الكامل في • تعلم الهتمل مع أحمد عوف
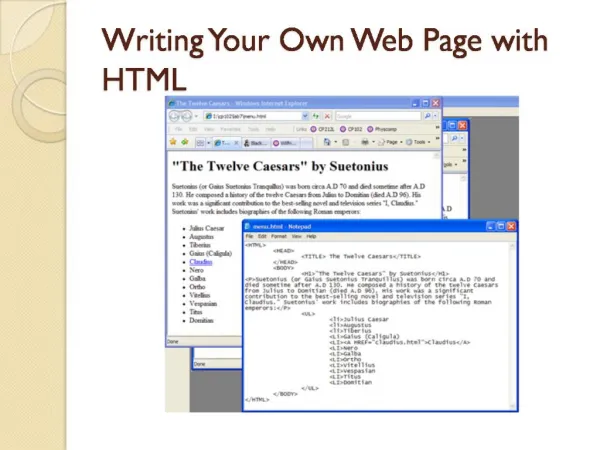
What is HTML ? HTML is a shortcut of ( Hyper Text Markup Language). It is the language which is used to create WebPages. It is not an ordinary programming language like C. For example it doesn't contain If statement or loops and when we need these statements we will include some scripts from Java or other languages. It doesn’t need any special Compilers. It doesn’t need any special operating system software. It doesn’t matter if your computer runs Windows, Unix, or Macintosh system software. It needs only a text editor like Notepad to write HTML statements and an Internet browser like Internet Explorer in order to test your pages and make sure they look the way they should. It is easy to learn HTML and it will take just few hours to learn how you can complete your WebPages.
How it works? • It is a collection of codes, it can be created from a simple text editor and saved as text file with the extension “.htm” or “.html” • What’s a tag? • Tags are instructions that tell your Web browser what to show on the page • The name of an HTML tag is enclosed in angle brackets (< >). • Most tags are two-sided. • Opening tag tells the browser to start applying a feature. • Closing tag tells the browser to stop applying a feature.
HTML tags need to be nested in order. First tag <html> Indicates that you are starting an HTML document <HEAD>[information about the document] </HEAD> <BODY>[data to appear on browser page]</BODY> Last tag </html> Indicates that you are ending an HTML document
How to start? • Before you start designing the website, there are some steps you should follow: • Establish a separate folder for the website contents and name it “e.g. my new website”. • Open the notepad program via: • start >> programs >> accessories >> notepad • then choose “file”, “save as”. A dialogue box will appear, choose the folder you have established before and in “file name” write “index.html”.You have established your website’s first page by that and on which you will do some changes later. • Q: Why did I choose the name “index.html” for the first page? • A: I chose “index” because it is important for any website to have this name for its first page in order to download the website on the net. You can name the rest pages you will establish as you like. • On the other side, “html” is the special extension for websites. • Write the basic tags on the page as we explained before.
So, “html” folder always starts with <html> tag and ends with </html> . While <HEAD> tag defines the beginning of the part that contains special information about identifying the page as the title shown on the browser’s address bar. This title must be between two tags <TITLE> .. </TITLE>. To end this part, </HEAD> tag must be added. Now, why don’t you establish a page? Open the “Notepad” program. Write: <HTML> <HEAD> <TITLE>My first HTML page</TITLE> <HEAD/> <BODY> Wow I am Writing My First Page <BODY/> </HTML>
Before we continue, I want to remind you to some notes when creating WebPages. • There is no difference between writing tags either in English capital letters “UPPERCASE” or in English small letters “lowercase”. So, you can write in any of them or even with them both. • Web browsers do not take additional spaces or the signs of ending paragraphs in consideration (i.e. when you press “Enter”).In other words, you can write your previous file as follows: • <HTML><HEAD><TITLE> My first HTML page </TITLE></HEAD><BODY> • Wow, I'm writing my first webpage </BODY></HTML>
Or: <HTML> <HEAD> <TITLE> My First HTML Page < /TITLE> < /HEAD> <BODY> Wow, I'm writing my first Page < /BODY> < /HTML>
How do we add a new line, a paragraph or certain spaces? <BR> tag allows us to add a new line “note: this tag has no ending tag; a single tag” <P></P> tag ends the paragraph with adding an empty line between paragraphs.   tag adds spaces between words “note:it must be written in lowercase” <HTML> <HEAD> <TITLE> My first HTML page < /TITLE> < /HEAD> <BODY> Wow, <BR> I'm writing my <BR> first page < /BODY> < /HTML> <HTML> <HEAD> <TITLE> My first HTML page < /TITLE> < /HEAD> <BODY> Wow, <P> I'm writing my <P>first page < /BODY> < /HTML> <HTML> <HEAD> <TITLE> My first HTML page < /TITLE> < /HEAD> <BODY> Wow, I'm writing my first First page< /BODY>< /HTML>
How do we choose text alignment? <P ALIGN=“CENTER”> text </P> <P ALIGN=“LEFT”> text </P> <P ALIGN=“RIGHT”> text </P> Also for putting paragraphs in the center or objects generally in the page, <CENTER> ... </CENTER> tag can be used. DIR feature Which is also used with <P>, determines the direction of text reading. “LTR” value directs the text from “Left To Right” and “RTL” directs it from “Right To Left”. <p dir="RTL"> Wow I'm writing my first page</p> How to format the text? <b> for bold writing </b> <i> for italic writing </i> <u> for underlined writing </u>
How do I establish a hyperlink? First, we use this tag to start establishing the link <A> </A> Which is the main tag to insert hyperlinks and it is an abbreviation to the word “Anchor”. It does not work alone but demands adding special features first and most important of which is: HREF By which we link our website to the desired object (we must write the object’s full address). It is an abbreviation to the word:HypertextREFerence. This is the basic tag for the hyperlinks <A HREF=”FirstPage.html”> My First Page </A> The link will appear as: My First Page
How do I create an email link ? Very easy <A HREF="mailto:hudasuwailem@gmail.com” > Contact me </A> It will appear as follows: Contact me How do I create a file link ? When inserting a file link, the browser shows the options box of saving the file or downloading it from the website: <A HREF=“hatha_al_quran256.ppt”> Download </A> The link will appear as the following and by pressing on it the options box will appear: Download
How do I establish a hyperlink on the same page? To establish a hyperlink on a certain paragraph or website on the same page, determine the text and name it: <A NAME="Top">text< /A> Then, write the following code in the place we want to link with the previous place: <A HREF="#Top">1st Paragraph< /A> Can I reach it from another page? Yes, if we determine the father file. E.g.: <A HREF="link_in_page.htm#Top”>text</A>
How do I insert an image? As usual, we must first know the special tag for inserting an image which is <IMG>. It is a single tag and an abbreviation to the word “IMAGE” Is this enough to insert an image? No, we must of course choose the wanted image. So, we add the SRC feature to choose the image’s place and name. It is an abbreviation to the word (SOURCE) as follows: <IMG SRC=“lolo.jpg”> How do I insert an image with a hyperlink? <A HREF="h.htm"><IMG SRC="lolo.jpg"></A> We notice that the image does not look exactly the same as the previous image. This is because the browser has put the image inside a “BORDER” to show that this image has a hyperlink to another page or file. You can of course put a border on an image that does not have a link as the following example: <img border="6" src=“lolo.jpg">
The features of some images are: <IMG SRC="image.jpg" ALIGN="BOTTOM"> <IMG SRC="image.jpg" ALIGN="TOP"> <IMG SRC="image.jpg" ALIGN="MIDDLE"> <IMG SRC="image.jpg" ALIGN="LEFT"> <IMG SRC="image.jpg" ALIGN="RIGHT">
The page features: Background color BGCOLOR="#FFFFFF" Text colorTEXT="#000000" Link color LINK="#FF00FF" Visited Link colorVLINK="#660066” Active Link colorALINK="#FF0000" Background imageBACKGROUND="bubbles.gif" <BODY BGCOLOR="#FFFFFF" BACKGROUND="bubbles.gif" TEXT="#000000“ LINK="#3399FF" VLINK="#9966FF" ALINK="#000000“ BGPROPERTIES="FIXED“ TOPMARGIN="0" MARGINHEIGHT="0"> Note: you must name the first page as (index.html) or (index.html) so the browser would identify which page will be displayed first.
TEXT Titles and font size:Headings:There are 6 different heading levels, from <H1> to <H6> <H1>Heading 1</H1> <H2>Heading 2</H2> <H3>Heading 3</H3> <H4>Heading 4</H4> <H5>Heading 5</H5> <H6>Heading 6</H6>
FONT SIZE: To choose the font size we use “font size”. There are 7 sizes for any font browsers could identify from 1 to 7 . We choose the needed size with two methods: the first is the direct <FONT SIZE=“1”> ................. Text will be here ................. </FONT> Note: The default font size is 3.
The second is depends on the current font: where numbers from 1 to 6 is written accompanied by the sign(+) positive or (-) negative. <FONT SIZE=“+4”> ................. Text will be here ................. </FONT> In this method, numbers 1-6 presents enlarging (+) or minimizing (-) the font from the default size. E.g. +4 means enlarging the font by 4 degrees from the default size which is 3, i.e. it will be on size 7. On the other hand, -1 means minimizing the font size by 1 degree, i.e. it will be on size 2.
Fonts Shapes and Colors: FACE Feature This feature chooses the type of font we desire. The default font in every browsers is: 12pt Black Times New Roman And to change the font to the desired one, the code is: <FONT FACE="Arial"> text </FONT> We may choose more than one type. In this condition, if the first chosen font was not found in the user’s computer, the other one will be managed to display … and so on. <FONT FACE="Traditional Arabic, Arabic Transparent, Simplified Arabic"> ............Text Here....... < /FONT>
Changing Font Color: <FONT COLOR=“#FF0000”> text </FONT> We must know that colors in HTML pages are known via the HEX code, which is consisted of 6 numbers. These numbers presents red, green and blue RGB. These are examples on the font colors, shapes and sizes. <FONT FACE="Impact" SIZE="6" COLOR="#000000">C < /FONT> <FONT FACE="Impact" SIZE="6" COLOR="#008080">O< /FONT> <FONT FACE="Impact" SIZE="6" COLOR="#FF0000">L< /FONT> <FONT FACE="Impact" SIZE="6" COLOR="#0000FF">O< /FONT> <FONT FACE="Impact" SIZE="6" COLOR="#800000">R< /FONT> <FONT FACE="Impact" SIZE="6" COLOR="#FF00FF">S< /FONT> The result will be like: C OLORS
What if we wanted to change the font shape, color and size all together? From this example, you will see all font conditions in one line: <FONT FACE="Arial" SIZE="5" COLOR="#00FF00"> This < /FONT> <FONT FACE="Times New Roman" SIZE="7" COLOR="#FF00FF"> is < /FONT> <FONT FACE="Arial" SIZE="2" COLOR="#FF0000"> multi < /FONT> <FONT FACE="Impact" SIZE="4" COLOR="#000000"> colors, < /FONT> <FONT FACE="Courier" SIZE="2" COLOR="#0000FF"> multi < /FONT> <FONT FACE="Times New Roman" SIZE="3" COLOR="#008080"> faces, < /FONT> <FONT FACE="Courier" SIZE="6" COLOR="#FFFF00"> and < /FONT> <FONT FACE="Arial" SIZE="5" COLOR="#808080"> multi < /FONT> <FONT FACE="Impact" SIZE="2" COLOR="#800000"> sizes < /FONT> <FONT FACE="Times New Roman" SIZE="7" COLOR="#00FFFF"> text < /FONT> Thisismulti colors, multi faces, andmultisizes text
Lists and Their Types: HTML language contains a group of tags specialized in organizing data in lists. There are two types of lists: Ordered lists. Unordered lists. We use <OL> ... < /OL> tag in ordered lists. and <UL> ... < /UL> for unordered lists. To determine list items, we use <LI> tag . It is a single tag written on the beginning of each item’s special line. List Item, e.g.: The result is: Maha Ebtihaj Arien <OL> <LI>Maha <LI>Ebtihaj <LI>Arien </OL>
e.g. • The result is: • Maha • Ebtihaj • Arien <UL> <LI>Maha <LI>Ebtihaj <LI>Arien </UL> To change the starting point <OL START="5"> We can choose Bullets or Numbering code as the following:
Moving Text To move a text we use MARQUEE tag . e.g.: <MARQUEE> Do you want this text to fly < /MARQUEE> This tag has many features. Some are: Background Color <MARQUEE BGCOLOR="#99CCFF"> The text < /MARQUEE> Its Height and Width <MARQUEE BGCOLOR="#99CCFF" HEIGHT="80" WIDTH=“%40"> The text < /MARQUEE>
Aligning text vertically taking top, middle and bottom values <MARQUEE BGCOLOR="#99CCFF" HEIGHT="80" WIDTH=“%40" ALIGN="middle"> The text < /MARQUEE> To specify the empty space between the pannier edge and the text on its sides: <MARQUEE BGCOLOR="#99CCFF" HEIGHT="80" WIDTH=“%40" HSPACE="30"> The text < /MARQUEE> To specify the empty space vertically from top to bottom, we use VSPACE and to specify the text movement, we use the BEHAVIOUR feature which has 3 values : scroll, slide and alternate. <MARQUEE BGCOLOR="#99CCFF" WIDTH=“%80" BEHAVIOR="slide"> The text < /MARQUEE>
The DIRECTION feature determines the direction of the text movement. It has 2 values: up and down. <MARQUEE BGCOLOR="#99CCFF" WIDTH=“%80" DIRECTION="up"> The text < /MARQUEE> Important Note: You can make the text you put in Marquee tag as a hyperlink and insert an image in it. Horizontal Ruler: We can draw a line choosing its size, width, color, alignment and if it has a shadow or not as follows: <HR SIZE="5" WIDTH=“%60" ALIGN="center" COLOR="#006699" NOSHADE>
Go back again to inserting images. Width and Height: <img src="images/a.gif" width="200" height="94"> ALT feature is used with <IMG>. We choose with it an alternative text showed in the image’s place. <IMG SRC="bearbig.gif" ALT="A lovely bear”> To choose the space separating the image and the text beside it, we use: VSPACE: For the vertical space between the text and the image’s both top and bottom edges. HSPACE: For the Horizontal space between the text and the image’s right and left edges. E.g. <IMG SRC="go.gif" HSPACE="10" VSPACE="10"> Important Note: The space is measured by pixel.
We have known previously that we can make a hyperlink from an image, but can we link the image to more than one link? Yes, that is by dividing the image into parts “named MAP” and we can divide it into circles, rectangles or different polygons and link each of them to a website. e.g. <IMG SRC="flowers.jpg" WIDTH="320" HEIGHT="310" BORDER="0" USEMAP="#ourmap" > <MAP NAME="ourmap"> <AREA SHAPE="poly" COORDS="10,10,130,10,110,65,10,140" HREF="http://asdh4.dk3.com"> <AREA SHAPE="rect" COORDS="28,255,310,300" HREF="http://www.ayna.com"> <AREA SHAPE="circle" COORDS="145,164,84" HREF="http://www.pcmag-arabic.com"> <AREA SHAPE="poly" COORDS="150,10,300,20,315,230" HREF="http://www.ahram.org.eg"> < /MAP>
How can we insert a sound as a page background? You can choose any sound file with mid, wav or au extensions to work automatically when downloading the page on the browser. We use by that <BGSOUND> , i.e. BackGround Sound. e.g.<BGSOUND SRC=“s.wav"> We can also choose how many times the sound is played, from one to an infinite number. <BGSOUND SRC=“s.wav" LOOP="infinite"> <BGSOUND SRC=“s.wav" LOOP="3"> How can we insert multimedia files (sound, video, flash…) ? <EMBED SRC="Media/CANYON.MID" AUTOSTART="false" LOOP="false" HEIGHT="45"WIDTH="170"> NOTE: If multimedia doesn’t work <NOEMBED> put here a massage to tell the user what to do </NOEMBED>
Tables <TABLE BORDER=“1”> <TR><TD> CELL1 </TD><TD> CELL2 </TD></TR> <TR><TD> CELL3 </TD><TD> CELL4 </TD></TR> </TABLE> This previous tag creates the following table: Let me explain the last tag: <TABLE> . . . </TABLE> Table identification tags. <TR> . . . </TR> Table Row identification tags. <TD> . . . </TD> Table Data (Cells) identification tags
Again <TABLE> <TR> <TD> Data </TD> <TD> Data </TD> </TR> <TR> <TD> Data </TD> <TD> Data </TD> </TR> <TR> <TD> Data </TD> <TD> Data </TD> </TR> </TABLE> This is the result
Dealing with tables method is done on three levels: • The Table level as whole. • The Rows level as whole or each individually. • The Cells level as whole or each individually. • Table features: • BORDER<TABLE BORDER=“5”> • WIDTH<TABLE WIDTH=“600”> • <TABLE WIDTH=“%80”> • HEIGHT<TABLE HEIGHT=“500”> • <TABLE HEIGHT=“%100”> • CELLSPACING ( To determine the space between each table cell.) • <TABLE CELLSPACING=“10”>
CELLPADDING ( To determine the space between cell edges and the text in every cell; to determine the cell margins.) • <TABLE CELLPADDING=“10”> • ALIGN ( To determine the table alignment.) • <TABLE ALIGN=“LEFT”> • <TABLE ALIGN=“RIGHT”> • BGCOLOR ( To determine the table background color, we can use the color names or the hex code.) • <TABLE BGCOLOR=“#0099cc”>
Cells features: • ALIGN ( To determine the text’s horizontally alignment inside the cell.) • <TD ALIGN=“LEFT”> • <TD ALING=“CENTER”> • <TD ALIGN=“RIGHT”> • VALIGN ( To determine the text’s vertically alignment inside the cell.) • <TD VALIGN=“MIDDLE”> • <TD VALIGN=“TOP”> • <TD VALIGN=“BOTTOM”> • BGCOLOR ( To determine the cell’s background color.) • <TD BGCOLOR=“#4682B4”> • <TD BGCOLOR=“#0099CC”> • Also you can put an image for the background. • <TD BACKGROUND=“lolo.gif”>
WIDTH ( To determine the cell’s width). • HEIGHT ( To determine the desired height). • COLSPAN ( merges the current cell with the desired horizontal cells). • ROWSPAN ( Merges the current cell with the desired vertical cells). • <TABLE BORDER=“1” ALIGN=“RIGHT” WIDTH=“200”> • <TR> • <TD ROWSPAN=“2”> A <BR> B </TD> • <TD> TOP CELL </TD> • </TR> • <TR><TD> BOTTOM CELL </TD> • </TR> • </TABLE>
CAPTION The latest tags used in tables are <CAPTION> . . . </CAPTION> which are used in adding a major title for the table. Therefore, they are put after <TABLE> directly and separately ( Not in the cells or rows tags). <TABLE BORDER=“1” WIDTH=“200”> <CAPTION> here is the table title </CAPTION> <TD> data 1 </TD> <TD> data 2 </TD> <TR> <TD> data 3 </TD> <TD> data 4 </TD> </TR> </TABLE>
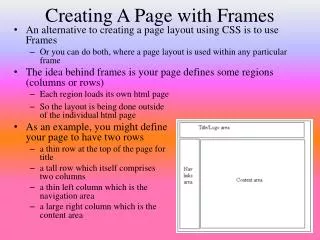
Frames Do you know what frames are? Ok, I will explain. Have you ever entered a page and noticed that it is divided into many sections where in each there is a separate page and looks unconnected to the others. Maybe you have clicked on a hyperlink in one of the sections and the page linked to it appeared in another section. If you had ever seen like these pages, this means that frames are familiar to you. The truth is that every section of it is a full separate HTML file. They are ordinary pages which do not differ at all from the ones you have known how to establish in previous lessons, and each page has no connection to the others. The bottom line is, how were they accompanied to appear in the shape you have seen? In addition to the ordinary pages and files, there is always a basic file that is established specially to identify the frames page, accompany them and choose their features.
Establish 3 or 4 simple files to use them in performing the examples: Contents.htm, Banner.htm & MasterFrame.htm. Now we will establish the basic file <FRAMESET> . . . </FRAMESET> as a replacement for <BODY> . . . </BODY> e. g. <HTML> <HEAD> <TITLE>Master Frame< /TITLE> < /HEAD> <FRAMESET> < /FRAMESET> < /HTML>
100 Pixel The remaining from the screen’s width 200 Pixel Now we will divide the page into three part: <FRAMESET ROWS="100,*"> <FRAME SRC=“frame1.htm"> <FRAMESET COLS="200,*"> <FRAME SRC=“frame2.htm"> <FRAME SRC=“frame3.htm"> < /FRAMESET> < /FRAMESET> And it will be like this:
Framesets features: • FRAMEBORDER ( Which displays a border for the frame if it takes the value 1 and hides the border if it takes the 0 value e. g. : • <FRAMESET ROWS="50,*" FRAMEBORDER="0"> • <FRAME SRC="frame1.html"> • <FRAME SRC="frame2.html"> • < /FRAMESET> • BORDER ( Which determines the border thickness which will be in pixel. ) • BORDERCOLOR ( To determine the border color.) • FRAMESPACING ( To add space around the border which will be in pixel.)
Frames features: • MARGINHEIGHT ( To determine the top and bottom frame margins which will be in pixel.) • e. g. : MARGINHEIGHT=“n” • MARGINWIDTH ( To determine the left and right frame margins which will be in pixel.) • e. g. : MARGINWIDTH=“n” • SCROLLING ( To determine the status of displaying the scrolling bar. It takes three values “yes” for appearance, “no” for hiding and “auto” for displaying the scrolling bar if needed.) • e. g. : SCROLLING=“yes” • SCROLLING=“no” • SCROLLING=“auto” • NORESIZE ( When we add this feature, the user can't control the size of the frame by maximizing or minimizing via the mouse. This feature doesn't take any value, just we write it.) • Also, BORDER, FRAMESPACING, FRAMEBORDER,BORDERCOLOR which are used with this tag and with the same details we have mentioned previously with <FRAMESET> but it determines one border features only and not a set of borders. من خصائص الوسم <FRAME> :
e. g. : <FRAMESET COLS=“%50,%50"> <FRAME SRC="frame1.htm" MARGINHEIGHT="40" MARGINWIDTH="30" SCROLLING="yes" NORESIZE> <FRAME SRC="frame2.htm"> </FRAMESET> ------------------------------------ In –line frames ( To insert a frame inside a normal web page. The in-line frames is an easy tag you just need to determine the place of the target page which will appear in the frame and determine the height and width properly e. g.: <IFRAME SRC=“inlineframes1.html” WIDTH=“%70” HEIGHT=“90”></IFRAME>
If our main page was divided into 2 sections, we can show the first section’s links in the second section. The following example is for illustration: The main page’s code is: <html><head><title> ...frames... </title></head> <frameset cols="20%,*"> <frame src=“frame1.htm"> <frame src=“frame2.htm" name="main"> </frameset> </html> We will show the links on page (frame1) in (frame), which we named (main) as follows: <html><head><title> ...frame1...</title></head> <!-- body --> <body> <a href="first.htm" target="main">first page</a> <p><a href="image1.htm" target="main">first image</a> </body> </html>
Do we need to determine (target) in each link? There is a faster way. Instead of determining (target) in each link, we use the tag <base> with the adjective (target). This will be a part of the page head as: <html><head> <title> ...table...</title> <base target="main"> </head> <!-- body --> <body> <a href="first.htm">first page</a> <p><a href="image1.htm">first image</a> </body> </html>
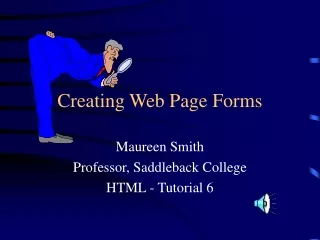
Forms The form tag is <FORM> . . . </FORM>and all the tags which will be related with the form will be between the form tags. We have three features for the form which are: ENCTYPE, METHOD and ACTION. e.g.: <FORM ACTION=“mailto:sa.baba.sa@gmail.com”METHOD=“post” ENCTYPE=“text/plain”> ACTION: Determine the address that will send the form data to, to be processed as required. METHOD:. Determine how they will be handled with the address specified in the previous property. ACTION: it has two values Post and GET. ENCTYPE: This property specifies which coding data will be sent in accordance with them.
Types of forms The <INPUT> tag is used for inserting data by the form e. g.: <FORM …> Please enter your address : <INPUT TYPE=“text” NAME=“address” VALUE=“Nablus,Palestine” SIZE=“40” MAXLENGTH=“30”> </FORM> Another e. g.: <FORM …> Please enter your name : <INPUT TYPE=“text” NAME=“name” SIZE=“40” MAXLENGTH=“30”> Please enter your password : <INPUT TYPE=“password” NAME=“password” SIZE=“40” MAXLENGTH=“30”> </FORM>
RADIO <input name="color" type="radio" value="Green"> الأخضر <input name="color" type="radio" value="black"> الأسود <input name="color" type="radio" value="blue"> الأزرق <input name="color" type="radio" value="red"> الأحمر CHECKBOX <input type="checkbox" name="ws" value="yes">Winamp <input type="checkbox" name="ps" value="yes">Photoshop <input type="checkbox" name="acd" value="yes">ACDSee <input type="checkbox" name="all" value="yes">All Important: in radio we can select one field only where in checkbox we can select more than one. So, it is usually used in conditions where it is possible to have more than one answer to the same question. In radio, field names are the same and the values differs. On the other hand, field names in checkbox differs and the values are the same.
Drop down Select Boxes <FORM> <SELECT NAME=“bro”> <OPTION VALUE=“wa”>Winamp <OPTION VALUE=“ps” >Photoshop <OPTION VALUE=“acd”>ACDSee <OPTION VALUE=“all”>All </SELECT> </FORM> Another e. g.: <FORM> <SELECT NAME=“browser” SIZE=“2”> <OPTION VALUE=“wa”>Winamp <OPTION VALUE=“ps” >Photoshop <OPTION VALUE=“acd”>ACDSee <OPTION VALUE=“all”>All </SELECT> </FORM>
<FORM> <SELECT NAME=“browser” SIZE=“4” MULTIPLE> <OPTION VALUE=“wa”>Winamp <OPTION VALUE=“ps” >Photoshop <OPTION VALUE=“acd”>ACDSee <OPTION VALUE=“all”>All </SELECT> </FORM> Another e. g.: <FORM> <SELECT NAME=“browser” SIZE=“4” MULTIPLE> <OPTION VALUE=“wa”>Winamp <OPTION VALUE=“ps” SELECTED>Photoshop <OPTION VALUE=“acd”>ACDSee <OPTION VALUE=“all”>All </SELECT> </FORM>