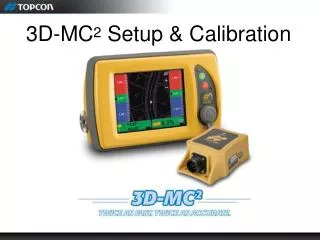
3D-MC 2 Setup & Calibration
450 likes | 595 Vues
3D-MC 2 Setup & Calibration. This Webinar is LISTEN only. QUESTIONS?. Questions will be answered in writing at the end of the Webinar. AGENDA Setup and Calibration Installation Machine Builder MC 2 Sensor Calibration Setting Valve Offsets Setting Gains Grading On Steep Slopes.

3D-MC 2 Setup & Calibration
E N D
Presentation Transcript
This Webinar is LISTEN only QUESTIONS? Questions will be answered in writing at the end of the Webinar.
AGENDA Setup and Calibration Installation Machine Builder MC2 Sensor Calibration Setting Valve Offsets Setting Gains Grading On Steep Slopes
Reference Material Reference Material • Quick Reference Guide 7010-0921 • Installation and Calibration Manual 7010-0924 • Simulator 9.0 code on secure dealer site
Installation Installation • New 9.0 operating code 3D-MC2 (Dozer only) • MC-R3s will have updated Euro 112 P2 Turbo boards (Will become standard when 9.1 code is released)
Installation • IMU (Slope Sensor) • New Installation • Existing slope sensor
Installation • IMU • Weld may cause IMU not to sit flat
Installation • IMU • Space between IMU and Guard • Access for mounting bolts • Access for measurements
Machine Builder • Machine Builder • IMU measurements from arrow
Machine Builder • Machine Builder
Machine Builder • 3D-MC2 Parameters • All measurements should be made as close as possible. Some machines may be more difficult than other. Measurements +/- 1” you should be fine (Don’t be Lazy) • The machine should be parked on smooth level ground
Machine Builder • IMU Behind • IMU Behind: Horizontal distance from the front most part of the cutting edge to the MC2 arrow.
Machine Builder • IMU Behind (1)
Machine Builder • IMU Inside • IMU Inside: Horizontal distance from the right corner of the cutting edge to the MC2 arrow.
Machine Builder • IMU Inside (2)
Machine Builder • IMU Above • IMU Above: Vertical distance from the cutting edge to the MC2 arrow.
Machine Builder • IMU Above (3)
Machine Builder • COR Inside • Horizontal distance from the center of blade rotation to the right side of the blade. • COR=Center of Rotation (Tilt)
Machine Builder • COR Inside (4)
Machine Builder • COR 6 Way Blade
Machine Builder • COR Inside • On 4 way blades or U-frame blades without a rotation or sloping ball pivot, the COR will be a point opposite of the sloping cylinder and may be difficult to locate.
Machine Builder • COR 4Way Blade (U Frame)
Machine Builder • COR Above • Vertical distance from the center of blade rotation to the cutting edge.
Machine Builder • COR Above (5) Note* The Installation and Calibration Manual 7010-0924 Rev A describes the measurement incorrectly. It describes the COR measurement as the Vertical distance from the center of blade rotation to the MC2 arrow. The graphic is correct. (COR to Cutting edge)
Machine Builder • Track Length • Horizontal distance from the center of the front sprocket to the center of the rear sprocket.
Machine Builder • Track Length (6) Track Length
Machine Builder • Blade Offset • With the blade square (no rotation), the horizontal distance from the center of the front sprocket to the MC2 arrow.
Machine Builder • Blade Offset (7) Measurement A - Measurement B= Blade Offset B A
Machine Builder • Antenna Measurements • All Antenna measurements are the same as a standard 3D system.
MC2 Sensor Calibration • MC2 Sensor Calibration • The MC2 (IMU) sensor requires Blade Slope calibration and Mainfall calibration. Both calibrations are accessed through the Slope Control Key.
MC2 Sensor Calibration • Calibrating Blade Slope • Calibrating the Slope Sensor is preformed by placing the blade at a know slope and entering that information into the control box. Note* The procedure in the manual shows calibrating the blade with a slope to ensure the proper +/- sign
MC2 Sensor Calibration • Calibrating Mainfall Slope • Place the machine on a uniform surface so that both the tracks and the blade are on the same surface, make sure the blade is flat on the ground and square to the machine. • Measure the mainfall slope of the pad and enter that number as the Mainfall slope. Be sure to turn the machine around and confirm the calibration is correct. It should read exactly opposite assuming the ground is smooth.
MC2 Sensor Calibration • Calibrating Mainfall Slope • The Mainfall Calibration is extremely important to the overall performance of the machine when working slopes.
Blade Wear • Blade Wear • As the cutting edge wears the mainfall calibration will become incorrect causing elevation errors especially on steep slopes, since the mainfall calibration is responsible for determining mast tilt when traveling up and down hills it is important to maintain a proper calibration. • Periodic adjustment (recalibration) will be required as the blade wears.
MC2 Sensor Calibration • Calibrating Mainfall Slope • The procedure to Adjust Mast Angle in the Installation and Calibration Manual 7010-0924 Rev A. Will be removed from the manual since this procedure should have been already preformed when installing the pole mount.
Valve Offsets • Setting Valve Offsets • Valve Offsets should be set so that the blade just begins to move. Do not set artificially large values as is sometimes typical in standard 3D control.
Gains • Setting Gains • Due to the nature of 3D-MC2 Gains can typically be set higher than with standard 3d system. • Elevation and Slope Gains should be set to the highest setting without the system becoming over reactive and unstable. • Test individually by switching to manual and placing the blade in a course correction then switch to auto. Keep increasing the gains individually until you reach the highest setting still maintaining stable control with the blade in the air. Small adjustment may need to be made once the machine is in the dirt.
Side Slopes • Side Slopes • Slower operating speed (As Slope increases speed decreases) • 3-1 or Greater • Eliminate Blade Rotation (Blade Parallel to slope) • IMU Compass will compensate for rotation (Future) 50% 2-1 50% 2-1
Mainfall Slopes • Mainfall Slopes • Slower operating speed (As Slope increases speed decreases) • Eliminate Blade Rotation (Blade Parallel to slope) • IMU Compass will compensate for rotation (Future) • Machine Builder measurements • Mainfall Calibration very critical 15%
Backup Relay • Backup Relay • Backup Relay supported in 9.0 • Backup function not supported with IGC machines (Future)
Selling Paver System FiveWebinar August 7th, 2009 • Machine Interface • Paver System Five Sensor Function • System Five Paving Applications • Benefits of Paver System Five
Questions? Link to download a copy of the this presentation. ftp://ftp.topconuniversity.com/ Presentation; video, PP, Q & A Additional requests for TU staff: Email: training@topcon.com