Download
1 / 67
2.07k likes | 6.04k Vues
Module 3 Use, calibration and maintenance of laboratory equipment. Learning objectives. At the end of this module you will be able to: describe briefly the operating characteristics of biological safety cabinets, centrifuges, autoclaves, inspissators, pH meters, incubators;

E N D
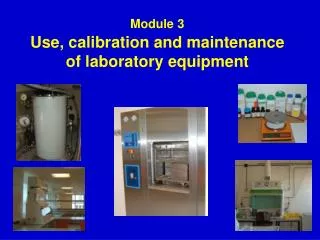
Module 3Use, calibration and maintenance of laboratory equipment
Learning objectives At the end of this module you will be able to: • describe briefly the operating characteristics of biological safety cabinets, centrifuges, autoclaves, inspissators, pH meters, incubators; • correctly use biological safety cabinets, centrifuges, autoclaves, inspissators, pH meters, incubators; • describe the main maintenance operations for biological safety cabinets, centrifuges, autoclaves, inspissators, pH meters, incubators.
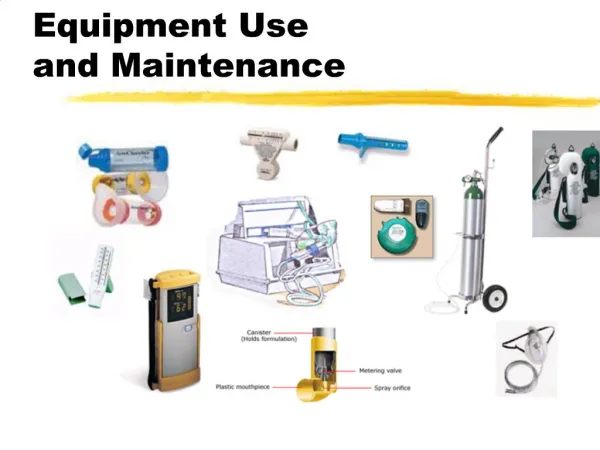
Content outline Principles, use and maintenance of: • biological safety cabinet (BSC) • centrifuge • autoclave • inspissator (coagulator) • pH meter • incubator
Biological safety cabinet (BSC) A ventilated contained area providing protection for the operator and the environment against infectious aerosols during the handling of hazardous microorganisms The most important equipment in all diagnostic mycobacteriology laboratories is the BSC.
HEPA filter HEPA = high-efficiency particulate air The HEPA filter traps and remove 99.97% of airborne particles of diameter 0.3 µm or more.
BSC class I and II • BSCs should beducted or vented to the outside. • No recirculation into the room is allowed. • The BSC should be connected to a UPS (Universal Power Supply). BSC class I and II – main differences
ClassI BSC • Protection of the user and the environment • Air is ducted to the outside of the building. HEPA filter
Class II BSC • Protection of the user, the environment and the product Class IIB BSC Class IIA BSC
Laminar vertical flow Laminar flow hood for product (not user) protection Horizontal airflow • Air blows towards workers. • Used only to protect product for sterile preparations (media preparation).
BSC location A,B– not recommended D, C–recommended D C A B
BSC – operations for correct use • Switch on the BSC airflow and the UV light (if present) 5–15 minutes before use. • Check the airflow velocity on the display. • Complete the logbook, recording details of operation of the BSC. • Switch off the UV lamp. Never work with the UV lamp on. • Disinfect the work surface, interior walls and interior window surface with 70% ethanol or other suitable compounds. Do not use corrosive substances.
BSC – rules for correct use • Organize all items needed for work in the BSC to avoid frequent displacements. • Organize the work to minimize arm movements. • Do not overcrowd the working area – this disturbs the airflow. • Conduct all manipulations within the BSC as far towards the back of the unit as possible (at least 15cm from the front grille). • In class II BSCs, never allow the front grille to be covered with anything. • Do not use large open flames in the BSC. • Do not accumulate waste in the BSC; remove it when activities are finished.
BSC – after use • Autoclave the waste. • Wipe down the inside of the BSC and work surface with 70% alcohol. • Switch on the UV light for 1 hour (if the lamp is in good working order). • Switch off the BSC fan.
Certification and maintenance Regular certification and maintenance, with replacement of filters, are needed and represent a major challenge in low-income countries. If maintenance is not carried out regularly, the filters may become clogged and tubercle bacilli may be blown into the face of the operator. A BSC that is not well maintained is more hazardous than protective.
BSC – evaluation of performance Performance of the BSC should be evaluated by the manufacturer or a qualified professional, with specific, well-calibrated equipment.
Out of order BSC – maintenance • Modern cabinets are equipped with airflow indicators and warning devices. • Maintenance, with replacement of filters, should be carried out by professionals when the airflow falls below the minimum recommended level. The BSC should not be used until this maintenance has been carried out.
BSC – maintenance Airflow smoke pattern tests are performed to determine: • whether the airflow along the entire perimeter of the work access opening is inward; • whether airflow within the work area is downward with no dead spots or refluxing; • whether ambient air passes onto or over the work surface; • whether there is refluxing to the outside at the window wiper gasket and side seals.
BSC – maintenance A cabinet leak test is carried out: • to determine whether exterior surfaces of all plenums, welds, gaskets, and plenum penetrations or seals are free of leaks; • before initial installation or annually on fully installed cabinets
BSC – fumigation • Decontamination of the BSC with formaldehyde gas. • Hydrogen peroxide. • Fumigation should be performed only by professionals. System DECONTAKIT
BSC – fumigation Fumigation of the BSC should be carried out: • before release of the BSC for use after a major biohazardous spill; • before replacement of HEPA filters; • before repair work requiring access to the sealed plenum; • before service or replacement of the circulation fan or components; • before maintenance work in contaminated areas; • before performance tests requiring entry into contaminated areas; • before movement of the BSC to another laboratory or area of use; • before changing work programmes, e.g. to non-TB work; • before release of the BSC for resale or salvage.
Centrifuge – selection of proper equipment for TB culture • The centrifuge should: • Have aerosol-free (O-ring sealed) swing buckets. • Have locking mechanism for protection to prevent opening before rotation has ceased. • Be able to generate 3000g. • Be refrigerated.
Centrifuge – use • Inspect the centrifuge chamber for liquid or signs of corrosion. • Check that there are shock-absorbing pads in the bottom of the centrifuge buckets. • Balance the sample tubes and insert them in the buckets in the appropriate position. • Never add water to a specimen to balance paired tubes • Use an empty tube filled with water as a “balance” . • Select the required time and speed. • Stop centrifuge immediately if any abnormal noise is noticed. • Never operate a centrifuge with the lid open. • Open the sealed buckets in the BSC.
Centrifuge tubes – adaptors • Centrifuge tubes must tolerate g-forces of at least 3000g. • Centrifuge tubes must be used with appropriate rubber or plastic cushions matched to the tube and bucket-holder. • Use only adaptors recommended by the manufacturer of the centrifuge in use.
RCF, g, RPM RCF (or g) = relative centrifugal force rpm = revolutions per minute RCF = 1.12 * 10−6 *r *v2 or RCF (g) = 1118 x r x (v/1000)2 r = radius in mm v = speed in rpm rpm = 1000 *√RCF/1.12 *r Always work in RCF, not rpm: new centrifuges can convert automatically. r (mm)
Centrifuge – installation • Ensure that the centrifuge is installed on a rigid, flat, level surface. • Because centrifuges produce vibration during operation, they must not be installed next to balances or other sensitive equipment. • Allow sufficient free space around the centrifuge for ventilation to prevent overheating. • Initial calibration should be performed only by a qualified service technician .
Centrifuge – daily maintenance • Wipe the inside bowl with disinfectant solution and rinse thoroughly. • If a refrigerated centrifuge is turned off at night, open the top to allow the bowl to dry. During the day when the unit is under refrigeration, keep the top closed to avoid condensation and ice build-up.
Centrifuge – monthly maintenance • Clean the centrifuge housing, rotor chamber, rotors and rotor accessories with a neutral cleaning agent. • Clean plastic and non-metal parts with a fresh solution of 5% sodium hypochlorite (bleach).
Centrifuge – annual maintenance Annual service should be carried out by a qualified service technician: centrifuge brushes, timer, speed and electrical leaks should all be checked.
Autoclave The autoclave using saturated steam under pressure is the most efficient means of: • sterilization in a diagnostic TB laboratory; • decontamination of biological material consisting of infectious waste.
Autoclave For optimum function: • All of the air in the chamber should be replaced by steam. • The temperature must be 121 ºC. • Materials to be sterilized must be packed loosely.
Tips for loading the autoclave • Only appropriate containers should be used. • Discarded cultures should be in solid-bottomed containers no more than 40 cm deep. • Leave a large air space around each container. • Never cover containers. • If autoclaving closed containers, add water to generate steam. Separate autoclaves should be used for sterilization of solutions or glassware (clean materials) and for decontamination of infectious materials.
Autoclaves suitable for laboratory use Pressure-cooker laboratory autoclave Autoclave with air discharge by gravity displacement
Autoclave – use • Prepare material for autoclaving with thermosensitive paper. • Do not load material to be sterilized with material to be decontaminated. • Fill the bottom of the autoclave with distilled water. • Open the air outlet valve. • Turn on the heating. • Close the outlet valve. • Do not touch the drainage tap or the outlet or the safety valve while heating under pressure. • When the required time is up, turn off the heating completely. • When the temperature falls below 100 ºC, open the outlet valve slowly.
Autoclave – use • Never unscrew the lid clamps and open the lid until the hissing sound has stopped. • Leave the sterilized/decontaminated material to cool before removing it from the autoclave. • Check whether the autoclave tape has turned black and the covering paper has turned brown. If they have not, the material is not decontaminated. Check the autoclave for malfunction. • Biological indicators should be used after 40 hours of use.
Autoclave – suggested protocols • Solid material for sterilization: 121 ºC (appropriate pressure 115 kPa), 20 min. • Solid material for decontamination: 121 ºC (appropriate pressure 115 kPa), 30 min. • Liquid material for sterilization: 15 min at 121 ºC if “liquid cycle” is available.
Autoclave – maintenance • Check door gaskets for cracks and pitting. • Check for proper operation of door clamps and door locks. • Inspect valve discs and seats for signs of wear or cutting. • Check pressure-release safety valves and thermometers.
Inspissator • Essential when egg media are “home-made” (made in the laboratory).
Inspissator – use • Carefully control the amount of heating. • Ensure the required temperature has been reached before loading the tubes • Heat the tubes at constant temperature of 80–85 ºC for 45 minutes. • Tubes or bottles loaded at an angle of 5–10º ( 10° ). • Always check the quality of media after cooling.
Inspissator – maintenance • Check temperature at each use. • Clean after preparation of each batch of culture media.