Download

1 / 33
370 likes | 831 Vues
CLINICAL APPLICATIONS AND MAINTENANCE PROCEEDURES FOR LABORATORY EQUIPMENT . LABORATORY CENTRIFUGE. Without reference, identify at least four out of six basic facts about the clinical applications of a centrifuge. LABORATORY CENTRIFUGE. Purpose

E N D
CLINICAL APPLICATIONS AND MAINTENANCE PROCEEDURES FOR LABORATORY EQUIPMENT
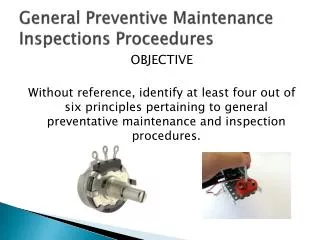
LABORATORY CENTRIFUGE • Without reference, identify at least four out of six basic facts about the clinical applications of a centrifuge.
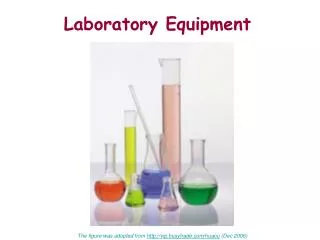
LABORATORY CENTRIFUGE • Purpose • Machine used to separate substances of different densities that are suspended in a fluid • Centrifuging only speeds up what will eventually happen with the force of gravity • You are, therefore, creating “artificial gravity”
LABORATORY CENTRIFUGE • Works because heavier particles move farther from the center of rotation and collect at the bottom of the container • Some common applications: • Separating red blood cells from whole blood • Separating plasma from whole blood • Separating platelets from plasma • Separating sediment from urine
LABORATORY CENTRIFUGE • Centrifuge components: • An electric motor to produce rotation • An apparatus called a rotor (or head) to hold the samples • Come in many different sizes depending upon the centrifuge and application • Hold varying amounts and/or sizes of sample containers (usually tubes)
LABORATORY CENTRIFUGE • Two basic rotor designs: • Fixed position (called fixed angle or vertical rotor) – samples remain in an upright, vertical position during rotation • Swing-bucket rotors – tube holders are moveable and swing into a horizontal position during rotation • Rotors must always be balanced for proper and safe rotation (the higher the rotation speed the more exact the balance must be)
LABORATORY CENTRIFUGE • Controls for speed and time • Some units (primarily small units) have a set speed (cannot be changed) • Many units have variable speeds • Nearly all units have variable timers
LABORATORY CENTRIFUGE • Safety features (should be mandatory on all units purchased) • Lid locks to prevent lid from being opened while rotor is spinning • Out-of-balance detector to stop rotation if rotor is not balanced properly • Optional features such as refrigeration or heating system can be added
LABORATORY CENTRIFUGE • Terms • Centrifugal force – the force that makes rotating bodies move away from the center of rotation • Centrifugation – the process by which substances of different densities are separated from one another by centrifugal force
LABORATORY CENTRIFUGE • G-Force (or G’s) – unit of measurement for samples undergoing centrifugation (a force of 1g is equal to the force of gravity at the earth’s surface) • Relative centrifugal force (RCF) – the force (measured in G’s) that a sample undergoes and depends upon:
LABORATORY CENTRIFUGE • Speed of rotation (measured in revolutions per minute [RPM]) • The rotating radius (the distance measured from the center axis of the rotor to the extreme tip of the tube • Formula for calculating the RCF using the RPM’s from a centrifuge display • RCF = (1.119 x 10⁻⁵) x RPM² x r • 1.119 x 10⁻⁵ is a conversion factor • r = radius of the rotor in centimeter
LABORATORY CENTRIFUGE • Basic factors that a laboratory technician considers when spinning a sample • Speed of rotation • This factor, of course, determines the RCF that the sample undergoes • Usually displayed as RPM on the centrifuge display • Some units can calculate and display the actual RCF
LABORATORY CENTRIFUGE • Amount of time the sample should spin (centrifugation time) • The time of centrifugation includes the time of acceleration, but not deceleration • The higher the force of gravity, the less time it will take for separation to occur • The time required is therefore inverse to the gravities generated by the centrifuge • Amount of time will also depend upon what is being centrifuged (some materials take longer to separate than others)
LABORATORY CENTRIFUGE • Types of laboratory centrifuges • Common laboratory centrifuges • Operate at speeds of about 3,000 RPM, but can attain speeds as high as 7,000 RPM • Some specialized centrifuges are equipped with heating or refrigeration systems to provide controlled temperatures • Two common configurations: • Floor standing (larger, hold more/bigger samples) • Tabletop (smaller units)
LABORATORY CENTRIFUGE • Microhematocrit centrifuges • Very small units capable of high speeds in the range of 10,000 – 11,000 RPM • Used with tiny capillary tubes that hold a very small whole blood sample • Used for quickly estimating red blood cell counts during patient screening and blood donation procedures
LABORATORY CENTRIFUGE • Micro centrifuges • Small, tabletop, high-speed units with maximum speeds around 13,000 – 15,000 RPM • Used for a wide variety of molecular biology studies and various procedures that require only a short spin cycle
LABORATORY CENTRIFUGE • Ultracentrifuges • Large, high-cost, specialized machines • Used mostly in research labs for separation of proteins and nucleic acids • Capable of speeds in the range of 20,000 – 100,000 RPM • All ultracentrifuges have refrigeration systems to compensate for the heat generated by the high rotation speeds
LABORATORY CENTRIFUGE • General Maintenance • Aside from the necessary preventive maintenance checks, routine verification of RPM and time are mandatory • RPM is normally determined using • Handheld photo-tachometer • Strobe light • Vibrating reed tachometer • Motor brushes (on units that utilize them) should be checked at regular intervals
LABORATORY REFRIGERATOR • Without reference, answer questions with at least a 70% accuracy about the laboratory refrigerator.
LABORATORY REFRIGERATOR • Most refrigeration systems are based on a vapor compression cycle for cooling. • This is a cycle where a refrigerant is forced to change from liquid to vapor and back which causes a strong cooling reaction. • This is explained in thenext few slides
LABORATORY REFRIGERATOR • There are four main components to a refrigeration system • Compressor – Refrigerant enters compressor as a vapor and is compressed to a high pressure • Condenser – cools the vapor until it starts condensing
LABORATORY REFRIGERATOR • Expansion Valve (also called throttle valve) – liquid refrigerant goes through which causes the pressure to abruptly decrease causing flash evaporation and auto-refrigeration. This remaining mixture is part liquid and part vapor at a low temperature and pressure.
LABORATORY REFRIGERATOR • Evaporator – The refrigerant then goes through the evaporator coils or tubes where a fan circulates air from within the refrigerator across the coils, thus cooling the air in the refrigerator
LABORATORY REFRIGERATOR • Calibration and Maintenance • Temperature check • Use calibrated thermometer to verify temperature is within tolerance • Clean dust and dirt off of any fans as well as off of the evaporator coils or tubes.
LABORATORY MICROSCOPE • Without reference, answer questions with at least a 70% accuracy about the laboratory microscope.
LABORATORY MICROSCOPE • Definition – A microscope is an instrument used to look at objects to small to see with the naked unaided eye. • The most common type of laboratory microscope is an optical microscope. This is usually in the form of a light microscope. • A light microscope uses a series of lenses to allow you to view a lighted object with up to 1500 times magnification.
LABORATORY MICROSCOPE • There are a few components of note in a light microscope. • Eyepieces – this is the part that you look directly through. They normally contain a lens with a small magnification amount – usually around 10 times. • Objectives – these are the main lenses in the microscope and are responsible for the largest portion of magnification • Stage and stage controls – the stage is the surface on which your specimen is placed. The stage can be moved a small amount using the stage controls in most microscopes. The controls are normally separated into coarse and fine adjustments.
LABORATORY MICROSCOPE • Diaphragm and light source – The light source is usually located belowthe stage with the diaphragm between them to control the amount and intensity of the light that reachesthe specimen.
LABORATORY MICROSCOPE • Common Maintenance • The most common thing that will need to be done with a microscope is the replacement of the light source bulb. • This is a very simple procedure in most units • Other that bulb replacement you may be required to clean the lenses or clean or repair the coarse and fine adjustment mechanisms. Anything beyond this normally requires sending the microscope out for service, but luckily problems of this nature are extremely rare.
LABORATORY MICROSCOPE • Coarse and fine adjustment mechanisms • The coarse and fine adjustment mechanisms are based on a series of gears attached to two different adjustment knobs. As each of these knobs are turned the stage is moved. The coarse adjustment causes the stage to move quickly while the fine adjustment moves it slowly. This causes the specimen to move which helps to focus the image.
LABORATORY MICROSCOPE • There is one thing to keep in mind about the maintenance of the coarse and fine adjustment mechanisms. • From time to time the gears that control these adjustments will become dirty or clogged with dirt and/or other debris. • You should know when this is the case because you will have difficulty adjusting the microscope. • Stage either won’t move at all or will move with short jerky motions. • In this situation you must disassemble and clean the adjustment mechanisms. When you do this you must be extremely careful to keep track of all of the small pieces within the microscope. Nothing is worse than going through all of the work to fix something and then it won’t work because you lost a piece.
LABORATORY MICROSCOPE • This is not the way to fix a microscope!