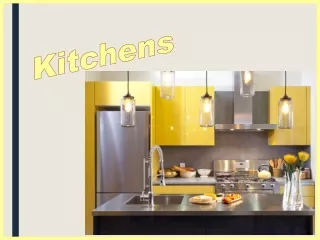
Kitchens
Kitchens. Kitchen Location. The location of the kitchen on the floor plan is important and depends upon several factors: Convenience to yard or outside work area. Where does the homeowner want the kitchen window? Do they want to look out at the street or in the back yard?


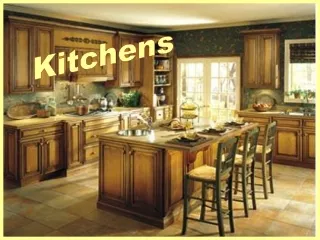
Kitchens
E N D
Presentation Transcript
Kitchen Location... The location of the kitchen on the floor plan is important and depends upon several factors: Convenience to yard or outside work area. Where does the homeowner want the kitchen window? Do they want to look out at the street or in the back yard? Convenience of unloading groceries and disposing of garbage and trash. Easy access to the front or back door. The kitchen is one of the busiest and most expensive rooms in the home, and it should be planned to save time and energy for those who work in it. The well-planned kitchen can prevent hazards that might cause accidents, and it can also provide a pleasant environment for family members.
"Great Room" concept... A kitchen can be more than just a place to prepare meals. For many families, it's the heart of the home and the "nerve center" where family members gather to talk, work, eat meals, and sometimes entertain guests. The term “great room” refers to the open floor plan concept, and usually includes the kitchen. There are no full-height walls between living, dining, and food preparation areas, so interaction between the areas is promoted. This is not a good plan for the cook who prefers to work alone, or keep the kitchen messes “hidden”.
Kitchen Size... When planning the kitchen consider your family size, the number of persons who will use the kitchen, the type of entertaining the family does, and where dining will take place. Will the kitchen include a laundry, home office center, gardening center, fireplace, or areas for rest and relaxation, child care, sewing, home business, or pantry storage? What type and amount of cooking, baking, or food preservation will the family do? A kitchen, without a dinette area, should have 80 to 100 square feet of usable floor space, as smaller kitchens may pose safety hazards. Areas greater than 150 to 160 square feet, however, may become too large to manage efficiently. You will use unnecessary time and energy on tasks in a kitchen that is too large. Small kitchen8 feet by 10 feet to 10 by 10 Medium kitchen10 feet square to 10 x 12 Large kitchen10 feet x 12 feet and up
Each kitchen has 4 major work centers that must be considered when designing the layout. Kitchen Work Centers... Refrigerator Center This taller appliance is best located so it will not block movement from one work center to another, so is usually at the end of the work area. One common fault in this area is not providing counter space on the handle side for convenience of putting in or removing things from the refrigerator. An 18-inch counter should be beside the door handle. The swing of the refrigerator door should not interfere with food transfer to other work centers or the dining table. It is helpful to locate this center near the entrance where you will bring groceries into the home. 68” minimum for height clearance 34” depth incl. handle 33” width 36” for side x side
Cook and Serve Center This center is planned around the range or cook-top, and is the work area for cooking and serving Convenience to the dining area is desirable. Kitchen Work Centers... In this area supplies, tools and equipment should be stored for food preparation that begins at this point. It is most desirable to store serving dishes in this area. In planning this center, avoid having a window — this can be dangerous, takes away needed storage space, and makes venting or hood installation difficult. 15 inches of counter space on either side of the range or cook-top is the minimum. Space is also needed to set serving dishes and to use as work area when cooking. Heat-proof counter space is an asset. 30” depth incl. handle Electric Burner Gas Burner 30” width
Newer technologies have been added to the kitchen cook and serve centers… Convection ovens are similar in looks and function to a conventional oven, but use fans to circulate the heated air and reduce cooking time. They are faster than conventional ovens, but slower than microwaves. They do brown food. Microwave ovens can sit on the countertop, be built into a cabinet or be installed over the range (usually incorporating a ventilation fan). Waves of energy cause molecules to vibrate, and the resulting friction creates heat within the food. Cooking time is shortened, but they are not effective for browning foods. Microwaves and built-in ovens should have at least 15" to 18" counter space on the handle side. Halogen ovens cook with powerful halogen lights in about 1/4th the conventional oven time. They are expensive. Rapid cook or combination ovens are also widely available.
Kitchen Work Centers... Sink Center The sink center is the most frequently used area in the kitchen and should be central to other major centers you plan. In this center, you will have sink, water and drainage for food preparation and kitchen clean-up jobs. You may want to include a food waste disposer, an automatic dishwasher and water heater. Ideally, there is at least 18 “ on the left side and 24 inches on the right side of the sink. 33-36” width 24” depth Poor storage space is usually a problem in the sink center because of the plumbing fittings, disposer and dishwasher. Items usually stored here include tools to clean food (brushes, etc.), storage supplies for leftovers, dishwashing supplies and tools, pitchers, coffeemakers, cutting board and wastebasket. Cleaning supplies stored in this area should be non-poisonous to small children.
The dishwasher and garbage disposal are part of the sink center… The dishwasher should ideally be located next to the sink. The most common type of garbage disposal is the continuous-feed type. It operates from an electric switch, and cold water is run while the food is being ground up and flushed away. The less common batch-feed type of disposal operates only when a lid is closed and latched. D
Kitchen Work Centers... Mixing Center The mixing center or food preparation center is ideally located between the refrigerator and sink center. If it is between the sink and range, it will involve more travel by the user. If possible avoid a window in this area so you can have the needed wall storage. Most packaged, canned and bottled foods should be stored in this center as well as equipment, baking pans and tools used for food preparation. Length of counter recommended for mixing is a minimum of 36 inches. When it is possible, a lower counter in the mixing area makes a more comfortable working height for most homemakers. Many homes have a “pantry” cabinet or room in the kitchen area. It should be located near either the cook & serve or the mixing center.
The Work Triangle... Kitchen layouts are based on a concept called the work triangle. The work triangle consists of imaginary lines that connect the middle of the refrigerator, with the middle of the range and the middle of the sink. For maximum comfort and efficiency, the three legs of the work triangle should total a minimum of 12’ and a maximum of 26'. Cross-traffic Each leg of the triangle should not be longer than nine feet or shorter than four feet. Ideally, the placement of a kitchen island or peninsula should not interfere with the work triangle. The work triangle should not be set in areas of pass-through traffic, which could interfere or cause safety concerns for the cook.
There are four basic kitchen layouts: the one-wall, the two-wall, the L-shaped and the U-shaped. Kitchen Layouts... Work Triangle
The L-Shaped kitchen provides a work area largely unbroken by traffic. The L-shape plan has two workstations on one wall and the third on an adjacent wall. One of the most common kitchen designs, it provides excellent flexibility in the placement of major appliances.
The U-Shaped kitchen is the most popular and efficient design. This design gives you a good working environment since no traffic pattern cuts through it. This kitchen offers a great amount of counter space and one area of the "U" may be used to separate the kitchen from the dining area.
Shown in the picture to the left… one wall of the arrangement is formed by an island. The Two-wall kitchen is an efficient use of small space. Also known as the Corridor or Galley kitchen, it allows for convenient access to the cabinets and appliances on both walls. Allow for the corridor to be at least 48" wide. Closing one end off will cut down on traffic, which is the disadvantage of this layout.
In the One-wall or Pullman kitchen layout, the appliances should be at least 48" apart (measure from center to center of the appliances). Work Triangle Popular for use in apartments and smaller homes, it is also used to compliment the "open space" concept used in modern homes. It is, however, considered the least efficient.
A kitchen island has obvious advantages: it provides more work space, may improve overall efficiency of the kitchen's work triangle, and acts as a room divider by diverting traffic away from the work triangle. Kitchen islands also serve as an obvious focal point of the kitchen, making it a prime spot for gatherings.It does, however, require more space. Kitchen Island... A kitchen island is a free-standing unit, composed of one or more cabinets. It is sometimes incorporated into the work triangle, when it houses either a sink or cooktop.
Kitchen Peninsula... The kitchen peninsula has many of the same advantages as an island, but it is not free-standing. It is either attached to other cabinets or to the wall. Since it only requires walking space on 3 sides instead of 4 like the island, it requires less space. Cabinets designed for peninsulas have toe kicks on both sides and doors may open from both sides. The peninsula is often used, as on this floor plan, to separate the kitchen from the dining areas. Countertops should overhang 12-15” to allow adequate seating knee space.
Cabinetry Layout... When you initially draw your house plan, you may just plan the general location of the appliances and cabinetry, without detail. Eventually, you start thinking in 3 dimensions. You have to visualize the plan. Next you draw up the room measurements, and decide exactly what cabinets will go where. The cabinets available will depend on whether they are custom made or not, and what company they are manufactured by.
Visualizing the Wall & Base Cabinets... Cabinets can be planned to go all the way to the ceiling. A 42” tall cabinet will do this with 8’ ceilings. The soffit area can be open or closed. Open soffit areas can be decorated, but may attract grease near the range area. 18” is the preferred space between base and upper wall cabinets. It allows for tall coffeemakers and other countertop appliances. A 30” high base cabinet would be used only in the mixing center. Standard height for all base cabinets is 34 ½”. With the countertop, it evens out at 36”. Standard cabinet width usually starts at 9” and increases in 3” increments up to 48”. 12” Wall Cabinet depth 12” Soffit 8’ or 96” standard ceiling height 24” Base Cabinet depth Toe Kick
Labeling Cabinets on the Floor Plan... Label refrigerators with REF and dishwashers with DW. Use architectural symbols for the range and sink. Label special appliances such as trash compactors. Use W for wall cabinets. Label the width first followed by the height. A 30” tall wall cabinet that is 24 inches wide would be labeled W2430. Wall cabinets above ranges and refrigerators may only be 12-15” tall…allow 24” over range minimum. Special cabinets over refrigerators are 24” deep. Use B for base cabinets. Base cabinets generally have drawers on top and doors on the bottom. Label them according to width, such as B24. Use DB for drawer units, preceded by the number 3 or 4 to indicate the number of drawers and followed by the width. 3DB18 is 18 inches wide and has 3 drawers. Use BB to add a breadboard to any base cabinet, such as B24BB or 3DB18BB. Use RT to indicate that roll trays are used instead of stationary shelves in base cabinets. B24RT
Start with the Corners... A corner can potentially represent wasted space in a kitchen. Specialized cabinets can take advantage of corners. Both wall and base cabinets can have “blind corners”. Corner cabinets might have different types of “lazy susan” revolving features to use space wisely. Corner wall units take 24” on each wall; base units take 36”…shown by the
Think about the amount of storage needed in each kitchen area. The dinnerware, flatware, and glassware is best stored close to the dishwasher. Pots, pans, cooking utensils and potholders go next to the range. Mixing bowls, mixer, bakeware, flour and spices go in the mixing center. Kitchen towels, the coffee maker, and storage bowls got next to the sink. Store the frequently used items within easiest reach.
Your turn to draw… Back door to garage Patio B27 REF DW 12 x 22’ B24BB B18 Pantry 36 x 84 Living Room
Add the wall cabinets; labeling all of them… Back door to garage Patio B27 REF DW 12 x 22’ B24BB W3630 B18 Pantry W2430 Draw and label work triangle with linear feet of each leg Living Room
Kitchens The End
Kitchen design project... Name:___________ Due: __________ Draw this “great room”. The measurements given are interior dimensions of the room. Be original and creative...but include all the required features listed below. 10’ 8’ 20’ 26’ Kitchen work area showing and labeling all cabinetry, informal dining space for 4 people, family room area, windows as desired, door out to balcony, door to laundry room, door to formal living/dining room combination, work triangle with each leg labeled with linear feet