PhotoStory
PhotoStory. What can be Added to PhotoStory Files? Pictures Photos Titles Narration Music. Import Pictures . Click on Import Pictures button Navigate to location of desired pictures Select pictures by clicking on the desired picture


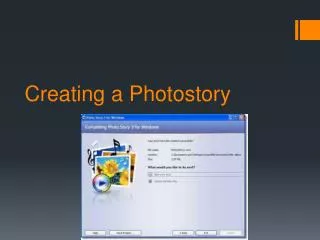
PhotoStory
E N D
Presentation Transcript
What can be Added to PhotoStory Files? Pictures Photos Titles Narration Music
Import Pictures • Click on Import Pictures button • Navigate to location of desired pictures • Select pictures by clicking on the desired picture • To select multiple pictures, hold the ctrl key while clicking on desired pictures • Click OK • Pictures will be imported in the order selected • Maximum of 300 pictures may be imported
Import Pictures NOTE: • Pictures added to a PhotoStory filmstrip after the initial import will be added AT THE END OF THE CURRENT PHOTOS • Moving pictures • Only 1 picture may be selected and moved at a time • A picture moved to the left; will be inserted to the LEFT of the picture it overlays • A picture moved to the right will be inserted to the RIGHT of the picture it overlays.
Acceptable Picture File Types • .bmp .pcd • .dib .pxc • .eps .png • .gif .psd • .jhf .rle • .jpe .tga • .jpeg .tif • .jpg
Converting PowerPoint Presentations to Images • Open the desired PowerPoint • Select File from the menu bar • Select Save As from the drop down menu • Set the Save as Type field to JPEG format • Change the File Name as desired • Click on Save • A folder will be created with each of the slides in the Powerpoint saved as an individual image • Import any of these images into PhotoStory using the standard image import method
Correct Red Eye Rotate Counterclockwise Rotate Clockwise Crop, Rotate, Add Effects, Auto Effects Remove Borders Correct Color Levels
Notes for Effects • Special effects can be applied to each picture individually or to all pictures simultaneously. However; if you apply the special effect to all photos in a PhotoStory file and the file contains a large number of photos it may take several minutes for the effect to be applied to all the photos. • Once a special effect has been applied it cannot by UNDONE; to remove it you may choose Reset; or set the special effect to NONE • Saving an effect on a photo DOES NOT save the PhotoStory file. Remember to save the PhotoStory project every few minutes.
Adding Titles • Titles may be added to any slide in PhotoStory • Titles by default turn off motion; panning, etc must be manually set on slides with titles • Title by default wrap text in PhotoStory, but manual line breaks can be set by hitting the Enter key • Only ONE font size, style and color may be used on a PhotoStory slide
Adding Titles • Titles may appear in bold, italics or both and may be aligned both vertically and horizontally on a PhotoStory slide • To create slides with particular backgrounds or varieties of font styles, colors, etc.: • create the slide in PowerPoint • save the PowerPoint slide as a .jpeg or other image file format • Import the image into PhotoStory • The maximum length of titles on a PhotoStory slide is 1,024 characters
Notes about Narration • A maximum of 5 minutes of narration may be recorded for each picture. • If narration is recorded and stopped, and the record button is click again BEFORE selecting another photo the narration for a slide can be picked up where it left off. • If narration is recorded for a slide; then another slide is selected; narration CANNOT be continued on the previous slide. To change or edit the narration the previous narration must be deleted and the narration must be re-recorded.