Effective Cover Letter Writing Guide
Learn how to craft a successful cover letter and resume in Microsoft Word. Format paragraphs, insert clip art, set tab stops, and create a professional business document. Enhance your job application with creative letterhead and relevant content. Microsoft Office 2007 tutorial.


Effective Cover Letter Writing Guide
E N D
Presentation Transcript
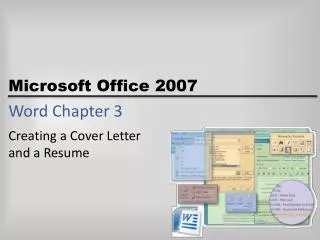
Word Chapter 3 Creating a Cover Letterand a Resume
Objectives • Format characters and paragraphs • Insert and format clip art • Set and use tab stops • Identify the components of a business letter • Insert the current date • Create and insert a building block Microsoft Office 2007: Introductory Concepts and Techniques - Windows Vista Edition
Objectives • Insert a Word table, enter data in the table, and format the table • Use a template to create a document • Fill in a document template • Copy and paste using the Office Clipboard • Indent paragraphs Microsoft Office 2007: Introductory Concepts and Techniques - Windows Vista Edition
Objectives • Insert a Quick Part • Sort a List • Use print preview to view and print a document • Address and print an envelope Microsoft Office 2007: Introductory Concepts and Techniques - Windows Vista Edition
Plan Ahead • Design a creative letterhead • Compose an effective cover letter • Craft a successful resume Microsoft Office 2007: Introductory Concepts and Techniques - Windows Vista Edition
Starting Word and Displaying Formatting Marks • Start Word. If necessary, maximize the Word window • If the Print Layout button is not selected, click it so that your screen layout matches Figure 3–3 on the next slide • If your zoom level is not 100%, change it to 100% • If the Show/Hide ¶ button on the Home tab is not selected already, click it to display formatting marks on the screen Microsoft Office 2007: Introductory Concepts and Techniques - Windows Vista Edition
Starting Word and Displaying Formatting Marks Microsoft Office 2007: Introductory Concepts and Techniques - Windows Vista Edition
Applying a Quick Style • Click No Spacing in the Styles gallery to apply the No Spacing style to the current paragraph Microsoft Office 2007: Introductory Concepts and Techniques - Windows Vista Edition
Changing Theme Colors • Click the Change Styles button on the Home tab to display the Change Styles menu, and then point to Colors on the Change Styles menu to display the Colors gallery • Click Urban in the Colors gallery to change the document theme colors to Urban Microsoft Office 2007: Introductory Concepts and Techniques - Windows Vista Edition
Typing Text • Type Lana Halima Canaan and then press the ENTER key Microsoft Office 2007: Introductory Concepts and Techniques - Windows Vista Edition
Using the Grow Font Button to Increase Font Size • Move the mouse pointer to the left of the line to be selected (in this case, the line containing your name) until the mouse pointer changes to a right-pointing block arrow, and then click the mouse to select the line • Move the mouse pointer into the transparent Mini toolbar, so that it changes to a bright toolbar. • Repeatedly click the Grow Font button on the Mini toolbar until the Font Size box displays 20, for 20 point Microsoft Office 2007: Introductory Concepts and Techniques - Windows Vista Edition
Using the Grow Font Button to Increase Font Size Microsoft Office 2007: Introductory Concepts and Techniques - Windows Vista Edition
Coloring Text • With the text still selected and the Mini toolbar still displaying, click the Font Color button arrow on the Mini toolbar to display the Font Color gallery • Click Teal, Accent 2, Darker 25%, which is the sixth color in the fifth row in the Theme Colors area, to change the color of the selected text to a shade of teal • Click the paragraph mark below the name to deselect the text and position the insertion point on line 2 of the document Microsoft Office 2007: Introductory Concepts and Techniques - Windows Vista Edition
Coloring Text Microsoft Office 2007: Introductory Concepts and Techniques - Windows Vista Edition
Inserting Clip Art • With the insertion point on line 2 below the name, click Insert on the Ribbon to display the Insert tab • Click the Clip Art button on the Insert tab to display the Clip Art task pane • If the Search for text box displays text, drag through the text to select it. • Type teacher in the Search for text box • Click the Go button to display a list of clips that match the description, teacher Microsoft Office 2007: Introductory Concepts and Techniques - Windows Vista Edition
Inserting Clip Art • Click the clip art of the apple on the stack of books to insert it in the document at the location of the insertion point • Click the Close button on the Clip Art task pane title bar to close the task pane Microsoft Office 2007: Introductory Concepts and Techniques - Windows Vista Edition
Inserting Clip Art Microsoft Office 2007: Introductory Concepts and Techniques - Windows Vista Edition
Resizing a Graphic Using the Size Dialog Box • With the graphic still selected, click the Size Dialog Box Launcher on the Format tab to display the Size dialog box • In the Scale area, triple-click the Height box to select it. • Type 35 and then press the TAB key to display 35% in the Height and Width boxes and resize the selected graphic to 35 percent of its original size • Click the Close button in the Size dialog box to close the dialog box Microsoft Office 2007: Introductory Concepts and Techniques - Windows Vista Edition
Resizing a Graphic Using the Size Dialog Box Microsoft Office 2007: Introductory Concepts and Techniques - Windows Vista Edition
Re-coloring a Graphic • With the graphic still selected, click the Recolor button on the Format tab to display the Recolor gallery • Click Accent color 2 Light in the Recolor gallery (third color in Light Variations area) to change the color of the selected graphic in the document window Microsoft Office 2007: Introductory Concepts and Techniques - Windows Vista Edition
Re-coloring a Graphic Microsoft Office 2007: Introductory Concepts and Techniques - Windows Vista Edition
Setting a Transparent Color in a Graphic • With the graphic still selected, click the Recolor button on the Format tab to display the Recolor gallery • Click Set Transparent Color in the Recolor gallery to display a pen mouse pointer in the document window • Position the pen mouse pointer in the graphic where you want to make the color transparent • Click the location in the graphic where you want the color to be transparent • Press the END key to deselect the graphic and move the insertion point to the end of the line, which is between the graphic and the paragraph mark Microsoft Office 2007: Introductory Concepts and Techniques - Windows Vista Edition
Setting a Transparent Color in a Graphic Microsoft Office 2007: Introductory Concepts and Techniques - Windows Vista Edition
Displaying the Ruler • If the rulers are not displayed already, click the View Ruler button on the vertical scroll bar Microsoft Office 2007: Introductory Concepts and Techniques - Windows Vista Edition
Setting Custom Tab Stops Using the Tabs Dialog Box • With the insertion point positioned between the paragraph mark and the graphic, click the Paragraph Dialog Box Launcher to display the Paragraph dialog box • Click the Tabs button in the Paragraph dialog box to display the Tabs dialog box • Type 6.5 in the Tab stop position text box • Click Right in the Alignment area to specify alignment for text at the tab stop clicking Clear All button erases all custom tab stops Tabs dialog box Tab stop position text box Right option button selected Set button OK button • Click the Set button in the Tabs dialog box to set a right-aligned custom tab stop • Click the OK button to place a right tab marker at the 6.5" mark on the ruler Microsoft Office 2007: Introductory Concepts and Techniques - Windows Vista Edition
Setting Custom Tab Stops Using the Tabs Dialog Box Microsoft Office 2007: Introductory Concepts and Techniques - Windows Vista Edition
Specifying Font Color before Typing • Click the Font Color button on the Home tab so that the text you type will be the color displayed on the face of the button • With the insertion point positioned between the graphic and the paragraph mark, press the TAB key to move the insertion point to the 6.5" mark on the ruler • Type 22 Fifth Street, Juniper, NV 89268 * Phone: 420-555-2939 * E-mail: lhc@world.net in the letterhead Microsoft Office 2007: Introductory Concepts and Techniques - Windows Vista Edition
Specifying Font Color before Typing Microsoft Office 2007: Introductory Concepts and Techniques - Windows Vista Edition
Bottom Bordering a Paragraph • With the insertion point in the paragraph to border, click the Border button arrow on the Home tab to display the Border gallery • Click Bottom Border in the Border gallery to place a border below the paragraph containing the insertion point Microsoft Office 2007: Introductory Concepts and Techniques - Windows Vista Edition
Bottom Bordering a Paragraph Microsoft Office 2007: Introductory Concepts and Techniques - Windows Vista Edition
Clear Formatting • With the insertion point between the e-mail address and paragraph mark press the ENTER key • Click the Clear Formatting button on the Home tab to apply the Normal style to the location of the insertion point Microsoft Office 2007: Introductory Concepts and Techniques - Windows Vista Edition
Clear Formatting Microsoft Office 2007: Introductory Concepts and Techniques - Windows Vista Edition
Converting a Hyperlink to Regular Text • Right-click the hyperlink (in this case, the e-mail address) to display the Mini toolbar and a shortcut menu • Click Remove Hyperlink on the shortcut menu to remove the hyperlink format from the e-mail address • Position the insertion point on the paragraph mark below the border Microsoft Office 2007: Introductory Concepts and Techniques - Windows Vista Edition
Converting a Hyperlink to Regular Text Microsoft Office 2007: Introductory Concepts and Techniques - Windows Vista Edition
Saving the Letterhead • With a USB fl ash drive connected to one of the computer’s USB ports, click the Save button on the Quick Access Toolbar to display the Save As dialog box • Type Canaan Letterhead in the File name text box to change the file name • If Computer is not displayed in the Favorite Links section, drag the top or bottom edge of the Save As dialog box until Computer is displayed. Click Computer in the Favorite Links section and then select the USB flash drive • Click the Save button in the Save As dialog box to save the document on the USB flash drive with the file name, Canaan Letterhead Microsoft Office 2007: Introductory Concepts and Techniques - Windows Vista Edition
Saving the Document with a New File Name • With a USB flash drive connected to one of the computer’s USB ports, click the Office Button to display the Office Button menu and then click Save As on the Office Button menu to display the Save As dialog box • Type Canaan Cover Letter in the File name text box to change the file name • If necessary, select the USB flash drive as the new save location • Click the Save button in the Save As dialog box to save the document on the USB flash drive with the file name, Canaan Cover Letter Microsoft Office 2007: Introductory Concepts and Techniques - Windows Vista Edition
Applying a Quick Style • Click No Spacing in the Styles gallery to apply the No Spacing style to the current paragraph Microsoft Office 2007: Introductory Concepts and Techniques - Windows Vista Edition
Setting the Custom Tab Stops Using the Ruler • With the insertion point on the paragraph mark below the border, press the ENTER key so that a blank line appears between the letterhead and the date line • If necessary, click the tab selector at the left edge of the horizontal ruler until it displays the Left Tab icon • Position the mouse pointer on the 3.5" mark on the ruler • Click the 3.5" mark on the ruler to place a left tab marker at that location on the ruler Microsoft Office 2007: Introductory Concepts and Techniques - Windows Vista Edition
Setting the Custom Tab Stops Using the Ruler Microsoft Office 2007: Introductory Concepts and Techniques - Windows Vista Edition
Inserting the Current Date in a Document • Press the TAB key • Click Insert on the Ribbon to display the Insert tab • Click the Insert Date and Time button on the Insert tab to display the Date and Time dialog box • Click the desired format (in this case, May 12, 2008) in the dialog box • If the Update automatically check box is selected, click the check box to remove the check mark • Click the OK button to insert the current date at the location of the insertion point Microsoft Office 2007: Introductory Concepts and Techniques - Windows Vista Edition
Inserting the Current Date in a Document Microsoft Office 2007: Introductory Concepts and Techniques - Windows Vista Edition
Entering the Inside Address and Salutation • With the insertion point at the end of the date, press the ENTER key three times • Type Mr. Raul Ramos and then press the ENTER key • Type Personnel Director and then press the ENTER key • Type Juniper Culinary Academy and then press the ENTER key • Type 202 Park Boulevard and then press the ENTER key • Type Juniper, NV 89268 and then press the ENTER key twice • Type Dear Mr. Ramos and then press the COLON key (:) to complete the entries of the inside address and salutation Microsoft Office 2007: Introductory Concepts and Techniques - Windows Vista Edition
Entering the Inside Address and Salutation Microsoft Office 2007: Introductory Concepts and Techniques - Windows Vista Edition
Creating a Building Block • Select the text to be a building block, in this case, Juniper Culinary Academy. Do not select the paragraph mark at the end of the text • Click the Quick Parts button on the Insert tab to display the Quick Parts menu • Click Save Selection to Quick Part Gallery on the Quick Parts menu to display the Create New Building Block dialog box • Typejca in the Name text box to replace the proposed building block name (Juniper Culinary) with a shorter building block name • Click the OK button to store the building block entry and close the dialog box. • If Word displays another dialog box, click the Yes button Microsoft Office 2007: Introductory Concepts and Techniques - Windows Vista Edition
Creating a Building Block Microsoft Office 2007: Introductory Concepts and Techniques - Windows Vista Edition
Inserting a Nonbreaking Space • Click to the right of the colon in the salutation and then press the ENTER key twice to position the insertion point one blank line below the salutation • Type I am responding to the junior culinary instructor position that you recently advertised in the and then press the SPACEBAR • Press CTRL+I to turn on italics. Type Juniper as the first word in the newspaper name and then press CTRL+SHIFT+SPACEBAR to insert a nonbreaking space after the word, Juniper Microsoft Office 2007: Introductory Concepts and Techniques - Windows Vista Edition
Inserting a Nonbreaking Space • Type Daily and then press CTRL+SHIFT+SPACEBAR to insert another nonbreaking space after the word, Daily • Type Herald and then press CTRL+I to turn off italics. Press the PERIOD key Microsoft Office 2007: Introductory Concepts and Techniques - Windows Vista Edition
Inserting a Nonbreaking Space Microsoft Office 2007: Introductory Concepts and Techniques - Windows Vista Edition
Inserting a Building Block • Press the SPACEBAR. Type As indicated on the enclosed resume, I have the credentials you are seeking and believe I can be a valuable asset to jca • Press the F3 key to instruct word to replace the building block name (jca) with the stored building block entry (Juniper Culinary Academy) • Press the PERIOD key Microsoft Office 2007: Introductory Concepts and Techniques - Windows Vista Edition
Inserting a Building Block Microsoft Office 2007: Introductory Concepts and Techniques - Windows Vista Edition