Download
1 / 7
70 likes | 86 Vues
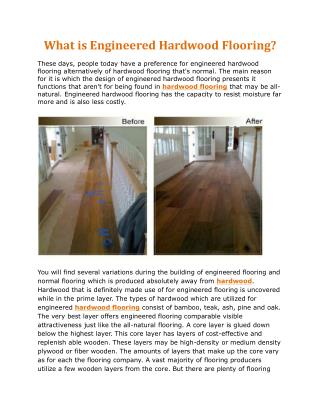
Installing hardwood flooring can seem to be just like a difficult job for a house owner, and it is true that not every do-it-yourselfer is about the challenge. An attractive hardwood floor is the result of careful planning and a few important know-how. This post is not intended to be a guide for installing hardwood floors, but rather how to prevent common pitfalls. For more details visit: https://almahdihardwoodflooring.com/service/wood-flooring-installation/

E N D
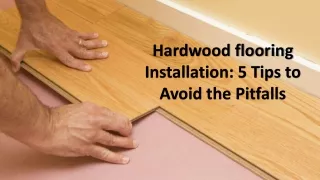
Hardwood flooring Installation: 5 Tips to Avoid the Pitfalls
Examine your subfloor In case your subflooring is in poor condition, getting down hardwood floors will not help. You must have a comparatively level subfloor, and then any modifications in height should be lower than 3/16? more than a 6' span. There's a few new ways to level out a subflooring. The simplest scenario takes place when OSB or plywood is not anchored down perfectly and including a handful of screws protects the issue. Much more extreme measures consist of planning the joists or even installing an additional layer of plywood with the suitable “filler” to achieve uniformity.
Acclimate the wood Improved dampness causes wood to increase while much less moisture leads to wooden to contract. This is known as wood movements. It is essential for hardwood floors to acclimate within the space exactly when getting hardwood flooring installationservices. Wood that isn't completely acclimated can result in spaces during the winter and maybe cupping during the summer. To prevent this, open and spread out the boxes for around a week, and make sure to run the A/C or heat at standard levels. Never keep hardwood floors in a moisture rich atmosphere just like an incomplete basement. Even after correct acclimation, the wood will expand/contract as moisture levels change. That is why it is important to keep about a 1/4? space around the perimeter of your install. Do not worry, this is concealed with baseboard and molding. If moisture is usually a major problem for the area, think about installing designed wood as many don't require acclimation.
First Row Must be Straight It is essential for your very first row of hardwood floors to be installed directly as every row after will be laid relative to it. A crooked very first row results in large curves since you progress with the space. External walls will often be not rectangle so think about marking a line parallel for an inside wall, complete opposite of your beginning position. Mark the locations within your joists and install the hardwood floors perpendicular. Be sure you generate a fastener right into a joist each and every opportunity. Think about what hurdles, just like a fire place hearth, exist how different beginning points can make the job easier.
Top nail and glue the boards You will encounter circumstances exactly where the flooring nailer will not match, like when laying the final board. Invariably, you will require to top nail or face nail these boards. Get your wood glue and put a bead to the groove of the earlier board. Use scrap wood and a pry bar to safely wedge these boards in area. Be sure to keep the finish nailer with adequate pressure to avoid it from bouncing around and marring the surface area of the board while hardwood flooring installation.
Buy or Rent the Right Tools Do not kid your self that you could make rip cuts using a jig saw or that you do not really require a pneumatic flooring nailer. Getting the right hardwood floors installation equipment can make your work definitely simpler and also the finished product will be much better. At least you will require: Miter saw- to make mix cuts as every row meets the wall. Table saw- to make tear cuts the place where a complete board thickness isn't acceptable. Cleat-nailer or Stapler- usually it is affordable to rent one of these. Cleats are generally simpler to find. Finish nailer- for blind nailing and best nailing.
Thank You To know more: https://almahdihardwoodflooring.com/service/wood-flooring-installation/